What Is the Bortle Scale? A Guide to Light Pollution

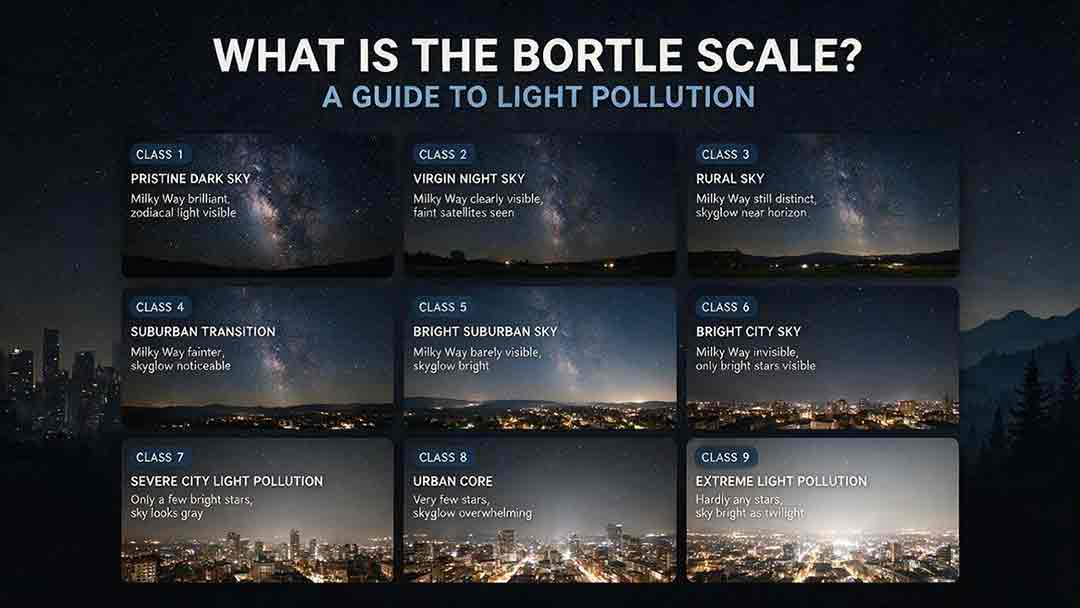
The Bortle Scale is a nine-class visual system for describing night-sky darkness, from Class 1 pristine skies to Class 9 inner-city skies. It uses visible features—including the Milky Way, zodiacal light, skyglow, clouds, and familiar deep-sky objects—to estimate how strongly artificial light affects astronomical observing at a specific place and time.
Key Takeaways
- Class 1 is the darkest and Class 9 is the brightest. A lower Bortle number generally means better visibility of faint stars, galaxies, nebulae, and Milky Way structure.
- The Bortle Scale is observational, not a fixed property of a ZIP code. Moonlight, haze, clouds, local glare, eye adaptation, and seasonal sky features can change the class you estimate.
- A light-pollution map is a planning tool, not an on-site measurement. Confirm a mapped estimate with field observations or a Sky Quality Meter.
- The best class depends on the target. Planets and the Moon remain rewarding from cities, while faint galaxies and diffuse nebulae benefit greatly from darker skies.
This guide explains what each Bortle class means, how to estimate your own sky accurately, how the scale differs from SQM readings and map data, and how to choose realistic observing targets for your conditions.
This guide is based on published specifications, authoritative documentation, and practical selection criteria rather than hands-on product testing.
How Does the Bortle Scale Work?
The Bortle Scale classifies the visible quality of a night sky from Class 1 to Class 9. John E. Bortle introduced the system in the February 2001 issue of Sky & Telescope to provide a more useful description than naked-eye limiting magnitude alone.
A Bortle estimate combines several visual indicators:
- The visibility and structure of the Milky Way
- The strength and direction of artificial skyglow
- Whether clouds look dark or illuminated
- The visibility of zodiacal light and other natural sky features
- The faintest stars visible to the unaided eye
- Whether familiar objects such as the Andromeda Galaxy or Triangulum Galaxy are visible
- How much detail remains visible through a telescope
The scale is intentionally practical. It describes what an observer can actually see under a particular set of conditions rather than reporting only one instrument reading.
The National Park Service Night Skies Report Guide describes the Bortle system as a nine-level classification based on visible sky objects. The original criteria are summarized by Sky & Telescope in its guide to the Bortle Dark-Sky Scale.
What Does Each Bortle Class Mean?
The table below summarizes the classes in practical terms. The visual signs assume a clear, moonless night after the observer has adapted to darkness. Actual visibility varies with eyesight, transparency, latitude, season, and the position of the Milky Way.
| Bortle class | Typical setting | Typical visual signs | Best-suited observing |
|---|---|---|---|
| 1 | Exceptional natural dark-sky site | Milky Way is highly structured; zodiacal features can be prominent; natural sky brightness is obvious; M33 may be visible without optical aid | Faint galaxies, diffuse nebulae, dark nebulae, comets, wide-field Milky Way observing |
| 2 | Typical truly dark site | Milky Way remains richly detailed; clouds appear as dark gaps; only limited skyglow is visible near a distant horizon | Nearly all visual deep-sky targets, astrophotography, meteor observing |
| 3 | Rural sky | Milky Way is prominent; some light domes appear near the horizon; faint deep-sky objects remain accessible | Galaxies, nebulae, clusters, comets, Milky Way photography |
| 4 | Rural–suburban transition | Milky Way is visible but less detailed; several horizon directions may show skyglow; faint objects lose contrast | General deep-sky observing, brighter galaxies and nebulae, clusters |
| 5 | Suburban sky | Milky Way may be weak or mainly visible near the zenith; clouds are brighter than the background; the sky looks gray rather than black | Moon, planets, double stars, clusters, brighter nebulae and galaxy cores |
| 6 | Bright suburban sky | Milky Way is limited to its brightest overhead region or absent; skyglow affects much of the sky; clouds appear bright | Moon, planets, double stars, open clusters, bright planetary nebulae |
| 7 | Suburban–urban transition | Milky Way is usually invisible; familiar constellations lose faint stars; most galaxies appear very weak | Moon, planets, double stars, bright clusters and a limited set of bright deep-sky objects |
| 8 | City sky | The sky is bright enough to reduce many constellations to their main stars; only brighter deep-sky objects remain detectable | Lunar and planetary observing, bright double stars, a few bright clusters |
| 9 | Inner-city sky | Many constellation stars disappear; the sky remains strongly illuminated even overhead | Moon, bright planets, selected double stars and the brightest clusters |
These descriptions are not promises that a particular object will always be visible. Altitude, transparency, Moon position, observer experience, telescope aperture, and local obstructions all influence the result.
Is a Lower Bortle Number Always Better?
A lower Bortle number is better for observing faint, extended objects, but it is not required for every type of astronomy.
Dark skies improve the contrast between a faint object and the sky behind it. That improvement is especially important for galaxies, diffuse nebulae, dark nebulae, the outer regions of star clusters, and the detailed structure of the Milky Way.
Bright targets depend less on sky darkness:
| Target | How strongly light pollution matters | Practical guidance |
|---|---|---|
| Moon | Low | Visible from every Bortle class; local glare and atmospheric steadiness often matter more |
| Jupiter, Saturn, Mars, Venus | Low to moderate | City observing can be productive because planets are bright |
| Double stars | Low to moderate | Many are accessible from urban and suburban sites |
| Open clusters | Moderate | Bright clusters remain useful city targets; darker skies reveal more members |
| Planetary nebulae | Moderate | Compact bright examples can work under suburban skies |
| Emission nebulae | Moderate to high | Darker skies help; a suitable narrowband visual filter may improve contrast for some objects |
| Galaxies | High | Darker skies usually reveal more extent and structure than additional magnification |
| Dark nebulae | Very high | These depend on contrast against dense Milky Way star fields |
| Meteor showers | High | A darker sky reveals more faint meteors |
For many beginners, a safe and accessible Bortle 4 or 5 site can be more useful than a remote Bortle 2 location that is difficult to reach or unsafe at night. NASA emphasizes that an observing site should provide both darker skies and a safe, open viewing area in its guide to finding good places to stargaze.
How Can You Estimate Your Bortle Class Step by Step?
Use the CLEAR field method to produce a repeatable estimate. CLEAR is an original observation framework designed to separate real sky quality from temporary conditions and local distractions.
C — Control the Conditions
Choose a clear night after astronomical twilight. For the most comparable result, observe when the Moon is below the horizon or near its new phase.
Do not rate a site during twilight, through thin cloud, or while a bright Moon is illuminating the sky. Those conditions describe the night you experienced, but they do not isolate artificial skyglow.
Record:
- Date and local time
- Moon phase, altitude, and whether the Moon is above the horizon
- Cloud cover
- Haze, smoke, dust, or humidity
- Snow or bright ground surfaces, if relevant
- Direction of nearby population centers
L — Limit Local Glare
Move away from streetlights, windows, illuminated signs, vehicle headlights, and security lights. Block unavoidable lamps with a wall, tree, vehicle, or portable observing screen without entering unsafe or restricted areas.
Direct glare can impair night vision even when the wider sky is relatively dark. The National Park Service explains that light pollution includes glare, light trespass, and skyglow, which affect observers in different ways. See the NPS overview of light pollution.
E — Let Your Eyes Adapt
Allow approximately 20–30 minutes without bright white light before making the estimate. Keep phone screens dim and red if they must be used, and use the lowest practical red-light setting.
NASA notes that full dark adaptation can take half an hour or more and recommends minimizing bright phone screens and flashlights. See How to Find Good Places to Stargaze.
A — Assess Several Anchor Features
Do not assign a Bortle class from one star or one app reading. Check several independent indicators:
- Milky Way: Is it absent, faint, obvious, or richly structured?
- Sky background: Does the sky look dark, gray, orange, or whitish?
- Light domes: How many horizon directions show artificial glow, and how high do the domes extend?
- Cloud appearance: Are clouds dark against the stars, or bright from light below?
- Constellation completeness: Are faint stars within familiar patterns visible?
- Deep-sky anchors: Can you see the Andromeda Galaxy, the Double Cluster, or another seasonally appropriate reference?
- Natural light features: Is zodiacal light visible at an appropriate season and time?
Choose reference objects that are high in the sky. Objects near the horizon pass through more atmosphere and can be hidden by haze even at a dark site.
R — Record a Range and Repeat
A careful observer should report Bortle 4–5 when the evidence falls between two classes rather than forcing a false level of precision.
Repeat the estimate on at least two suitable nights. If the results differ, record the conditions and keep both observations. A site can behave differently after rain, during wildfire smoke, under humid air, or when nearby lighting changes.
A Practical Bortle Observation Worksheet
Copy this worksheet into an observing log:
| Field | Observation |
|---|---|
| Location | |
| Date and time | |
| Moon above horizon? | |
| Cloud cover | |
| Transparency: poor / fair / good / excellent | |
| Direct lights visible? | |
| Eye-adaptation time | |
| Milky Way appearance | |
| Number and direction of light domes | |
| Clouds dark or illuminated? | |
| Faintest clearly visible stars or constellation pattern | |
| Deep-sky anchor objects visible | |
| Provisional Bortle class or range | |
| Confidence: low / medium / high | |
| Reason for uncertainty |
How Should You Decide the Final Class?
Use this confidence rule:
- High confidence: At least three independent indicators agree and the conditions were clear, moonless, and well controlled.
- Medium confidence: Most indicators agree, but local glare, mild haze, seasonal limitations, or incomplete dark adaptation affected the result.
- Low confidence: The rating depends mainly on a map, one object, one SQM reading, or a night with Moonlight or cloud.
This approach does not modify the official Bortle criteria. It provides a transparent way to communicate how reliable an estimate is.
Is a Bortle Map the Same as an On-Site Bortle Rating?
No. A map estimates artificial sky brightness over an area, while a Bortle class is assigned from what an observer sees under actual conditions.
Light-pollution maps are valuable for trip planning because they show where darker areas are likely to be. However, a mapped color or label may not account for:
- A new commercial development or recently changed street lighting
- A bright facility close to the observing site
- Mountains, trees, or buildings that block a distant light dome
- Smoke, dust, humidity, or cloud
- The Moon
- Seasonal changes in natural sky brightness
- The observer’s adaptation and visual experience
A map can therefore help answer “Where should I investigate?” It cannot fully answer “What is the sky like tonight at this exact spot?”
A Better Three-Layer Decision Process
Use three layers when choosing a site:
- Map estimate: Identify promising regions and avoid major light domes.
- Site inspection: Check access, horizon, local fixtures, traffic, safety, and property rules during daylight.
- Field confirmation: Estimate the Bortle class or take repeated sky-brightness measurements on a clear, moonless night.
Treat any app that gives a class from GPS coordinates as an estimate unless it is reporting a recent, documented field observation.
Is the Bortle Scale the Same as an SQM Reading?
No. The two methods describe related but different things.
A Sky Quality Meter (SQM) measures sky brightness, commonly in magnitudes per square arcsecond. In that unit, a higher value indicates a darker measured sky.
| Method | What it measures | Main strength | Main limitation |
|---|---|---|---|
| Bortle class | The visual observing environment using several sky features | Describes what the sky looks like to an observer | Subjective and affected by experience and temporary conditions |
| SQM reading | Brightness within the instrument’s field of view | Fast and repeatable when used consistently | Does not describe the whole sky or every visual feature |
| Naked-eye limiting magnitude | Faintest star an observer can detect | Requires no equipment | Strongly affected by eyesight, effort, and star-field selection |
| Satellite/model map | Estimated artificial sky brightness over a geographic area | Excellent for regional planning | Not a real-time local observation |
The National Park Service reports that a sky brightness near 22 mag/arcsec² represents the darkest portion of a pristine sky, while lower values are brighter. It also notes practical limitations of handheld meters under extremely dark conditions. See the NPS Night Skies Report Guide.
Why You Should Avoid Exact SQM-to-Bortle Conversion Tables
There is no universal one-to-one conversion between an SQM number and a Bortle class.
An SQM may point near the zenith while the Bortle assessment considers horizon glow, cloud appearance, Milky Way structure, deep-sky visibility, and the observer’s entire visual environment. Two sites can have similar zenith readings but very different light domes near the horizon.
A conversion chart can provide a rough orientation, but it should not be presented as a precise measurement of Bortle class.
How Much Brighter Is One Sky Than Another?
Astronomical sky brightness uses a logarithmic magnitude scale. A difference of five magnitudes per square arcsecond corresponds to a factor of 100 in brightness.
The brightness ratio can be estimated with:
Brightness ratio = 10^(0.4 × magnitude difference)
Example
Suppose one site measures 21.5 mag/arcsec² and another measures 20.5 mag/arcsec².
The magnitude difference is:
21.5 − 20.5 = 1.0
The brightness ratio is:
10^(0.4 × 1.0) ≈ 2.51
Under comparable measurement conditions, the 20.5 site is therefore approximately 2.5 times brighter in sky background than the 21.5 site.
This is an instrument-based brightness comparison, not proof that the sites differ by a specific number of Bortle classes.
Can the Bortle Class Change From Night to Night?
Yes. The underlying artificial lighting may remain similar, but the observed sky can change substantially.
Moonlight
Moonlight raises the natural sky background and hides faint objects. A Bortle assessment intended to characterize artificial light pollution should normally be made with the Moon below the horizon.
NASA advises observers seeking faint deep-sky objects to track Moon phase and position because Moonlight can overwhelm subtle targets. See Stargazing for Beginners.
Clouds
At a light-polluted site, low clouds often reflect artificial light and make the sky dramatically brighter. At a naturally dark site, clouds may appear as dark patches because little upward artificial light is available to illuminate them.
Haze, Smoke, Dust, and Humidity
Particles and droplets scatter light. A site can therefore appear brighter and less transparent even when the number of nearby lights has not changed.
The National Park Service notes that air pollution and atmospheric conditions can increase the scattering of artificial light. See Light Pollution Sources.
Local Lighting
A single unshielded fixture near the observer may not change a regional map, but it can reduce dark adaptation and make the location much less useful.
Seasonal Sky Features
The Milky Way’s brightest regions are not equally placed throughout the year. Zodiacal light is also seasonal and depends on observing time and latitude. A class estimate should use features that are actually available during the session.
What Can You See at Different Bortle Classes?
The following recommendations are practical estimates, not guarantees.
Bortle 1–3: Faint-Object Conditions
Prioritize:
- Galaxies with low-surface-brightness outer regions
- Diffuse and dark nebulae
- Comets
- Milky Way structure
- Meteor showers
- Wide-field binocular observing
- Deep-sky astrophotography
At these sites, protect dark adaptation carefully. A bright phone screen or vehicle light can waste much of the advantage.
Bortle 4–5: Productive General Observing
Prioritize:
- Brighter galaxies
- Messier objects
- Emission and planetary nebulae
- Globular and open clusters
- Double stars
- The Moon and planets
- Milky Way photography under suitable seasonal conditions
These classes can provide an excellent balance between access and sky quality. NASA notes that a Bortle 3 or 4 location is dark enough for a strong evening of stargazing for many observers.
Bortle 6–7: Bright-Suburban Strategy
Prioritize:
- Moon and planets
- Double stars
- Open clusters
- Bright globular clusters
- Compact planetary nebulae
- Brighter emission nebulae when conditions and equipment are suitable
Observe targets when they are highest in the sky and shield yourself from local lights. Use lower expectations for faint galaxy structure.
Bortle 8–9: Urban Astronomy
Prioritize:
- Lunar features near the terminator
- Jupiter’s cloud belts and moons
- Saturn’s rings
- Venus phases
- Mars during favorable apparitions
- Bright double stars
- The Pleiades and other bright clusters
- Solar observing only with correctly designed, securely mounted front-aperture solar equipment
Urban astronomy remains real astronomy. A city observer can build strong skills in finding objects, focusing, tracking, sketching, timing events, and recognizing changes in planetary appearance.
Can a Larger Telescope Overcome Light Pollution?
A larger telescope can reveal more light, but it does not make the sky itself darker.
Increasing aperture collects more light from both the target and the illuminated sky background. Larger aperture can improve resolution and make compact or bright objects easier to study, but faint extended galaxies may still lack contrast under a bright sky.
A practical decision order is:
- Reduce direct glare.
- Observe when the target is high.
- Choose a clear, transparent night.
- Use an appropriate magnification.
- Travel to a darker site when the target depends on low contrast.
- Increase aperture only after the observing conditions and setup are understood.
Some visual filters can improve contrast for selected emission nebulae by transmitting specific wavelengths and suppressing others. No filter turns a city sky into a pristine dark site, and broadband filters generally provide limited help for galaxies.
How Should Astrophotographers Use the Bortle Scale?
Use the Bortle class as a planning description, not as a complete exposure calculator.
Astrophotography results also depend on:
- Camera sensor and gain settings
- Optical focal ratio
- Filter type
- Exposure length
- Total integration time
- Gradient direction
- Moon altitude and phase
- Atmospheric transparency
- Calibration and processing
- Local light sources outside the map’s resolution
Two Bortle 5 sites can produce different gradients because one has evenly distributed suburban glow while the other faces a bright city in one direction.
For repeatable imaging decisions, record:
- Bortle estimate
- SQM reading, if available
- Target altitude
- Moon separation and altitude
- Filter
- Exposure settings
- Histogram position
- Gradient direction
- Number of usable frames
The useful question is not only “What Bortle class is this site?” It is also “How does this target and imaging setup perform here under documented conditions?”
What Common Bortle Scale Mistakes Should You Avoid?
Treating a Map Label as a Measurement
A map is modeled data. Confirm the site in person.
Rating the Sky With the Moon Up
The result mixes natural Moonlight with artificial skyglow and is difficult to compare with a moonless rating.
Using Only the Faintest Star You Can See
Naked-eye limiting magnitude depends strongly on eyesight, experience, effort, and the selected star field. The Bortle Scale was created partly to avoid relying on this one measure.
Looking at a Phone Before Classifying the Sky
A bright screen can reduce sensitivity to faint stars and Milky Way detail. Allow your eyes to readapt before making a judgment.
Ignoring Transparency
A hazy rural sky may show fewer faint objects than a transparent night at the same location. Record transparency separately from the estimated Bortle class.
Converting One SQM Reading Directly Into an Exact Class
A single zenith reading does not describe horizon glow or the appearance of the entire sky. Report the SQM value and Bortle estimate as separate observations.
Assuming a Telescope Changes the Site’s Bortle Class
Bortle class describes the observing environment. It does not change when a larger telescope is used.
How Can You Reduce Light Pollution at Home?
The most effective approach is not simply to remove all lighting. It is to use light only where, when, and at the level required.
DarkSky International and the Illuminating Engineering Society recommend five principles for responsible outdoor lighting:
- Useful: Install light only for a defined purpose.
- Targeted: Direct light downward and keep it within the intended area.
- Low level: Use no more brightness than necessary.
- Controlled: Use timers, dimmers, and motion controls.
- Warm-colored: Limit short-wavelength blue-violet light where practical.
Review the full Five Principles for Responsible Outdoor Lighting.
Home Lighting Checklist
- Remove or switch off fixtures with no clear purpose.
- Shield bulbs so the light source is not directly visible from neighboring property or the sky.
- Aim fixtures downward.
- Reduce excessive brightness.
- Add timers or motion sensors.
- Choose warmer-color outdoor lighting where appropriate.
- Close blinds or curtains when bright interior light spills outside.
- Ask neighbors respectfully before assuming a fixture violates local rules.
- Check local lighting ordinances before making legal claims or filing a complaint.
Responsible lighting can improve visibility by reducing glare while still supporting legitimate safety and access needs.
A Simple Decision Tree for Using the Bortle Scale
Are you planning an observing trip?
- Use a light-pollution map to identify candidate areas.
- Check access, opening hours, weather, Moon position, and safety.
- Confirm the sky on site.
Are you comparing two regular observing locations?
- Observe on comparable clear, moonless nights.
- Use the CLEAR method at both sites.
- Record a class range and, if available, repeated SQM readings.
Are you selecting targets for tonight?
- Use the current sky, not only the mapped class.
- Choose planets, the Moon, double stars, or bright clusters under urban skies.
- Reserve faint galaxies and diffuse nebulae for darker or more transparent nights.
Are you tracking whether local lighting is changing?
- Use repeatable dates, times, directions, and equipment.
- Keep Bortle notes, limiting-magnitude observations, photographs, or SQM readings.
- Avoid claiming a trend from one unusually clear or hazy night.
How Should You Use the Bortle Scale in Practice?
Use the Bortle Scale as a structured field description rather than an exact scientific instrument.
For casual stargazing, the class helps set realistic expectations and choose targets. For travel, maps help identify candidate sites, while an on-site assessment confirms whether local glare and horizon glow are acceptable. For long-term monitoring, record the Bortle estimate alongside Moon, weather, transparency, and instrument readings.
The most useful result is often a carefully documented range—such as Bortle 4–5 with moderate eastern skyglow—rather than an unsupported exact number.
Frequently Asked Questions
Is Bortle 4 good for stargazing?
Yes. Bortle 4 is generally useful for broad visual astronomy. The Milky Way should be visible under suitable seasonal and weather conditions, and many star clusters, nebulae, and brighter galaxies are accessible. Faint, low-contrast detail will still improve at a darker site.
Can the Milky Way be seen from Bortle 5?
It may be visible, especially when its brighter regions are high overhead and the air is transparent. The Milky Way is typically weaker and less structured than under Bortle 3 or 4 skies. Moonlight, haze, and nearby glare can make it disappear.
Can a location have more than one Bortle class?
A location can reasonably receive different estimates on different nights because atmospheric conditions, Moonlight, local lighting, and observer adaptation change. Report the conditions and consider using a range when evidence falls between classes.
Is an SQM value more accurate than a Bortle class?
An SQM is more repeatable for measuring brightness within its field of view, but it does not replace the visual information captured by a Bortle assessment. The strongest record contains both measurements and a description of the observing conditions.
How accurate are light-pollution apps?
They are useful for regional planning but may be based on modeled or older data. They may not resolve individual fixtures, temporary lighting, weather, terrain shielding, or current Moon conditions. Treat the displayed Bortle number as an estimate until the site is observed.
Does light pollution affect planets?
Light pollution affects planets less than faint deep-sky objects because planets are bright. Direct glare, atmospheric turbulence, poor telescope cooling, low altitude, and excessive magnification are often more important limitations for planetary detail.
Sources
- Sky & Telescope — Light Pollution and Astronomy: The Bortle Dark-Sky Scale
- NASA Science — How to Find Good Places to Stargaze
- NASA Science — Stargazing for Beginners
- U.S. National Park Service — Night Skies Report Guide
- U.S. National Park Service — Light Pollution
- U.S. National Park Service — Light Pollution Sources
- DarkSky International — Five Principles for Responsible Outdoor Lighting
More from Observing Conditions
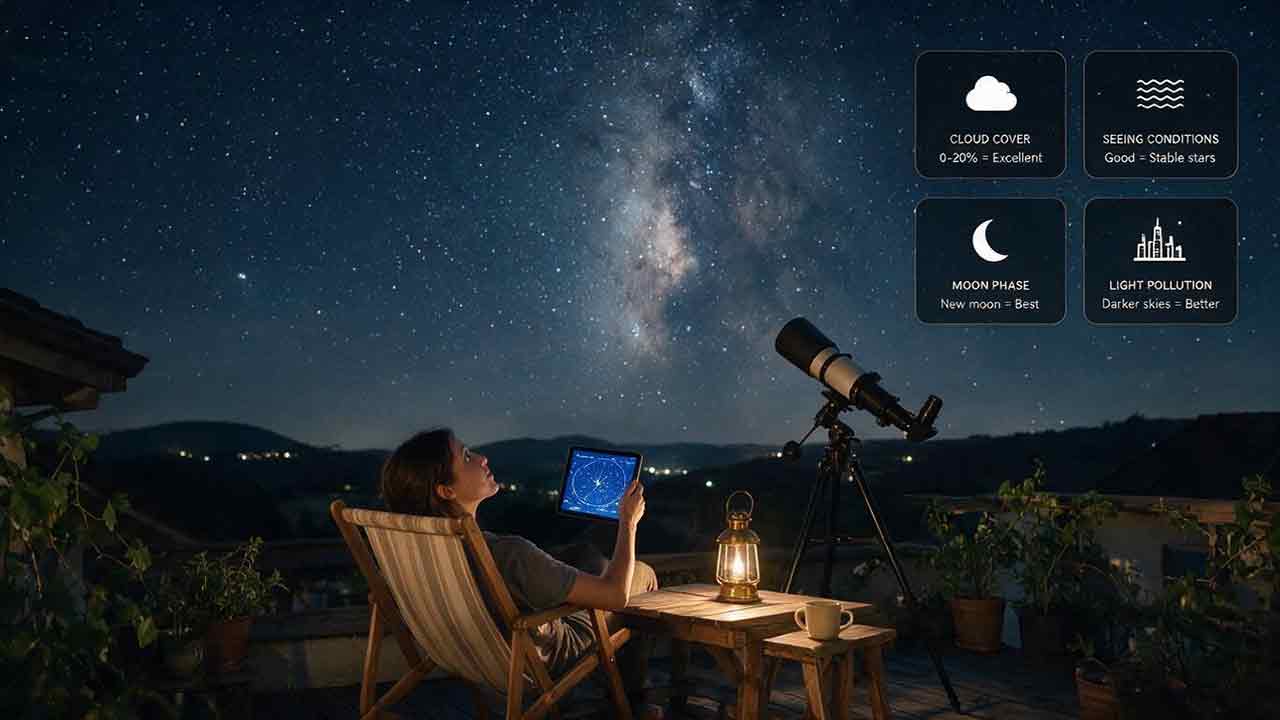
How to Check Whether Tonight Is Good for Stargazing
A useful stargazing forecast requires more than a clear-weather icon. This guide explains how to check hourly cloud cover, precipitation and lightning risk, atmospheric transparency, astronomical seeing, Moon position, twilight, target altitude, wind, dew, smoke, light pollution, and site access before deciding whether to observe. Readers will learn why a night can be excellent for planets but poor for galaxies, how to distinguish cloud cover from transparency and seeing, and how to match changing conditions to the Moon, Milky Way, meteor showers, clusters, double stars, and deep-sky objects. The article includes a 10-minute checking process, a CLEAR decision framework, a hypothetical worked example, forecast-tool comparisons, rescue strategies for marginal nights, troubleshooting advice, a complete checklist, and safety guidance for thunderstorms and hazardous travel.
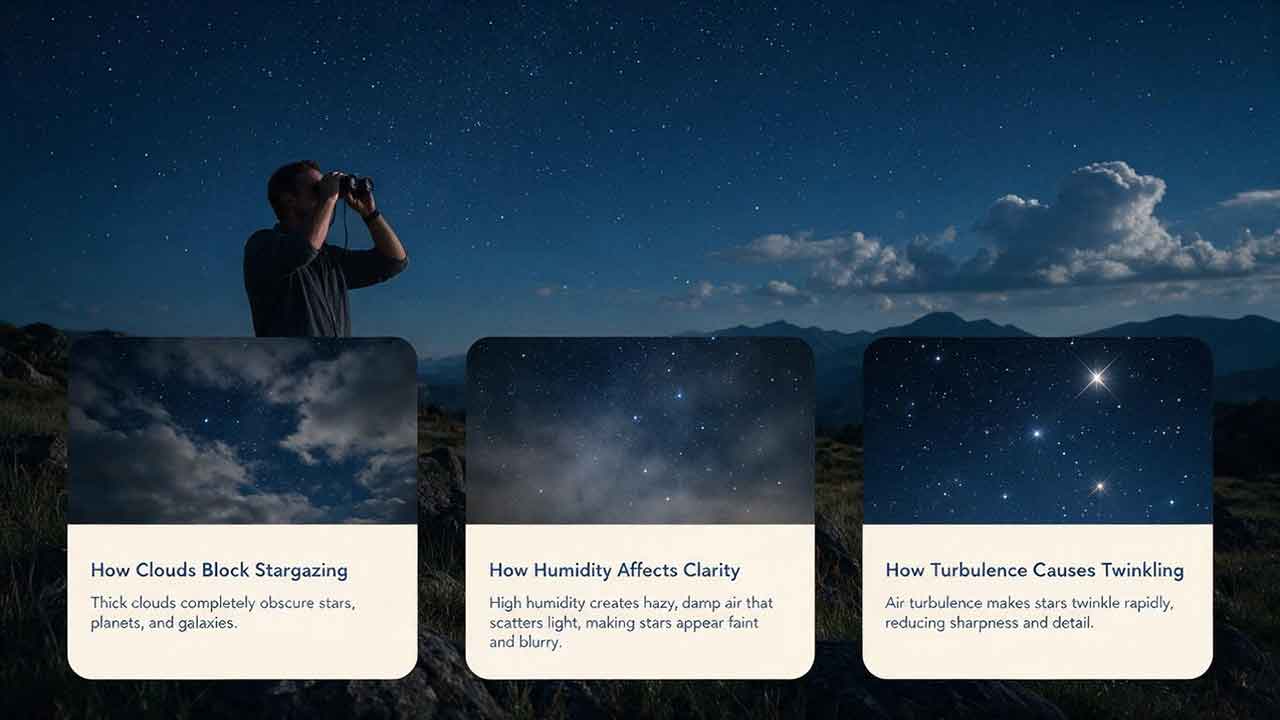
How Clouds, Humidity, and Air Turbulence Affect Stargazing
Clear skies do not always produce sharp telescope views, and high humidity does not automatically make a night unsuitable for astronomy. This practical guide separates cloud cover, transparency, moisture, dew risk, and atmospheric seeing so observers can diagnose conditions accurately. It explains how thin cirrus can weaken faint objects, why dew point is more useful than relative humidity alone for predicting condensation, and how turbulent air blurs planetary and lunar detail. The article introduces the original CAST planning framework—Clouds, Air moisture, Seeing, and Target—to help readers interpret forecasts and match each night to appropriate observing goals. A temperature–dew point calculation, target-selection tables, realistic observing scenarios, a go/change-target/cancel matrix, troubleshooting guide, and pre-session checklist turn weather data into practical decisions. Authoritative material from NASA, NOAA, the National Weather Service, the European Southern Observatory, and telescope-manufacturer documentation supports the scientific and equipment-care guidance.
How Long Does It Take Your Eyes to Adjust to Darkness?
Your eyes begin adapting to darkness within seconds, but useful night vision develops in stages. Pupil dilation happens quickly, cone sensitivity improves during the first several minutes, and rod-based sensitivity can continue increasing for roughly 20–40 minutes after strong light exposure. This guide explains how rods, cones, rhodopsin, glare, age, eye health, and previous lighting affect the timing. Readers will learn how to preserve dark adaptation with dim red light, use averted vision for faint targets, organize a safe observing site, and match the waiting period to the Moon, planets, star clusters, galaxies, nebulae, or meteor showers. The article also includes an ADAPT planning framework, a real-world observing timeline, a light-source comparison, troubleshooting guidance, a detailed checklist, and signs that persistent night-vision difficulty should be evaluated by an eye-care professional.
Explore More Topics
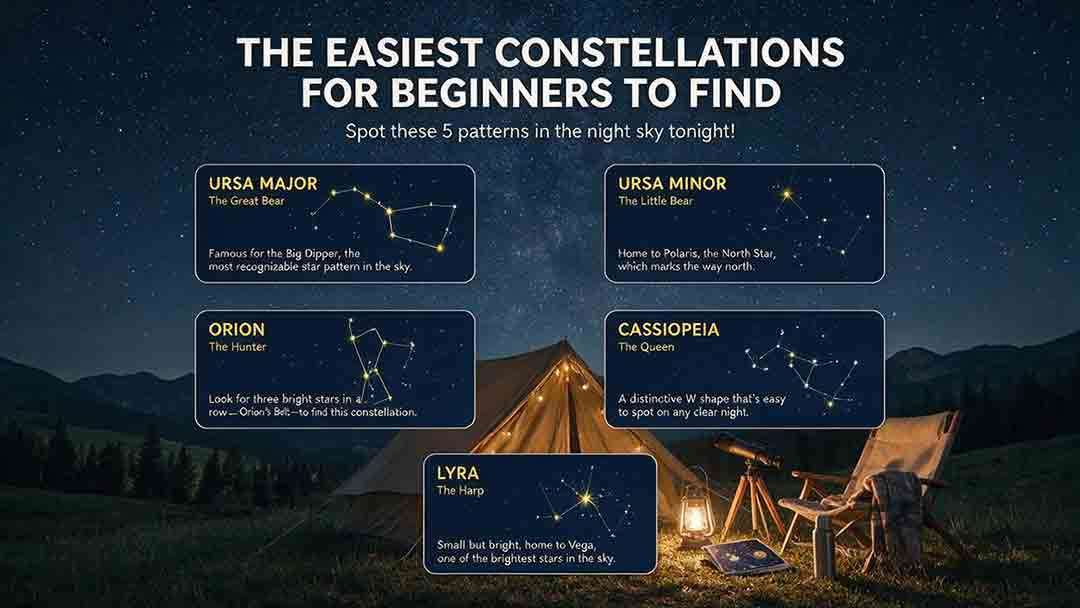
The Easiest Constellations for Beginners to Find
This beginner-friendly guide explains how to find Orion, Ursa Major through the Big Dipper, Cassiopeia, Cygnus, and Scorpius using clear naked-eye observing steps. It compares each pattern through an original Beginner Visibility Score and shows readers how to choose a first target based on season, latitude, light pollution, moonlight, and horizon visibility. The guide also clarifies the difference between constellations and asterisms, explains how the Big Dipper can point toward Polaris, and provides dedicated recommendations for Southern Hemisphere observers, including Crux. Practical tools include the Anchor-Pattern Method, the Three-Check Rule, a 10-minute observing session, city-sky guidance, troubleshooting advice, an equipment comparison, and a safety checklist. Authoritative references from the International Astronomical Union, NASA, NSF NOIRLab, and the European Southern Observatory support the key astronomical facts.
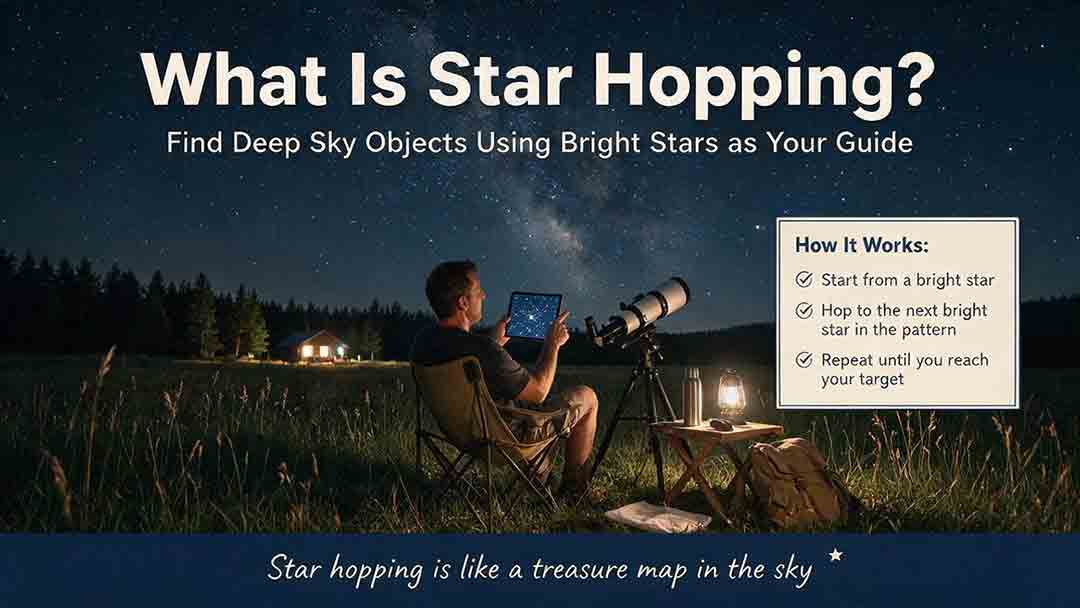
What Is Star Hopping and How Do You Do It?
Star hopping is a practical way to navigate the night sky by moving from a bright, recognizable star to a fainter target through a sequence of visible star patterns. This guide explains how beginners can plan a reliable route, align a finder, match a star chart to a telescope’s field of view, and recognize rotated or mirror-reversed images. It introduces the Anchor–Path–Field–Confirm method, provides a step-by-step observing process, and shows how field-of-view estimates can help determine a practical chart scale. A worked example demonstrates how to locate Messier 13 using the Keystone of Hercules, while the troubleshooting table addresses common problems such as finder misalignment, excessive magnification, incorrect chart orientation, and targets that remain invisible despite correct pointing. The included field checklist gives binocular and telescope users a repeatable method for planning and completing future star hops.
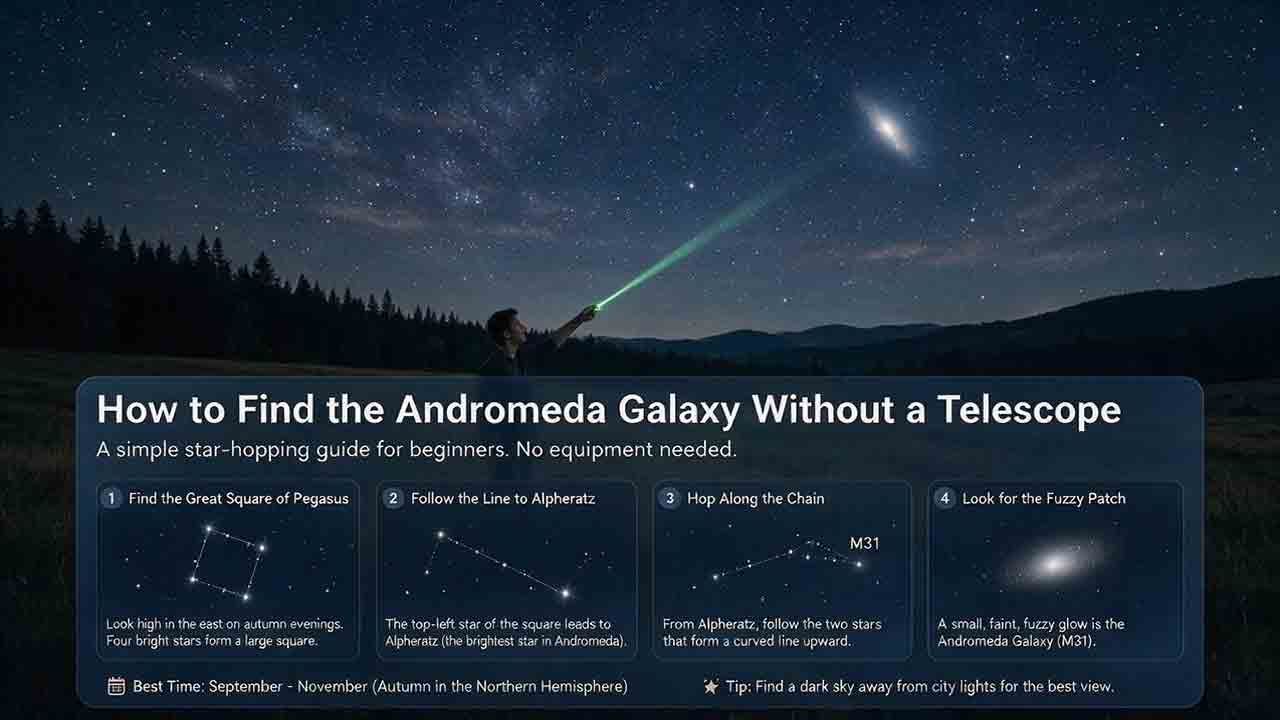
How to Find the Andromeda Galaxy Without a Telescope
Finding the Andromeda Galaxy without a telescope is possible when you know which stars to use as landmarks. This practical guide explains how to start at the Great Square of Pegasus, identify Alpheratz, follow the Andromeda star chain to Mirach, and use two nearly equal short hops to reach Mu Andromedae and M31. It also explains what the galaxy realistically looks like to the naked eye, why dark skies and averted vision matter, and how binoculars can help confirm the target. Beginners can use the six-point observing checklist, three-night practice method, troubleshooting guidance, and reusable observation log to improve each attempt. The guide distinguishes calculated angular distances from practical field estimates and clearly explains its source-checking process without claiming personal testing. It is designed primarily for Northern Hemisphere observers while also addressing visibility limitations from Southern Hemisphere locations.