How Clouds, Humidity, and Air Turbulence Affect Stargazing

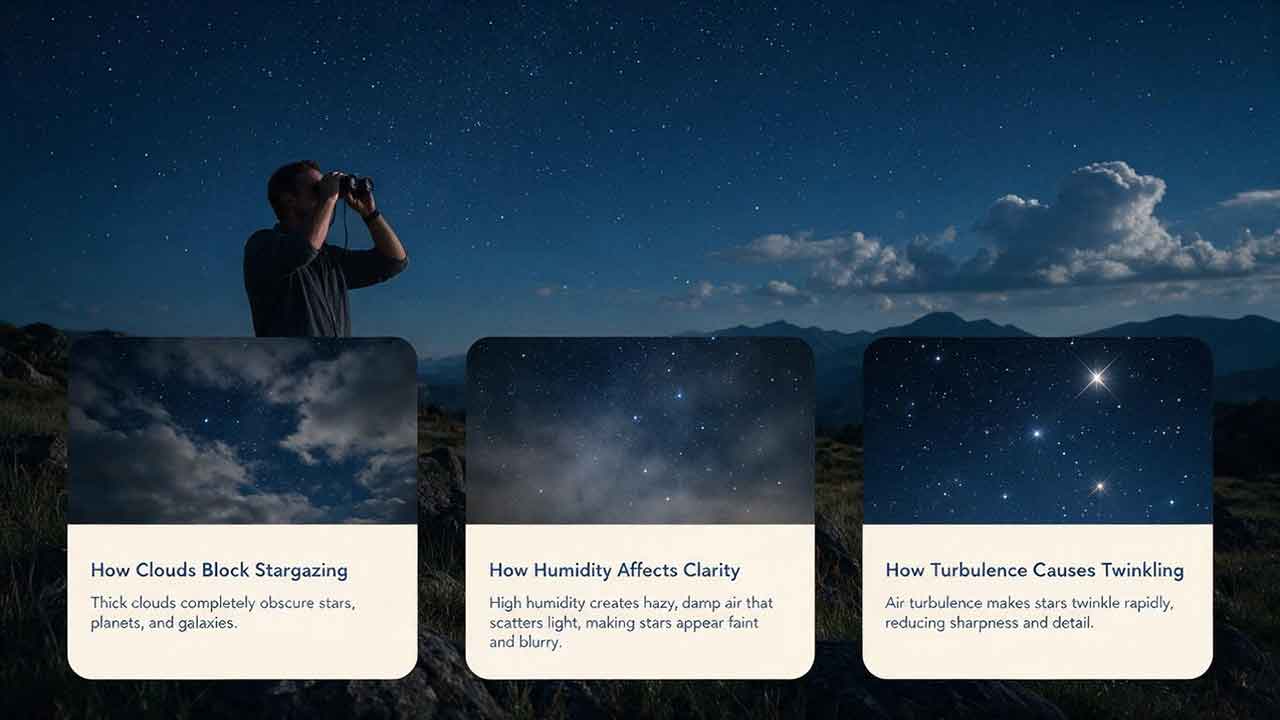
Clouds reduce or block incoming light, humidity can lower transparency and create dew on optics, and air turbulence blurs fine detail by making stars and planets shimmer. These conditions affect different targets in different ways: transparent skies favor faint deep-sky objects, steady air favors planets and double stars, and dry conditions mainly protect equipment from condensation.
Key Takeaways
- Cloud cover and transparency are not the same. A mostly open sky can still have thin cirrus or haze that weakens faint objects.
- Humidity does not automatically mean poor seeing. Use dew point and the temperature–dew point spread to judge condensation risk.
- Air turbulence controls sharpness. Unsteady air can ruin high-power planetary detail even when the sky looks perfectly clear.
- Match the target to the conditions. Poor seeing may still allow productive low-power deep-sky observing, while moderate haze may still permit bright planetary work.
This guide explains how to separate cloud cover, transparency, humidity, dew risk, and atmospheric seeing; how to interpret a weather forecast; and how to decide whether to observe, change targets, or protect the telescope.
This guide is based on published specifications, authoritative documentation, and practical selection criteria rather than hands-on product testing.
How Are Clouds, Humidity, and Air Turbulence Different?
Clouds, humidity, and turbulence affect stargazing through different physical mechanisms. Treating them as one “bad weather” category makes it harder to choose the right target or diagnose a disappointing view.
| Condition | What it changes | What the observer notices | Most affected targets |
|---|---|---|---|
| Cloud cover | Blocks or scatters incoming light | Stars disappear, brighten and fade, or develop halos | All targets, especially faint objects and imaging |
| Thin cloud or haze | Reduces transparency and contrast | Milky Way weakens; faint objects fade; sky background may brighten | Galaxies, nebulae, comets, Milky Way |
| High moisture and small dew-point spread | Raises condensation risk | Objective, corrector, eyepiece, or camera window gradually fogs | Any observation after dew forms |
| Atmospheric turbulence | Distorts the wavefront of incoming light | Stars twinkle; planets shimmer or look soft at high power | Planets, Moon, double stars, high-resolution imaging |
| Local heat currents | Creates turbulence close to the telescope | Image “boils,” shifts, or improves after equipment cools | High-power visual observing and planetary imaging |
| Wind | Shakes equipment and mixes air layers | Vibration, tracking errors, unstable focus | Long focal-length viewing and imaging |
Transparency describes how well light passes through the atmosphere. Seeing describes how atmospheric turbulence affects image sharpness. A night can have excellent transparency but poor seeing, or steady seeing under a humid, hazy sky.
The European Southern Observatory defines seeing as a property of atmospheric turbulence and distinguishes it from the final image quality produced by the atmosphere, telescope, and instrument. See the ESO overview of observing-condition definitions.
How Do Clouds Affect Stargazing?
Clouds reduce stargazing quality by blocking light, scattering light, and making transparency vary across time and direction. The impact depends on cloud thickness, altitude, coverage, and movement.
Thick Clouds and Overcast
Thick clouds can completely hide celestial objects. Broken cloud may allow short observing windows, but rapidly changing transparency makes faint-object comparisons and long imaging sequences unreliable.
An overcast forecast should normally be treated as a no-go condition for planned telescope observing. Waiting for a small gap can make sense for a brief look at the Moon or a bright planet, but not for a session that requires stable calibration or uninterrupted exposures.
Thin Cirrus
Thin cirrus is easy to underestimate because stars may remain visible through it. However, faint stars and low-contrast deep-sky objects can lose brightness well before the sky appears “cloudy.”
ESO separates photometric, clear, and thin-cirrus conditions according to visible cloud and transparency variation. That distinction is useful for amateurs: cloud cover percentage alone does not describe how consistent the transmitted light will be. See ESO Observing Conditions.
Typical signs of thin cloud include:
- Halos around bright stars, planets, or the Moon
- Stars fading and brightening together across a region
- A pale or milky background
- Reduced Milky Way contrast
- Imaging histograms or guide-star brightness changing without an equipment adjustment
Scattered or Broken Clouds
Scattered clouds can still leave useful openings. The main question is whether the target remains in a clear region long enough for the planned activity.
For casual visual observing, gaps may be sufficient. For long-exposure imaging, variable cloud can reduce usable frames, affect guiding, and complicate flat-field or background consistency.
NASA’s cloud-cover protocol classifies skies by the fraction covered, from no clouds through scattered, broken, and overcast. These categories describe coverage, not astronomical transparency. See the NASA Cloud Cover Protocol.
Why Low Clouds Can Brighten an Urban Sky
At a light-polluted location, low clouds can scatter artificial light back toward the ground. The sky may become much brighter even when the cloud itself blocks stars.
At a truly dark site, clouds may instead appear as dark patches against a star-rich background. This contrast is one reason cloud appearance can help observers judge local artificial skyglow.
For a broader explanation of sky brightness, continue with What Is the Bortle Scale? A Guide to Light Pollution.
Does High Humidity Always Ruin Stargazing?
No. High relative humidity raises the risk of haze, fog, and dew, but it does not automatically produce poor atmospheric seeing.
Relative humidity is the amount of water vapor present compared with the maximum possible at the current temperature. Because that maximum changes with temperature, relative humidity often rises during the night as the air cools even when the actual amount of water vapor changes little.
NOAA explains that dew point is the temperature at which water vapor condenses into liquid droplets. Dew point is therefore more useful than relative humidity alone when estimating how close the air is to condensation. See NOAA’s guide to humidity and dew point.
What Is the Temperature–Dew Point Spread?
The temperature–dew point spread is the difference between the current air temperature and the dew point.
Dew-point spread = air temperature − dew point
As the spread narrows, the air is closer to saturation. Optics can still collect dew before the reported air temperature reaches the dew point because exposed surfaces can radiate heat toward the sky and cool below the surrounding air temperature.
Calculation Example
Suppose the air temperature is 12°C and the dew point is 10°C:
12°C − 10°C = 2°C
The spread is only 2°C. That does not guarantee dew, but it indicates that condensation risk is increasing and active dew control may be useful.
Later, the air cools to 10.5°C while the dew point remains 10°C:
10.5°C − 10°C = 0.5°C
The smaller spread means the session is much closer to saturation. Check the front optic, eyepieces, finder, camera window, and exposed electronics more frequently.
Do not treat any single threshold as universal. Surface temperature, wind, local terrain, ground moisture, radiative cooling, and equipment design all affect when dew begins.
How Does Humidity Reduce Transparency?
Humidity can reduce transparency when water droplets, haze, or other suspended particles scatter light. The effect is usually most obvious around cities, near the horizon, and around bright sources such as the Moon.
A humid night may still be transparent after a weather front clears the air. Conversely, a relatively dry night can have poor transparency because of smoke, dust, pollution, or thin cloud.
Use several indicators rather than one humidity number:
- Are distant lights surrounded by large halos?
- Is the Milky Way weaker than expected?
- Does the horizon look washed out?
- Are stars near the zenith reasonably crisp and bright?
- Is smoke, dust, or haze reported?
- Is the Moon creating a large bright region in the sky?
If faint stars are missing but bright planets remain sharp, transparency may be the primary limitation rather than seeing.
How Does Dew Form on Telescope Optics?
Dew forms when an optical surface cools to or below the local dew point. Corrector plates, refractor objectives, eyepieces, finders, and camera windows can cool by radiating heat toward the open night sky.
The first sign is often a gradual loss of contrast rather than an obvious water film. Bright stars become diffuse, focusing becomes difficult, and the image may seem to fade even though the sky remains clear.
How Can You Reduce Dew Risk?
Use the least intrusive method that keeps the optical surface slightly above the dew point:
- Attach a correctly sized dew shield before the session.
- Use a regulated dew heater when the spread is small or the site is consistently damp.
- Keep unused eyepieces capped in a case or pocket.
- Avoid breathing directly onto eyepieces.
- Check secondary equipment such as finders and guide scopes.
- Route heater cables so they cannot catch on the mount.
- Follow the telescope and heater manufacturers’ electrical guidance.
A dew shield slows radiative cooling and also blocks some stray light. Celestron’s technical explanation describes how a dew shield helps keep an exposed optic above the dew point for longer; see Telescope Dew Shields: Your Key to Crystal-Clear Views.
Do not wipe coated optics repeatedly during a session. If equipment becomes wet, follow the manufacturer’s care instructions and allow it to dry in a clean environment before long-term storage.
Use a practical dew-control routine when humidity is high and exposed surfaces are cooling toward the dew point.
How Does Air Turbulence Affect Stargazing?
Air turbulence changes the refractive index along the light path, distorting the incoming wavefront. To the eye, stars twinkle; through a telescope, fine detail moves, smears, or briefly snaps into focus.
NASA describes Earth’s atmosphere as a light-distorting layer that makes stars appear to quiver and limits the resolution of ground-based telescopes. See NASA’s overview of atmospheric distortion and the Hubble Space Telescope.
What Is Astronomical Seeing?
Astronomical seeing is the image-blurring effect caused by atmospheric turbulence. Professional observatories often quantify it by the apparent width of a star image in arcseconds under standardized conditions.
Amateur observers do not need a numerical seeing measurement to make useful decisions. Practical signs include:
- Rapid star twinkling, especially high in the sky
- Planet edges that ripple or refuse to hold focus
- Lunar detail that looks as if it is underwater
- Double stars merging at magnifications that normally separate them
- Short moments of sharpness between longer blurred intervals
Twinkling near the horizon is common because the light passes through more atmosphere. Judge seeing with a star or planet reasonably high above the horizon.
What Causes Poor Seeing?
Atmospheric turbulence can occur at multiple levels:
- Fast-moving or strongly sheared air aloft
- Mixing between air layers at different temperatures
- Wind crossing terrain, buildings, or trees
- Warm roofs, walls, pavement, or vehicles releasing stored heat
- A telescope tube or mirror that has not adjusted to outdoor temperature
- Observing across a rooftop or directly above a heated building
Professional observatories separate atmospheric seeing from the final image quality delivered by a telescope and instrument. Amateur observers should make a similar distinction: poor sharpness can come from the atmosphere, local heat, telescope cooling, collimation, focus, vibration, or several causes at once.
What Is the Difference Between Seeing and Transparency?
Seeing controls fine detail; transparency controls how faint an object can be detected against the sky.
| Observed condition | Likely interpretation | Better targets |
|---|---|---|
| Stars twinkle strongly, but the Milky Way is bright | Good transparency, poor seeing | Galaxies, nebulae, clusters, low-power views |
| Stars barely twinkle, but the sky looks pale or hazy | Good seeing, poor transparency | Planets, Moon, double stars |
| Stars are steady and faint objects are obvious | Good seeing and good transparency | High-power planets and faint deep-sky objects |
| Stars twinkle and the sky is hazy | Poor seeing and poor transparency | Bright targets at modest power or postpone |
| Image degrades gradually while the sky remains unchanged | Dew or equipment issue | Pause and inspect optics |
| Only low-altitude objects look unstable | Airmass and horizon turbulence | Observe targets higher in the sky |
This distinction prevents a common mistake: abandoning a clear night because planets look soft, even though the same conditions may still support excellent wide-field deep-sky observing.
Which Conditions Matter Most for Different Targets?
The best forecast depends on the observing goal.
| Target or activity | Cloud tolerance | Transparency priority | Seeing priority | Dew-control priority |
|---|---|---|---|---|
| Moon | Small gaps may be usable | Low to moderate | High for fine detail | Moderate |
| Planets | Thin cloud may be tolerable visually | Moderate | Very high | Moderate |
| Double stars | Clear line of sight required | Moderate | High | Moderate |
| Open clusters | Small cloud gaps may work | Moderate to high | Low to moderate | Moderate |
| Galaxies | Clear, transparent sky preferred | Very high | Low to moderate | Moderate |
| Diffuse nebulae | Clear, transparent sky preferred | Very high | Low | Moderate |
| Milky Way viewing | Broad clear sky needed | Very high | Low | Low to moderate |
| Meteor showers | Wide cloud-free area needed | High | Low | Low |
| Planetary imaging | Continuous clear window preferred | Moderate | Very high | High |
| Deep-sky imaging | Stable, clear transparency needed | Very high | Moderate, depending on image scale | High |
Choose observing equipment according to your goals, portability needs, and expected site conditions.
How Can You Evaluate a Stargazing Forecast?
Use the CAST framework before deciding whether to travel or set up equipment. CAST is an original planning method that separates four conditions that generic weather icons often combine.
C — Clouds and Transparency
Check more than the headline cloud percentage.
Review:
- Total cloud cover
- Low, middle, and high cloud layers
- Timing and movement of cloud bands
- Fog, smoke, dust, and haze
- Whether the Moon will illuminate thin cloud
- Whether the target is in the clearest direction
A forecast that says “mostly clear” may still contain high cirrus that weakens deep-sky contrast.
A — Air Moisture and Dew Risk
Record:
- Air temperature
- Dew point
- Temperature trend
- Relative humidity
- Wind speed
- Ground conditions after rain
- Proximity to water, valleys, or irrigated fields
Calculate the temperature–dew point spread at the start of the session and again later. A falling air temperature with a nearly unchanged dew point deserves closer monitoring.
S — Seeing and Turbulence
Use any astronomical seeing forecast as guidance, not certainty.
Also check:
- Upper-level wind information, if available
- Surface wind and gusts
- Rapid temperature changes
- Whether the site is downwind of buildings or terrain
- Whether the telescope has cooled
- Whether the target is high above the horizon
A calm surface does not guarantee steady air aloft, and a moderate breeze does not always mean poor atmospheric seeing.
T — Target and Timing
Choose targets that match the strongest condition rather than demanding ideal weather in every category.
- Poor seeing but high transparency: observe galaxies, nebulae, and clusters at modest power.
- Stable seeing but moderate haze: observe planets, the Moon, or double stars.
- Small dew-point spread: use dew control and shorten the session if necessary.
- Passing cloud: choose bright targets and avoid long automated imaging runs.
- Clear but windy: use a sheltered site and lower magnification if vibration remains.
A Quick Go, Change Target, or Cancel Matrix
| Forecast or field condition | Decision | Best response |
|---|---|---|
| Overcast or thunderstorms nearby | Cancel | Do not set up outdoors |
| Broken fast-moving cloud | Change plan | Short visual looks at bright targets |
| Thin cirrus, steady air | Change target | Planets or double stars instead of faint galaxies |
| Clear sky, poor seeing | Go | Low-power deep-sky observing |
| Clear sky, good seeing, moderate haze | Go selectively | Planets, Moon, compact bright objects |
| Clear sky, small dew-point spread | Go with protection | Dew shield, heater, frequent checks |
| Clear, transparent, steady, low dew risk | Go | Nearly any target appropriate to the site |
| Thunder heard or lightning seen | Stop immediately | Move to a substantial building or hard-topped vehicle |
The U.S. National Weather Service states that there is no safe place outside when thunderstorms are in the area. If thunder is audible, go indoors and follow current local safety guidance. See NWS Lightning Safety.
Real-World Example 1: Clear Sky but Blurry Jupiter
The forecast shows almost no cloud, and the air is dry. Jupiter is bright, but its belts ripple and focus never stays stable.
The likely limitation is seeing rather than transparency. First confirm that the telescope is thermally adjusted, collimated if required, and not aimed across a roof. Then lower the magnification and wait for brief steady moments.
If the planet remains unstable, switch to open clusters or brighter deep-sky objects. A cloud-free night can still be productive even when high-resolution planetary work is poor.
Real-World Example 2: Humid Night With Steady Planets
Relative humidity is high, bright stars do not twinkle much, and Saturn looks sharp. The Milky Way is weak, while a thin halo surrounds distant lights.
The air may be steady but less transparent. Planetary observing can remain productive, although dew risk may rise as the temperature approaches the dew point.
Use a dew shield or heater and avoid assuming that the high humidity caused poor seeing. The limiting factors are more likely reduced transparency and condensation risk.
Real-World Example 3: Mostly Clear Forecast but Faint Objects Disappear
A weather app reports low total cloud cover, yet the Andromeda Galaxy looks weaker than usual and star brightness changes slowly. Bright objects show soft halos.
High thin cloud is the likely cause. The visible openings between cloud bands do not guarantee stable transparency.
For visual observing, switch to the Moon, planets, or double stars. For calibrated deep-sky imaging, postponing may save time because changing transparency can reduce data consistency.
How Can You Troubleshoot a Poor Telescope View?
| Symptom | Most likely causes | What to check first |
|---|---|---|
| Planet shimmers rapidly | Atmospheric seeing, low altitude, local heat | Target altitude, rooftops, telescope cooling |
| View slowly becomes dim and foggy | Dew | Objective, corrector, eyepiece, finder |
| Every bright object has a broad halo | Thin cloud, haze, dew | Naked-eye sky, optic surfaces, nearby lights |
| Stars are sharp at low power but soft at high power | Seeing, thermal adjustment, collimation | Reduce power, inspect star image, allow cooling |
| Image shakes rather than shimmers | Wind or mount vibration | Tripod, ground, cables, wind exposure |
| Only one eyepiece looks foggy | Condensation from breath or handling | Swap eyepiece and inspect its eye lens |
| Guide-star brightness changes together across the frame | Cloud or transparency variation | Cloud motion and sky background |
| Image improves later in the evening | Cooling ground, calmer air, telescope equilibrium | Record time and temperature trend |
| One horizon is consistently worse | Haze, light pollution, low cloud, terrain airflow | Observe higher or in another direction |
| Focus changes during a long imaging run | Temperature change, dew, mechanical shift | Optics, focuser, temperature log |
Do not increase magnification repeatedly when the image is already unstable. A larger image is not necessarily a sharper image.
What Common Forecasting Mistakes Should You Avoid?
Looking Only at the Cloud Icon
A single icon may hide high cloud, haze, smoke, changing cloud bands, or poor seeing. Open the hourly and layered forecast when available.
Using Relative Humidity Without Dew Point
Relative humidity is temperature-dependent. Dew point and the temperature–dew point spread provide a clearer view of condensation risk.
Assuming Dry Air Means Good Seeing
Dry air can be turbulent. A dry, windy night with strong temperature mixing may offer excellent transparency but unstable planetary detail.
Assuming High Humidity Means Bad Seeing
A humid night can have steady air. The main concerns may be haze and dew rather than sharpness.
Ignoring Local Heat
A forecast describes a wider area, not the warm roof, driveway, vent, wall, or vehicle next to the telescope.
Judging Conditions From a Low Star
Stars near the horizon commonly twinkle more because their light passes through more atmosphere. Test seeing with an object higher in the sky.
Forgetting Equipment Temperature
A warm mirror or tube can create internal currents that resemble poor atmospheric seeing. Allow the telescope to adjust according to its design and manufacturer guidance.
Continuing During Thunder
Cloud breaks do not make a thunderstorm safe. End the session and move indoors when thunder is heard.
A Pre-Session Stargazing Checklist
Weather and Safety
- No thunderstorm or lightning threat
- Safe access, parking, and exit route
- Cloud layers checked by hour
- Fog, smoke, dust, and haze checked
- Wind and gusts acceptable for the equipment
- Moon altitude and phase checked
- Temperature and dew point recorded
Equipment
- Telescope has time to adjust to outdoor temperature
- Dew shield installed
- Dew heater and power supply available when needed
- Unused eyepieces protected
- Tripod is stable and cables cannot snag
- Lens caps and storage cases are dry
- Cleaning is not planned in the field unless manufacturer guidance requires it
Observing Plan
- One high-seeing target selected
- One high-transparency target selected
- One bright fallback target selected
- Targets are scheduled near their highest altitude
- A stopping condition is defined for cloud, dew, wind, or safety
For Milky Way planning, prioritize transparent, dark skies with minimal cloud cover and skyglow.
Which Condition Should Determine Your Decision?
Use the condition that most strongly affects the chosen target.
For planets and double stars, seeing usually deserves the highest priority. For galaxies, nebulae, comets, and the Milky Way, transparency and cloud stability matter more. For every telescope session, dew risk determines how long the equipment can remain usable.
A practical next step is to record cloud type, temperature, dew point, seeing impressions, transparency, target altitude, and the actual result for several sessions. Your own log will reveal which forecasts are most reliable at your regular observing site.
Frequently Asked Questions
Can stargazing be good when humidity is high?
Yes. High humidity can increase haze and dew risk, but the air may still be steady enough for excellent planetary or double-star observing. Check transparency visually and monitor the temperature–dew point spread rather than rejecting the night from relative humidity alone.
Do thin clouds completely prevent astronomy?
Not always. Bright objects such as the Moon, planets, and some double stars may remain visible through thin cloud. Faint-object observing and precision imaging suffer more because transmission changes and contrast falls.
Why do planets look blurry when the sky is clear?
A clear sky describes cloud cover, not atmospheric steadiness. Turbulence, low target altitude, local heat, telescope cooling, collimation, vibration, or excessive magnification can all blur planetary detail.
Is dew more likely when relative humidity reaches 100%?
Condensation risk is high near saturation, but telescope optics can cool below the reported air temperature and collect dew before a weather station reports 100% relative humidity. Dew point, surface cooling, wind, and equipment design all matter.
Is calm wind always a sign of good seeing?
No. Surface wind and turbulence aloft are different conditions. Calm ground-level air may coexist with strong upper-atmosphere turbulence, while a light breeze may reduce local heat buildup without destroying seeing.
Should I cancel when the forecast says partly cloudy?
It depends on the goal. Partly cloudy conditions may support casual visual observing through gaps, but long imaging sequences and faint-object work need more stable transparency. Cancel if thunderstorms are possible or the site cannot be used safely.
Sources
European Southern Observatory — Observing Conditions: Definitions
Definitions of sky transparency, seeing, turbulence constraints, and image quality.NASA Science — The History of Hubble
Explanation of how atmospheric distortion limits ground-based image sharpness.NASA AERONET — Cloud Cover Protocol
Field categories for estimating cloud coverage.NOAA NESDIS — What Is Humidity?
Definitions of humidity, relative humidity, dew point, saturation, and condensation.National Weather Service — Lightning Safety
Outdoor lightning safety guidance.Celestron — Telescope Dew Shields: Your Key to Crystal-Clear Views
Manufacturer explanation of radiative cooling, dew formation, and dew-shield function.
More from Observing Conditions
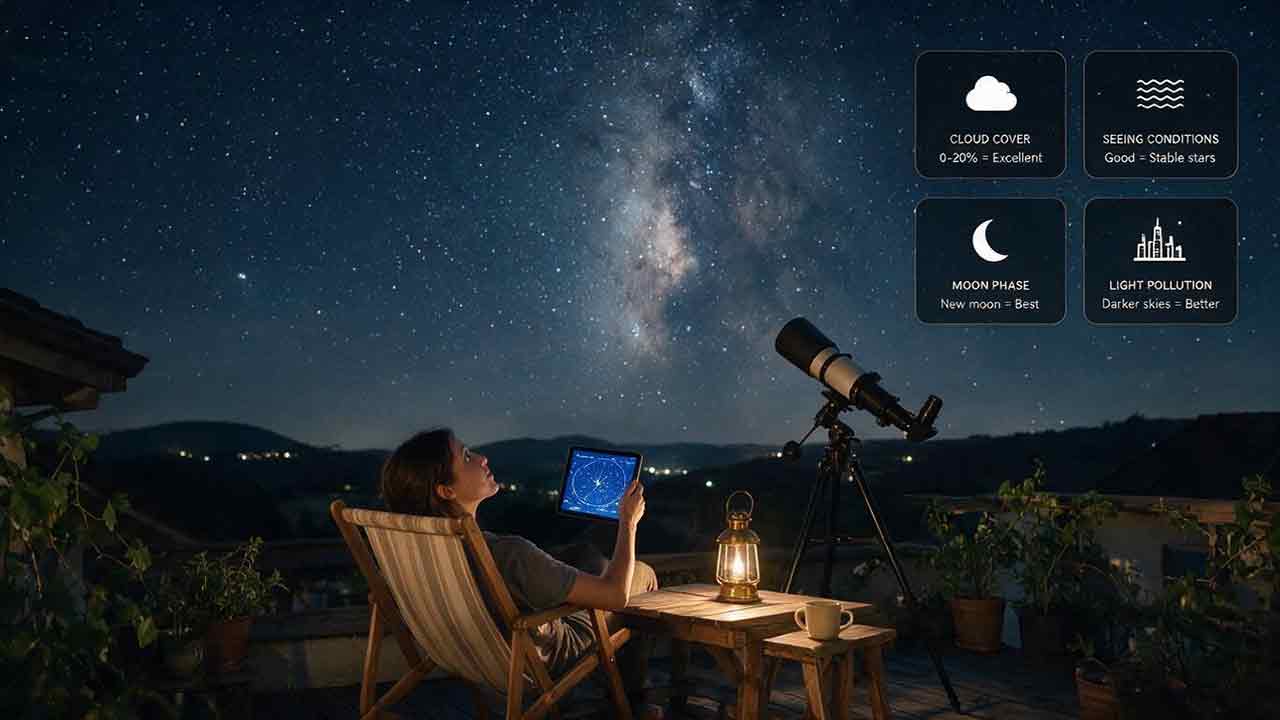
How to Check Whether Tonight Is Good for Stargazing
A useful stargazing forecast requires more than a clear-weather icon. This guide explains how to check hourly cloud cover, precipitation and lightning risk, atmospheric transparency, astronomical seeing, Moon position, twilight, target altitude, wind, dew, smoke, light pollution, and site access before deciding whether to observe. Readers will learn why a night can be excellent for planets but poor for galaxies, how to distinguish cloud cover from transparency and seeing, and how to match changing conditions to the Moon, Milky Way, meteor showers, clusters, double stars, and deep-sky objects. The article includes a 10-minute checking process, a CLEAR decision framework, a hypothetical worked example, forecast-tool comparisons, rescue strategies for marginal nights, troubleshooting advice, a complete checklist, and safety guidance for thunderstorms and hazardous travel.
How Long Does It Take Your Eyes to Adjust to Darkness?
Your eyes begin adapting to darkness within seconds, but useful night vision develops in stages. Pupil dilation happens quickly, cone sensitivity improves during the first several minutes, and rod-based sensitivity can continue increasing for roughly 20–40 minutes after strong light exposure. This guide explains how rods, cones, rhodopsin, glare, age, eye health, and previous lighting affect the timing. Readers will learn how to preserve dark adaptation with dim red light, use averted vision for faint targets, organize a safe observing site, and match the waiting period to the Moon, planets, star clusters, galaxies, nebulae, or meteor showers. The article also includes an ADAPT planning framework, a real-world observing timeline, a light-source comparison, troubleshooting guidance, a detailed checklist, and signs that persistent night-vision difficulty should be evaluated by an eye-care professional.
How Moonlight Affects Stargazing
Moonlight affects stargazing by brightening the sky background and reducing the contrast of faint celestial objects. This guide explains why galaxies, diffuse nebulae, the Milky Way, zodiacal light, and weak meteors are more vulnerable than planets, double stars, bright clusters, and the Moon itself. It shows why lunar illumination alone is not enough for planning: moonrise, moonset, altitude, target separation, atmospheric transparency, and local light pollution also shape the result. Readers will learn how each major Moon phase changes the best observing window, how to protect dark adaptation, when magnification or filters may help, and how to rescue an unexpectedly bright session. The article also includes a PHASE–TIME–HEIGHT–DISTANCE–AIR–TARGET planning framework, a first-quarter worked example, target-selection tables, common mistakes, a practical checklist, and useful FAQs.
Explore More Topics
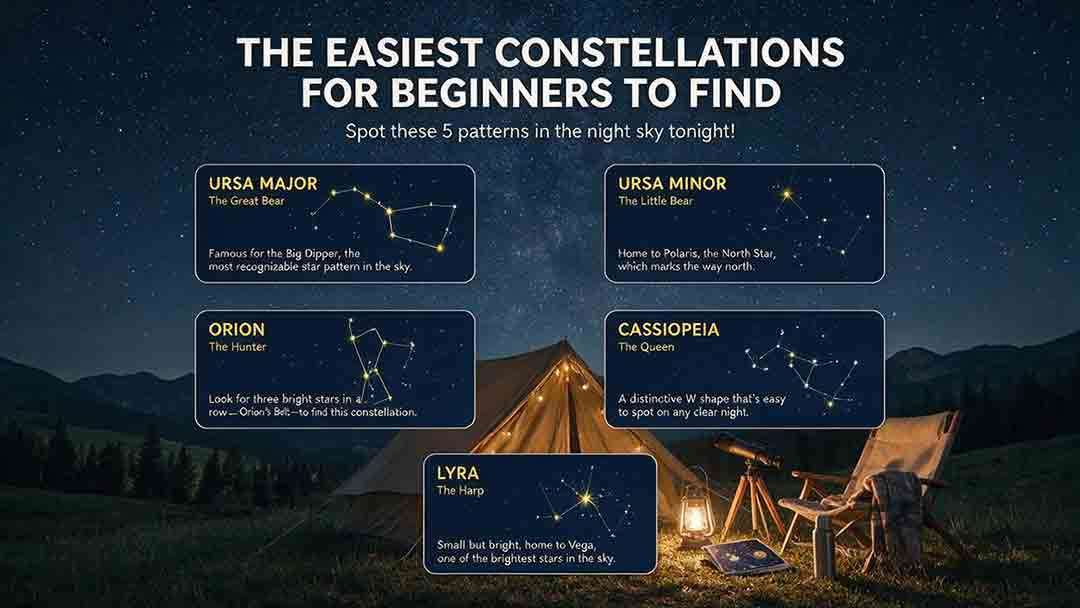
The Easiest Constellations for Beginners to Find
This beginner-friendly guide explains how to find Orion, Ursa Major through the Big Dipper, Cassiopeia, Cygnus, and Scorpius using clear naked-eye observing steps. It compares each pattern through an original Beginner Visibility Score and shows readers how to choose a first target based on season, latitude, light pollution, moonlight, and horizon visibility. The guide also clarifies the difference between constellations and asterisms, explains how the Big Dipper can point toward Polaris, and provides dedicated recommendations for Southern Hemisphere observers, including Crux. Practical tools include the Anchor-Pattern Method, the Three-Check Rule, a 10-minute observing session, city-sky guidance, troubleshooting advice, an equipment comparison, and a safety checklist. Authoritative references from the International Astronomical Union, NASA, NSF NOIRLab, and the European Southern Observatory support the key astronomical facts.
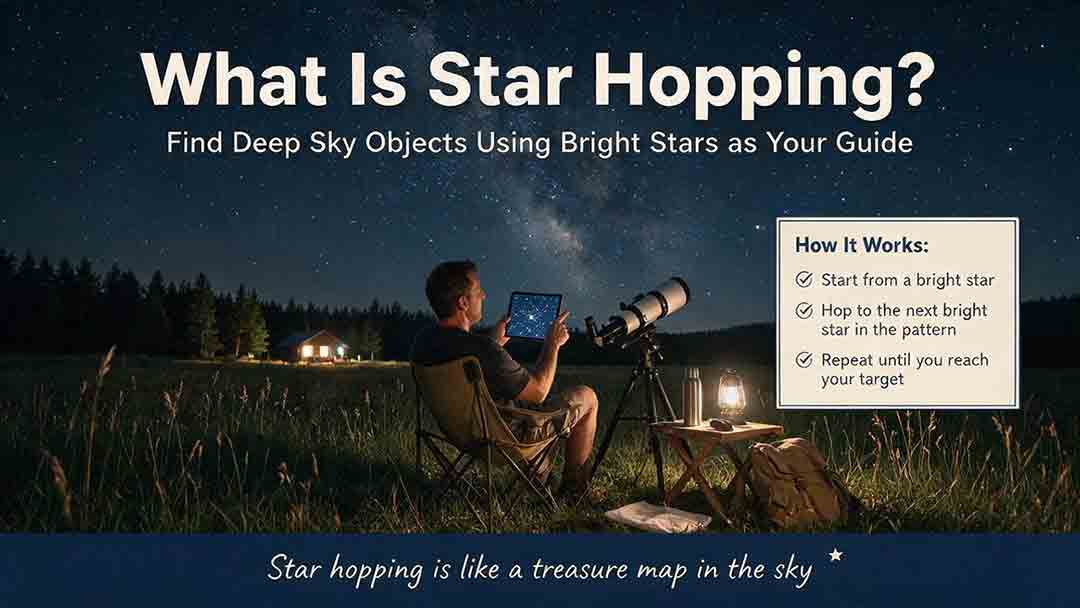
What Is Star Hopping and How Do You Do It?
Star hopping is a practical way to navigate the night sky by moving from a bright, recognizable star to a fainter target through a sequence of visible star patterns. This guide explains how beginners can plan a reliable route, align a finder, match a star chart to a telescope’s field of view, and recognize rotated or mirror-reversed images. It introduces the Anchor–Path–Field–Confirm method, provides a step-by-step observing process, and shows how field-of-view estimates can help determine a practical chart scale. A worked example demonstrates how to locate Messier 13 using the Keystone of Hercules, while the troubleshooting table addresses common problems such as finder misalignment, excessive magnification, incorrect chart orientation, and targets that remain invisible despite correct pointing. The included field checklist gives binocular and telescope users a repeatable method for planning and completing future star hops.
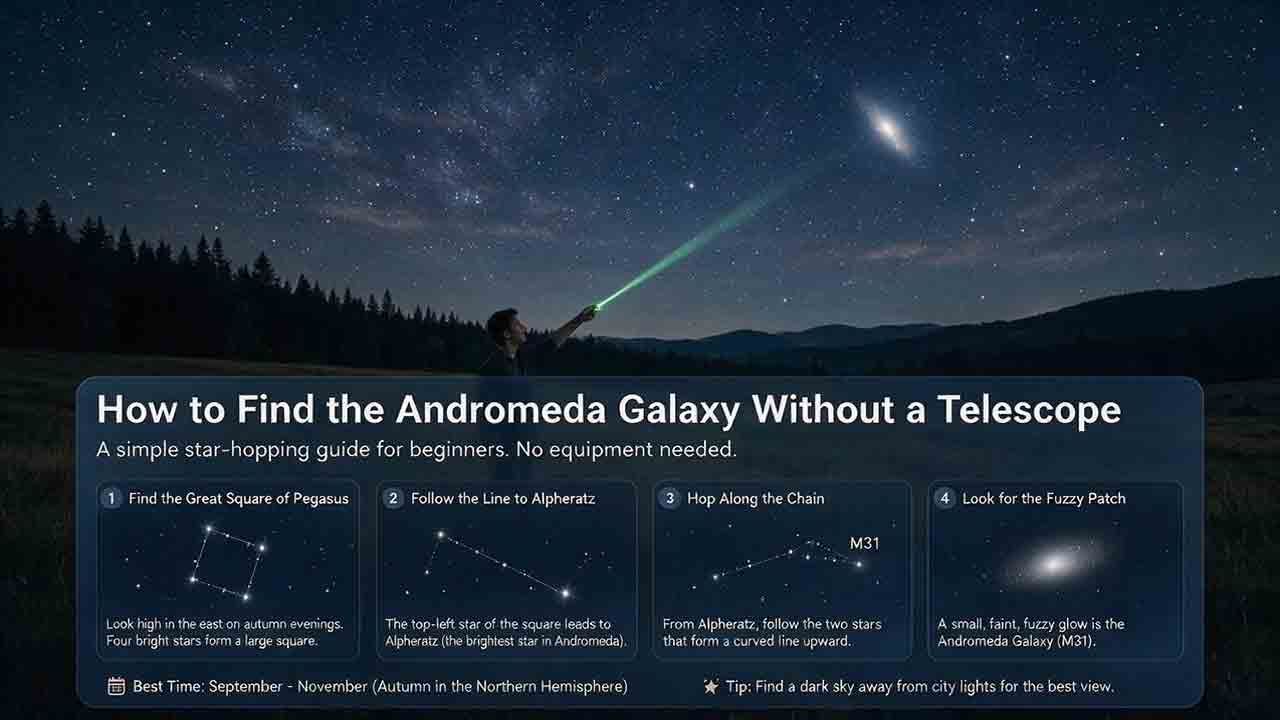
How to Find the Andromeda Galaxy Without a Telescope
Finding the Andromeda Galaxy without a telescope is possible when you know which stars to use as landmarks. This practical guide explains how to start at the Great Square of Pegasus, identify Alpheratz, follow the Andromeda star chain to Mirach, and use two nearly equal short hops to reach Mu Andromedae and M31. It also explains what the galaxy realistically looks like to the naked eye, why dark skies and averted vision matter, and how binoculars can help confirm the target. Beginners can use the six-point observing checklist, three-night practice method, troubleshooting guidance, and reusable observation log to improve each attempt. The guide distinguishes calculated angular distances from practical field estimates and clearly explains its source-checking process without claiming personal testing. It is designed primarily for Northern Hemisphere observers while also addressing visibility limitations from Southern Hemisphere locations.