What Is Star Hopping and How Do You Do It?

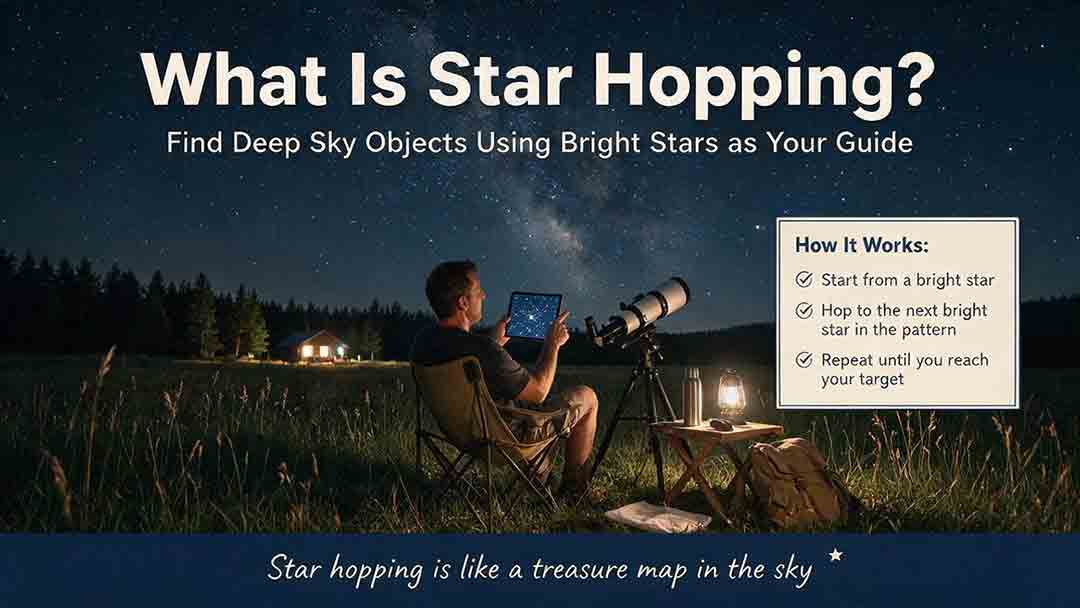
Star hopping is a manual way to navigate the night sky. You begin at a bright star or recognizable pattern, compare the surrounding stars with a chart, and move through a series of smaller star patterns until you reach a fainter target. The method works with binoculars, finder scopes, and telescopes, without requiring computerized pointing.
Key Takeaways
- Start from a bright star or pattern you can identify with confidence.
- Plan a route through recognizable pairs, triangles, curves, and star chains.
- Match the chart’s scale and orientation to the view through your equipment.
- Navigate with a wide field, then increase magnification after confirming the target.
- If you become lost, return to the last field you recognized instead of guessing.
This guide explains how to plan a star-hopping route, match a chart to your instrument, estimate a useful field of view, diagnose common navigation problems, and confirm that you are pointing at the correct location—even when the target itself is difficult to see.
What Does Star Hopping Mean?
Star hopping is the process of navigating from a recognizable star to a less obvious celestial target by following intermediate stars and patterns shown on a chart.
It works much like navigating between landmarks on a map. A bright star is the starting landmark, smaller star patterns become checkpoints, and the destination may be a double star, star cluster, nebula, or galaxy.
Star hopping is useful when:
- A telescope does not have computerized GoTo pointing
- A GoTo mount places the telescope near, but not directly on, a target
- The target is too faint to see with the unaided eye
- You want to verify the exact field surrounding an object
- You want to learn how constellations and deep-sky objects connect across the sky
Professional and educational observing resources often use finder charts for the same reason: many celestial objects cannot be located by aiming at the object directly. NASA’s observing materials, for example, include star charts for objects that must be found from surrounding stars. (NASA: Hubble’s Night Sky Challenge)
Star hopping can confirm where an instrument is pointing, but it cannot guarantee that a faint object will be visible. Detection still depends on sky brightness, atmospheric transparency, target altitude, optical aperture, magnification, and the object’s surface brightness.
How Does Star Hopping Work?
A reliable star hop has four parts:
- Anchor: Begin at a star or pattern you cannot easily mistake.
- Path: Divide the route into recognizable intermediate patterns.
- Field: Match the chart’s scale and orientation to the instrument.
- Confirm: Verify the surrounding stars before deciding that you have arrived.
This Anchor–Path–Field–Confirm method is a route-planning framework used in this guide. It is not an official astronomical standard. Its purpose is to prevent a small error from being carried through several unverified telescope movements.
Choose a dependable anchor. The nearest visible star is not necessarily the best starting point. A slightly more distant star may be easier to identify because it belongs to a familiar constellation or distinctive asterism.
A useful anchor is generally:
- Bright enough to locate easily
- Part of a recognizable pattern
- Close enough to keep the route manageable
- Separated from similar-looking stars that might cause confusion
Build the path from shapes, not left-right instructions. Directions such as “move left” change when a chart is rotated or when an optical system reverses the view. Triangles, pairs, curves, and uneven quadrilaterals remain recognizable even when their orientation changes.
Match the chart to the field. A chart that covers too much sky may omit the faint stars needed near the target. A chart that is too narrow may make it difficult to understand how the current field connects to the wider constellation.
The AAVSO Variable Star Plotter allows users to adjust field of view, limiting magnitude, and north-south and east-west orientation. Although it is designed primarily for variable-star charts, those controls illustrate the main settings needed to match a chart to an observed field.
Confirm the field before judging the target. Do not assume that you have arrived simply because the telescope moved approximately the expected distance. First check whether the nearby pairs, triangles, and brightness patterns agree with the chart.
What Equipment Do You Need?
Star hopping does not require expensive equipment. It does require a practical transition from the wide naked-eye sky to the narrower field of a telescope.
| Equipment | Primary purpose | Most useful stage |
|---|---|---|
| Unaided eyes | Locate constellations and bright anchor stars | Beginning the route |
| Binoculars | Reveal fainter stars while preserving a wide field | Route preview and wide targets |
| Red-dot or reflex finder | Aim the telescope at a visible star | Initial alignment |
| Optical finder scope | Show intermediate stars too faint for the naked eye | Middle of the route |
| Low-power eyepiece | Provide a relatively wide telescope field | Final approach |
| Printed chart or planetarium app | Display the route and destination field | Planning and navigation |
| Dim red light | Make a paper chart readable at night | Dark observing locations |
A finder scope is helpful but not mandatory in every setup. A short-focal-length telescope may provide a field wide enough to navigate directly with a low-power eyepiece, while binoculars may be sufficient for large and relatively bright targets.
The British Astronomical Association identifies a finder, a low-power wide-field eyepiece, and a basic aiming device as useful star-hopping tools. It also notes that the main telescope may sometimes be used for the final part of a route when the necessary stars are too faint for the finder. (British Astronomical Association: Star Hopping)
Keep chart lighting genuinely dim
Red light can be less disruptive than white light, but brightness and exposure time still matter.
The National Park Service explains that bright light can disrupt dark adaptation and that even red illumination should be kept dim. The same source discusses averted vision—the practice of looking slightly beside a faint object so that more light-sensitive parts of the retina contribute to detection. (National Park Service: Dark Adaptation and Red Flashlights)
A phone’s night mode does not make the display harmless. Reduce the brightness, avoid staring at the screen, and shield it from nearby observers.
How Do You Star Hop Step by Step?
1. Choose a realistic target
Select an object that is:
- Above the horizon at the planned observing time
- Accessible from your latitude
- High enough to clear local trees and buildings
- Bright enough for your equipment and sky conditions
- Located near a recognizable star pattern
For a first route, choose a bright open cluster, globular cluster, or double star rather than a diffuse galaxy with low surface brightness.
A planetarium program such as Stellarium can display the sky for a selected location, date, and time. Its official guide also documents location settings, sky navigation, deep-sky objects, light-pollution simulation, ocular views, and other observing tools. (Stellarium User Guide)
2. Plan the complete route indoors
Do not begin by zooming directly to the target. Start with a wide chart and identify:
- The constellation containing the target
- A dependable anchor star
- Two or more intermediate checkpoints
- The small pattern surrounding the target
- The approximate field required at each stage
The route should become more detailed as it approaches the destination. The first stage may use an entire constellation, while the final stage may depend on a small triangle visible only through the finder or eyepiece.
For help orienting a chart before planning the route, see How to Read a Star Chart.
3. Align the finder with the telescope
A finder that points somewhere different from the main telescope makes accurate navigation nearly impossible.
During daylight, aim the telescope at a distant stationary feature, such as a distinctive building detail or the top of a utility pole. Center the feature in a low-power eyepiece, then adjust the finder until it points to the same place.
Check the alignment again on a bright star after dark, especially if the telescope has recently been transported or assembled.
Never aim a telescope or finder at or near the Sun unless you are using certified solar-observing equipment and an appropriate supervised procedure. Ordinary eyepiece filters, improvised materials, and unfiltered finders are not safe.
4. Determine the image orientation
Binoculars generally show an upright, familiar view. Telescope orientation depends on the optical design, diagonal, finder, and observing position.
A traditional Newtonian reflector usually produces a view that can be matched by rotating the chart. A refractor or Cassegrain telescope used with a star diagonal may produce a mirror-reversed view that cannot be corrected by rotation alone.
To determine the orientation:
- Center a bright star.
- Move the telescope gently in a known direction.
- Watch how the star moves across the field.
- Rotate or mirror the chart until the pattern matches.
The British Astronomical Association explains how inverted and mirror-reversed telescope views differ and why an observer must understand the field orientation before matching it to a chart. (British Astronomical Association: Which Way Is Up?)
5. Center and verify the anchor
Locate the anchor with the unaided eye, then place it in the red-dot finder, optical finder, or low-power eyepiece.
Do not identify it by brightness alone. Compare at least two nearby stars with the chart before continuing. This reduces the risk of beginning from a different star of similar brightness.
6. Move one checkpoint at a time
Move toward the first intermediate pattern rather than attempting the whole route in one motion.
At each checkpoint:
- Keep part of the previous pattern visible when practical
- Move the telescope slowly
- Center the next recognizable pattern
- Compare its shape and brightness order with the chart
- Stop if the observed field no longer agrees
Overlapping fields preserve a visual connection between one checkpoint and the next.
7. Switch to the widest useful telescope view
Once the finder reaches the final checkpoint, look through the main telescope with a low-power eyepiece.
High magnification narrows the field, removes useful reference stars, and magnifies small pointing errors. It is usually better for examining a confirmed target than for navigating toward it.
8. Confirm the final star field
Use the smallest distinctive pattern around the target as the final checkpoint.
Depending on the object and conditions, the target may appear as:
- A soft circular glow
- A small misty patch
- A close pair of points
- An unresolved star-like point
- A subtle brightening of the background
- Nothing obvious at first
This distinction is essential:
Star-field confirmation answers, “Am I pointing at the correct place?” Target visibility answers, “Can my eyes and equipment detect the object under these conditions?” These are separate questions.
9. Increase magnification after confirmation
Once the target field is centered, try a higher magnification if the object is compact enough to benefit.
If the target disappears after changing eyepieces, return to the wide-field eyepiece and recenter it. The telescope may have shifted, or the object may have been near the edge of the original field.
How Do You Match the Chart to Your Field of View?
Field of view describes how much sky appears through a finder or eyepiece. A wider field generally makes navigation easier because it contains more recognizable stars.
Calculate a planning field
When the eyepiece’s field-stop diameter is known, true field can be estimated with:
True field in degrees = 57.3 × eyepiece field-stop diameter ÷ telescope focal length
Tele Vue publishes this formula in its official eyepiece technical information. (Tele Vue Eyepiece Specifications)
Suppose a telescope has:
- A focal length of 1,200 mm
- An eyepiece field stop of 27 mm
The estimated true field is:
57.3 × 27 ÷ 1,200 ≈ 1.29°
The field is therefore approximately 1.3° wide.
Treat the result as a planning estimate. The comfortably usable field may be smaller because stars near the edge can be affected by distortion, reduced sharpness, or difficult eye placement.
Estimate how many overlapping views you need
A practical route estimate is:
Estimated number of hops = route distance ÷ usable step size
The usable step should normally be smaller than the full field so that successive views overlap.
Using approximately half the field width is a conservative starting recommendation, not a fixed astronomical rule.
For the example above:
- Estimated field: 1.29°
- Conservative step: about 0.65°
- Route segment: 3°
The estimate is:
3 ÷ 0.65 ≈ 4.6
You might therefore plan approximately five overlapping field placements.
More overlap may be useful when:
- The field is sparse
- Several patterns look similar
- Light pollution hides faint checkpoints
- The eyepiece is less sharp near the edge
- You are unfamiliar with the route
This estimate helps determine whether the chart scale is practical. It is not an instruction to move the telescope in exact measured increments.
What if the field-stop diameter is unavailable?
Some manufacturers do not publish a field-stop measurement.
Use the manufacturer’s stated true field when available. As a rougher alternative, divide the eyepiece’s apparent field by the magnification. That estimate is less precise because apparent-field specifications and optical distortion vary.
The purpose of either calculation is to choose a chart that resembles the observed view—not to turn star hopping into a blind angular measurement exercise.
Which Star-Hopping Route Is Best?
The best route is not necessarily the shortest. It is the route with the most dependable checkpoints.
| Route factor | More dependable | Less dependable |
|---|---|---|
| Starting point | Bright and unmistakable | Faint or easily confused |
| Intermediate fields | Clear pairs, triangles, or chains | Sparse or repetitive patterns |
| Field continuity | Successive views overlap | Each move enters a completely new field |
| Chart match | Correct scale and orientation | Wrong scale or mirror state |
| Final confirmation | Distinctive stars surround the target | Target lies in a nearly empty field |
| Observing conditions | Checkpoints remain visible | Haze, moonlight, or city glow hides them |
When comparing possible routes, ask:
- Which starting star can I identify most confidently?
- Which path contains the clearest intermediate patterns?
- Can I keep part of the previous field visible?
- Is there a distinctive pattern around the destination?
A slightly longer route through several clear triangles is often easier than a direct route across an empty-looking field.
The route must also match the actual sky. A detailed chart is not useful if most of its stars are invisible from the observing location.
Example: How Do You Star Hop to Messier 13?
Messier 13, also called the Hercules Cluster, is a useful practice target for observers who can locate Hercules.
NASA identifies M13 as a globular cluster in Hercules with an apparent magnitude of 5.8 and notes that it can be spotted with binoculars under suitable conditions. Its visibility and appearance still depend on local sky brightness, target altitude, equipment, and observer experience. (NASA: Messier 13)
Before beginning, use a planetarium chart to confirm that M13 is above local obstructions and high enough to avoid the worst horizon haze.
- Find the Keystone of Hercules. This four-star pattern resembles an uneven quadrilateral. Under bright city skies, it may be easier to begin from a brighter regional landmark such as Vega and then identify Hercules on a wide chart.
- Identify Eta and Zeta Herculis. These stars mark the western side of the Keystone. Verify the complete four-star pattern rather than identifying either star in isolation.
- Move from Eta toward Zeta. M13 lies roughly one-third of the way from Eta Herculis toward Zeta Herculis. Treat that fraction as an initial cue, not a final measurement.
- Match the local field. Compare the nearby stars with NASA’s dedicated M13 star chart, which is labeled as a mid-northern-latitude chart. The broader NASA M13 page also includes finder materials for different latitude ranges.
- Confirm the cluster. In binoculars or a low-power telescope, M13 may appear as a small, round, hazy patch rather than a photographically detailed cluster. Confirm the nearby stars before increasing magnification.
The “one-third” estimate gets you into the correct area. The matching star pattern tells you whether you have actually arrived.
Common Star-Hopping Problems and Fixes
| Problem | Likely cause | Practical fix |
|---|---|---|
| The anchor is not in the telescope | Finder misalignment or wrong starting star | Realign the finder and verify neighboring stars |
| The chart appears backward | Mirror-reversed telescope or diagonal view | Use a horizontal-flip or reversed-chart setting |
| The pattern is correct but tilted | The field is rotated relative to the chart | Rotate the chart until the shapes align |
| The chart shows too many stars | Limiting magnitude is set too faint | Hide fainter stars until the chart matches the view |
| The eyepiece shows more stars | The chart is too shallow or too wide | Increase chart depth or zoom into a smaller field |
| Every field looks similar | The route lacks distinctive patterns | Redesign it around pairs, triangles, or curves |
| The correct field is visible but not the target | Target is faint, diffuse, low, or affected by sky glow | Confirm the field, use averted vision, or try better conditions |
| The target disappears after changing eyepieces | It was not centered or the telescope shifted | Return to low power and recenter |
| The route gradually drifts away | Movements are too large | Increase field overlap and verify every checkpoint |
| Stars appear blurred | Focus, dew, vibration, or atmospheric conditions | Refocus and inspect the exposed optics |
A diffuse object does not necessarily become easier at higher magnification. Increasing magnification spreads its light over a larger apparent area and may make it harder to detect under some conditions.
What should you do when completely lost?
Stop moving the telescope.
Return to the last checkpoint you can identify. If you cannot recover it, go back to the original anchor and restart. Continuing from an unidentified field usually adds uncertainty and takes longer than beginning again.
How Should Beginners Practice?
Start with targets that are relatively bright and located near obvious star patterns.
Useful practice targets include:
- Bright open clusters
- Wide double stars
- Distinctive asterisms
- Bright globular clusters
- The Andromeda Galaxy under suitable conditions
- Familiar stars inside well-known constellations
One effective exercise is to follow a route in both directions:
- Choose two visible stars.
- Identify an intermediate chain on a chart.
- Follow the chain with binoculars.
- Reverse the route and return to the starting star.
The return journey reveals whether you recognized the patterns or merely remembered a direction.
For another practical naked-eye route, see How to Use the Big Dipper to Find Other Stars. Northern Hemisphere beginners can also practice establishing a reference direction with How to Find the North Star.
Unaided-eye beginners: Learn a few large seasonal patterns before attempting faint telescope targets.
Binocular users: Begin with broad routes and large targets. The wide, generally upright field makes pattern matching more forgiving.
Manual telescope users: Move through three scales—the naked-eye sky, the finder, and the low-power eyepiece.
GoTo users: Use surrounding stars to verify the mount’s result or correct a small pointing error.
Urban observers: Build routes from brighter checkpoints and reduce the chart’s limiting magnitude until it resembles the visible field.
Star-Hopping Field Checklist
Use this checklist outdoors after reading the full method above.
Before observing
- Confirm that the target is visible from your latitude and observing time
- Check its altitude and nearby obstructions
- Choose an unmistakable anchor
- Plan at least two intermediate checkpoints
- Set the chart to the correct location, date, and time
- Match the chart’s field width to the instrument
- Adjust the chart’s limiting magnitude
- Determine whether the telescope view is rotated or mirrored
- Align the finder with the main telescope
- Prepare a dim red light or low-brightness display
- Begin with the widest useful eyepiece
During the route
- Confirm every checkpoint before moving
- Navigate by patterns rather than left-right instructions
- Keep successive views overlapping
- Move slowly
- Return to the last confirmed field if lost
- Confirm the surrounding stars before judging target visibility
- Increase magnification only after centering the destination field
A Practical Next Step
Choose one bright target, plan the complete route indoors, and practice following it in both directions. Reliable star hopping comes from confirming each field, not from moving quickly.
Binocular users can begin with a broad route to a bright cluster. Telescope users should move from a naked-eye anchor to the finder and then to a low-power eyepiece. Once the destination field is confirmed, adjust magnification according to the target and observing conditions.
Frequently Asked Questions
Can you star hop without a telescope?
Yes. You can follow routes between bright stars with the unaided eye or use binoculars to reveal fainter checkpoints. Binocular star hopping is often easier for beginners because the field is wide and usually upright.
Is star hopping better than a GoTo telescope?
Neither method is better in every situation. GoTo pointing can locate objects efficiently when the mount is aligned, while star hopping works without computerized navigation and helps you understand the surrounding sky. The two methods can be used together.
How long does it take to learn star hopping?
Simple routes may become comfortable within the first few observing sessions. Progress depends on finder alignment, field width, chart orientation, sky brightness, and the clarity of the selected checkpoints.
Can you star hop from a city?
Yes, but the route should use brighter stars because urban sky glow hides faint checkpoints. Adjust the chart so that it resembles the stars actually visible from the observing site.
Why can I find the correct field but not see the object?
Correct pointing does not guarantee detection. A target may be too faint, diffuse, low above the horizon, or affected by haze, moonlight, and local lighting. Confirm the surrounding stars before changing the route.
Why does my telescope view not match the chart?
The view may be rotated, inverted, or mirror-reversed. Rotate the chart for an inverted field or use a mirror-image setting when east and west are reversed. Also check that the chart’s field width and star depth match the instrument.
Sources
The following sources were accessed on August 4, 2026:
- NASA Science — Hubble’s Night Sky Challenge
- NASA Science — Messier 13, the Hercules Cluster
- NASA Science — M13 Star Chart
- British Astronomical Association — Star Hopping
- British Astronomical Association — Which Way Is Up?
- American Association of Variable Star Observers — Variable Star Plotter
- Stellarium — Official User Guide
- National Park Service — Dark Adaptation and the Value of Red Flashlights
- Tele Vue Optics — Eyepiece Specifications and True-Field Formula
Source verification: Technical claims, calculations, safety language, and observing guidance were checked against the official and specialist sources listed above on August 4, 2026.
Editorial basis: This guide was prepared using official astronomy references, finder-chart tools, published optical formulas, and practical route-planning principles. It does not claim hands-on testing of any specific telescope, finder, binocular, or eyepiece.
More from Constellations & Star Hopping
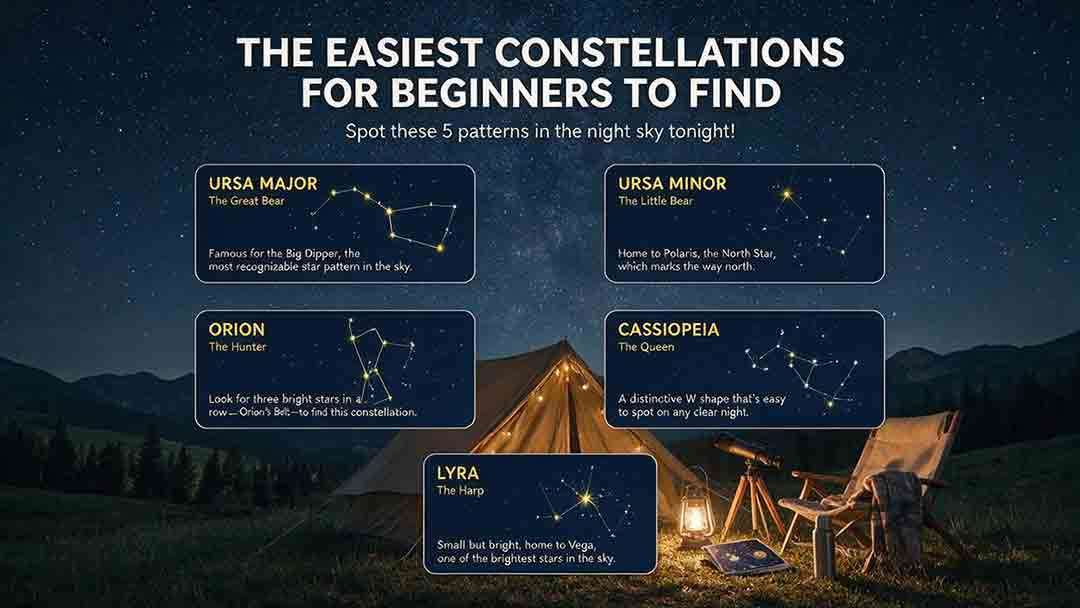
The Easiest Constellations for Beginners to Find
This beginner-friendly guide explains how to find Orion, Ursa Major through the Big Dipper, Cassiopeia, Cygnus, and Scorpius using clear naked-eye observing steps. It compares each pattern through an original Beginner Visibility Score and shows readers how to choose a first target based on season, latitude, light pollution, moonlight, and horizon visibility. The guide also clarifies the difference between constellations and asterisms, explains how the Big Dipper can point toward Polaris, and provides dedicated recommendations for Southern Hemisphere observers, including Crux. Practical tools include the Anchor-Pattern Method, the Three-Check Rule, a 10-minute observing session, city-sky guidance, troubleshooting advice, an equipment comparison, and a safety checklist. Authoritative references from the International Astronomical Union, NASA, NSF NOIRLab, and the European Southern Observatory support the key astronomical facts.
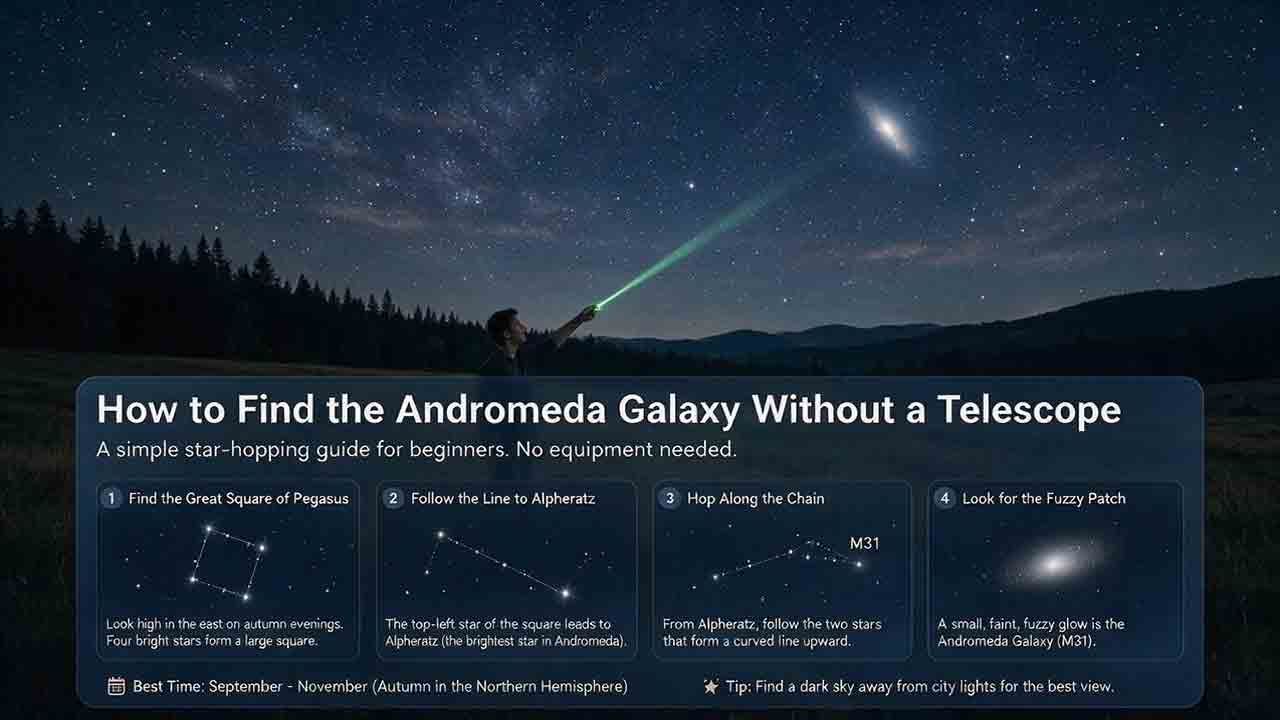
How to Find the Andromeda Galaxy Without a Telescope
Finding the Andromeda Galaxy without a telescope is possible when you know which stars to use as landmarks. This practical guide explains how to start at the Great Square of Pegasus, identify Alpheratz, follow the Andromeda star chain to Mirach, and use two nearly equal short hops to reach Mu Andromedae and M31. It also explains what the galaxy realistically looks like to the naked eye, why dark skies and averted vision matter, and how binoculars can help confirm the target. Beginners can use the six-point observing checklist, three-night practice method, troubleshooting guidance, and reusable observation log to improve each attempt. The guide distinguishes calculated angular distances from practical field estimates and clearly explains its source-checking process without claiming personal testing. It is designed primarily for Northern Hemisphere observers while also addressing visibility limitations from Southern Hemisphere locations.
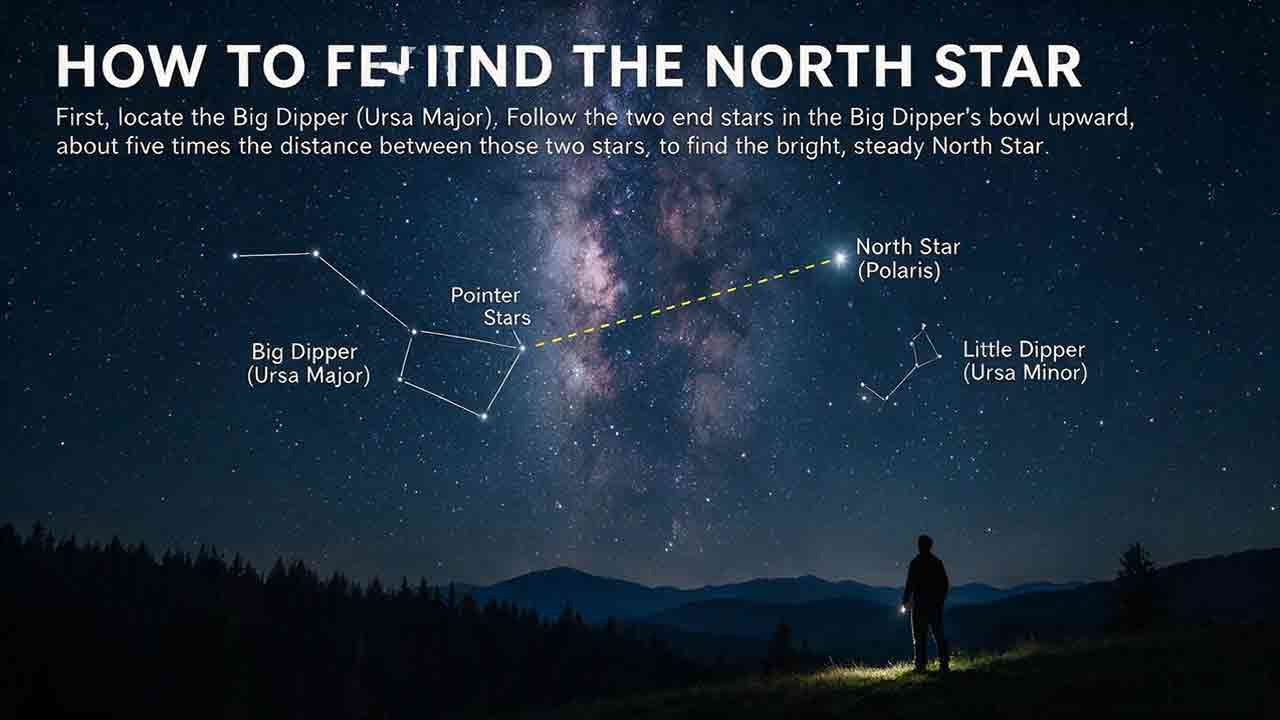
How to Find the North Star
Finding the North Star becomes straightforward once you know how to use the Big Dipper’s two pointer stars, Merak and Dubhe. This practical guide walks beginners through the complete process of locating Polaris, confirming it by position and latitude, and avoiding common mistakes such as choosing the brightest star or following the pointer line in the wrong direction. It also explains why Polaris appears nearly stationary, how its altitude relates approximately to an observer’s northern latitude, and why the full Little Dipper may be difficult to see under city skies. Readers will find troubleshooting advice for haze, light pollution, blocked horizons, misleading astronomy apps, and compass differences caused by magnetic declination. The article also includes a quick confirmation checklist, viewing-condition comparisons, an observation log, and a seven-step field routine. Clear safety guidance explains that Polaris is useful for approximate orientation but should not replace proper navigation tools.
Explore More Topics
How to Stay Warm and Comfortable During Winter Stargazing
Winter stargazing requires more preparation than wearing one heavy coat because observers often remain nearly motionless for long periods. This guide explains how to check temperature, wind chill, road conditions, snow, and shelter before leaving; build a moisture-managing base, insulating middle, and wind-resistant outer layer; and protect hands, feet, head, face, chair, and ground contact. Readers will learn how to combine liner gloves with mittens, avoid sweat, plan warm-up breaks, use heated clothing safely, manage food and hydration, protect batteries, and prevent condensation when cold equipment returns indoors. The article also includes the WARMER planning framework, clothing and glove comparisons, a three-hour worked example, cold-stress warning signs, troubleshooting guidance, departure rules, FAQs, and a complete winter stargazing checklist.
Red Flashlights for Stargazing: Why Astronomers Use Them
Astronomers use dim red flashlights because dark-adapted rod vision is less sensitive to long-wavelength red light than to much of the visible spectrum. A controlled red beam can illuminate charts, eyepieces, cables, and walking paths while causing less disruption than a typical white flashlight. This guide explains how rods, cones, rhodopsin, wavelength, brightness, exposure time, and beam direction shape the result. Readers will learn why red light is not harmless, how to compare handheld lights and headlamps, which product features prevent accidental white-light activation, how to configure a phone screen, and when safety requires a white emergency light. The article also includes the RED-SAFE buying framework, a task-lighting table, a worked observing example, DIY filter guidance, star-party etiquette, troubleshooting advice, FAQs, and complete purchase and field-use checklists.

Stargazing While Camping: A Practical Planning Guide
Camping can provide long, convenient access to dark skies, but a successful astronomy trip requires more than choosing the darkest location on a map. This guide explains how to combine campground rules, weather, Moon timing, food storage, wildlife protection, quiet hours, power, dew control, and telescope setup into one workable plan. It introduces the original CAMP framework—Confirm access, Align conditions, Map functional zones, and Prepare fallbacks—plus a three-zone campsite layout separating sleeping, service, and observing areas. Readers can compare developed, walk-in, backcountry, dispersed, and astronomy-focused campgrounds; build a night schedule from daylight arrival through morning pack-up; and use practical decision tables for Moonlight, cloud, wind, dew, neighboring lights, and campfire impacts. The article also includes a hypothetical two-night family plan, a go/modify/cancel decision tree, troubleshooting guidance, and a complete campsite checklist grounded in NASA, National Park Service, and National Weather Service resources.