How to Find the North Star

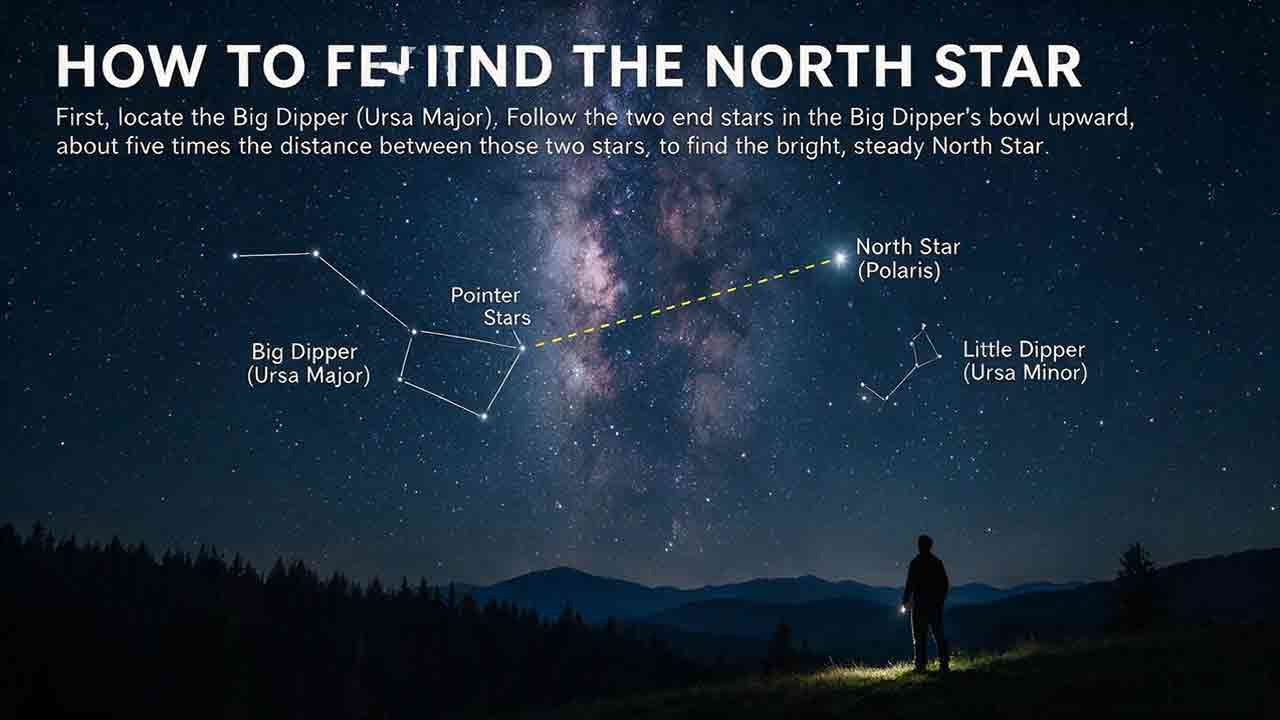
To find the North Star, locate the Big Dipper and identify the two stars on the outer edge of its bowl: Merak and Dubhe. Draw an imaginary line from Merak through Dubhe, then continue approximately five times the distance between them. The moderately bright star near the end of that projected line should be Polaris.
Key Takeaways
- Merak and Dubhe provide the simplest beginner route to Polaris.
- Polaris is moderately bright, not the brightest star in the night sky.
- Its height above a level northern horizon approximately matches your northern latitude.
- The Little Dipper may be incomplete under city skies even when Polaris is visible.
- Polaris is suitable for general orientation, not precision navigation.
This guide explains how to find Polaris, verify that you have the correct star, estimate where it should appear from your latitude, and diagnose common problems caused by light pollution, haze, seasonal sky positions, and blocked horizons.
Safety note: Use Polaris for stargazing and approximate orientation only. Do not rely on unaided star navigation as your sole method during remote travel, marine navigation, aviation, or an emergency. Carry a map, compass, GPS receiver, or other appropriate navigation tools.
How Do You Find the North Star Using the Big Dipper?
The most dependable beginner method is to find the Big Dipper and use the two stars forming the outer edge of its bowl.
The Big Dipper is an asterism—a recognizable star pattern contained within a larger official constellation. It forms part of Ursa Major, the Great Bear.
The pattern changes orientation during the night and throughout the year. It may look upright, sideways, tilted, or upside down, but the relationship between its four-star bowl and three-star handle remains the same.
Step 1: Face Roughly North
Begin by looking toward the northern half of the sky.
A compass or phone compass can help you face the correct general direction. Exact alignment is unnecessary at this stage; the purpose is simply to avoid searching the southern sky.
Remember that a conventional compass normally indicates magnetic north. Polaris lies close to the direction of geographic, or true, north.
Step 2: Find the Big Dipper
Look for seven prominent stars arranged like a large ladle:
- Four stars form the bowl.
- Three stars form a curved handle.
- The two bowl stars farthest from the handle are the pointer stars.
Do not reject the pattern because it appears rotated. Mentally turn the bowl-and-handle shape until it matches the structure you recognize.
Step 3: Identify Merak and Dubhe
Merak and Dubhe form the side of the Big Dipper’s bowl opposite the handle.
In the familiar upright illustration:
- Merak appears at the lower outer corner.
- Dubhe appears at the upper outer corner.
Those upper and lower positions change as the pattern rotates. The more reliable rule is to use the bowl edge farthest from the handle.
Step 4: Project a Line From Merak Through Dubhe
Imagine a straight line beginning at Merak, passing through Dubhe, and continuing beyond Dubhe.
Extend that line about five times the apparent separation between Merak and Dubhe.
The five-gap rule is a practical sky estimate rather than a precise angular calculation. It places your eyes in the right search area.
Step 5: Identify and Verify Polaris
The moderately bright star near the end of the projected line should be Polaris.
Polaris marks the end of the Little Dipper’s handle. However, the other stars of the Little Dipper are relatively faint, so the pattern may be incomplete under urban or suburban skies.
NASA explains that the two stars at the end of the Big Dipper’s cup point toward Polaris, which lies close to the north celestial pole:
What Is the North Star and How Do You Find It? — NASA Science
Original Schematic: How the Pointer Line Works
The diagram below shows the relationship rather than the exact scale or orientation of the stars.
                                      ★ Polaris
                                      ↑
                                      ·
                                      ·   Extend about five
                                      ·   Merak–Dubhe gaps
                                      ·
                                 ● Dubhe
                                 ↑
                                 │
                                 ● Merak
                              ___/
                     ●———●———●
                         Big Dipper
                           handle

Direction: Merak → Dubhe → Polaris
Not to scale. The Big Dipper rotates in appearance during the night and year. Polaris is moderately bright, and the Little Dipper may be incomplete under city skies.
Quick Polaris Confirmation Checklist
Before accepting a candidate star as Polaris, check five points:
- You are facing the northern sky.
- You used the bowl edge opposite the Big Dipper’s handle.
- You projected the line from Merak through Dubhe.
- The candidate’s altitude broadly matches your northern latitude.
- If nearby stars are visible, the candidate marks the end of the Little Dipper’s handle.
A candidate supported by several checks is more reliable than one selected only because it appears bright.
How Can You Confirm That the Star Is Really Polaris?
Use the Pattern–Projection–Altitude check.
Pattern
Confirm that you selected Merak and Dubhe, the two bowl stars farthest from the Big Dipper’s handle.
Projection
Confirm that the direction is Merak → Dubhe → Polaris, continuing outward beyond Dubhe.
Altitude
Confirm that the candidate’s height above a level northern horizon is approximately consistent with your northern latitude.
These checks are designed to work together. None is as reliable when used alone.
| Evidence | Practical confidence | Interpretation |
|---|---|---|
| Pointer line, latitude, and Little Dipper agree | Strong | The identification is well supported |
| Pointer line and latitude agree | Good | Often sufficient under light-polluted skies |
| Only the general northern direction agrees | Weak | Use a chart, app, or second star pattern |
| The star was chosen mainly for brightness | Very weak | Restart with Merak and Dubhe |
This is an observing aid, not a scientific measurement scale.
What Does Polaris Look Like?
Polaris resembles an ordinary, moderately bright star.
It does not have a unique naked-eye shape or dramatic glow. Its importance comes from its position near the north celestial pole rather than exceptional brightness.
Polaris is:
- The brightest star in Ursa Minor
- Not the brightest star in the night sky
- Usually visible without optical equipment under a clear northern sky
- Often visible from cities when glare and obstructions are limited
- Close to, but not exactly at, the north celestial pole
The Royal Observatory explains the relationship between Polaris, Ursa Minor, and the Little Dipper:
Ursa Minor, the Little Bear, and Polaris — Royal Observatory
What Is Commonly Mistaken for Polaris?
| Object | Why it can be confusing | How to rule it out |
|---|---|---|
| A bright planet | It may look far brighter than nearby stars | Check the Merak–Dubhe pointer line |
| Sirius or Vega | Both can appear more prominent than Polaris | Confirm that you are facing north |
| An aircraft | It may initially resemble a bright star | Look for flashing lights or a changing course |
| A satellite | It can resemble a steadily moving star | Watch for continuous motion across the sky |
| Another northern star | It may lie in the same general region | Compare the pointer line and expected altitude |
Over a short period, stars retain the same positions relative to nearby star patterns. Aircraft and satellites move noticeably.
How High Above the Horizon Should Polaris Appear?
The altitude of Polaris above a level northern horizon is approximately equal to the observer’s northern latitude.
Altitude means the angular height of an object above the horizon:
- 0° is on the horizon.
- 45° is halfway between the horizon and overhead.
- 90° is directly overhead.
| Northern latitude | Approximate Polaris altitude |
|---|---|
| 10°N | 10° above the northern horizon |
| 20°N | 20° above the northern horizon |
| 30°N | 30° above the northern horizon |
| 40°N | 40° above the northern horizon |
| 50°N | 50° above the northern horizon |
| 60°N | 60° above the northern horizon |
| 70°N | 70° above the northern horizon |
The relationship is approximate because:
- Polaris does not sit precisely on the north celestial pole.
- The visible horizon may not be level.
- Trees, buildings, and terrain may hide the true horizon.
- Hand measurements introduce personal error.
- Atmospheric effects become more significant near the horizon.
At the geographic North Pole, Polaris would appear very close to overhead rather than exactly at the zenith.
Practical Example: Checking Polaris at 35° North
Suppose you are observing near 35°N latitude.
A plausible Polaris candidate should appear roughly 35° above a level northern horizon. A closed fist held at arm’s length spans about 10° for many observers, so three and a half fist-widths would be a reasonable rough estimate.
A very bright object only one fist-width above the horizon would be an unlikely candidate.
Latitude cannot prove the identification by itself, but it can quickly eliminate a star in an implausible position. Confirm the remaining candidate with the Big Dipper pointer line.
The National Park Service describes the fist-at-arm’s-length method as an approximate way to measure angles in the sky:
Lewis and Clark Used a Sextant; You Can Use Your Hands — National Park Service
Where Can You See the North Star?
Polaris is primarily useful to observers in the Northern Hemisphere.
| Observer location | Expected position or visibility |
|---|---|
| Mid-northern latitudes | Well above the northern horizon |
| High northern latitudes | High in the northern sky |
| Low northern latitudes | Close to the northern horizon |
| Near the equator | Extremely low and often difficult to observe |
| Just south of the equator | Generally below the geometric horizon |
| Most of the Southern Hemisphere | Not visible |
As an observer travels north, Polaris appears higher. As the observer travels south, it appears lower.
At low northern latitudes, buildings, hills, trees, haze, humidity, dust, and light pollution can hide Polaris even when it is geometrically above the horizon.
The Southern Hemisphere currently has no similarly bright star close to the south celestial pole. Southern observers commonly use constellations such as the Southern Cross to estimate south.
Can You See Polaris Throughout the Year?
For many observers at mid- and high-northern latitudes, Polaris remains geometrically above the horizon throughout the year.
That does not guarantee that it can always be observed. Actual visibility still depends on:
- Darkness
- Cloud cover
- Atmospheric transparency
- Local lighting
- Terrain and buildings
- Seasonal daylight at high latitudes
Polaris appears nearly stationary because it lies close to the north celestial pole. It actually traces a small circle rather than remaining perfectly fixed.
The Big Dipper and Cassiopeia appear to rotate around the same region as Earth turns.
How Do Viewing Conditions Affect Polaris?
The following matrix describes general expectations rather than guaranteed results.
Actual visibility depends on latitude, weather, eyesight, Moon position, atmospheric transparency, local lighting, and obstructions.
| Viewing condition | Big Dipper | Polaris | Little Dipper |
|---|---|---|---|
| Dark rural sky | Usually easy to recognize | Usually easy to see | Much of the pattern may be visible |
| Typical suburb | Main stars often remain visible | Usually visible | Only part may appear |
| Bright city center | Pattern may look incomplete | Sometimes visible | Usually difficult |
| Hazy northern horizon | Difficult to recognize | May be obscured | Usually difficult |
| Bright Moon nearby | Main stars often remain visible | Often visible | Fainter stars may disappear |
| Buildings blocking north | Partly or fully hidden | May be hidden | Unreliable |
| Thin or broken cloud | Bright stars appear intermittently | Visibility changes quickly | Fainter stars disappear first |
A clear northern horizon may be more useful than a darker location with trees or buildings blocking the view.
Can You Find Polaris From a City?
Yes. Polaris and the brighter stars of the Big Dipper can often be seen from urban and suburban locations.
The complete Little Dipper is much harder to see because most of its stars are fainter.
Improve Your Urban View
- Stand where a wall or tree blocks nearby lamps without blocking the north.
- Avoid looking directly at vehicle headlights or illuminated signs.
- Lower your phone brightness before observing.
- Give your eyes several minutes to adjust.
- Look after haze or thin cloud has cleared.
- Find the Big Dipper before searching for the Little Dipper.
- Move to a wider northern view if buildings interrupt the pointer line.
If Merak, Dubhe, and Polaris are visible, you do not need the entire Little Dipper to complete the identification.
For broader naked-eye observing expectations, see What Can You See in the Night Sky Without a Telescope?
What If the Big Dipper Is Not Visible?
The Big Dipper may be low, partly obscured, hidden by cloud, or oriented differently from the illustration you remember.
Check whether:
- A building or tree blocks the northern sky.
- Cloud or haze covers the relevant area.
- Nearby lighting is reducing contrast.
- Only part of the bowl is visible.
- You are expecting the pattern to remain upright.
Can Cassiopeia Help You Find Polaris?
Cassiopeia can help identify the general region around the north celestial pole when the Big Dipper is low or blocked.
Its five main stars form a broad W or M shape. Cassiopeia appears on the broadly opposite side of Polaris from the Big Dipper as the northern sky rotates.
However, Cassiopeia does not provide a single beginner-friendly pointer line as precise as the Merak–Dubhe method.
Use Cassiopeia to narrow the search area, then verify the candidate with:
- Its expected altitude
- A star chart
- An astronomy app
- The Little Dipper, if visible
- The Big Dipper when it becomes available
Do not identify Polaris solely from its approximate position relative to Cassiopeia.
For help matching patterns to the real sky, read How to Read a Star Chart.
Which Method Should You Use?
| Method | Best use | Main strength | Main limitation |
|---|---|---|---|
| Big Dipper pointers | First choice | Clear and repeatable | May be low or blocked |
| Cassiopeia | Backup search pattern | Distinctive W or M shape | Less precise for direct pointing |
| Little Dipper | Confirmation | Polaris marks the handle’s end | Most stars are relatively faint |
| Planisphere | Learning seasonal positions | No battery or sensor errors | Must be set correctly |
| Astronomy app | Fast verification | Useful in unfamiliar skies | Sensors and screen orientation may mislead |
| Compass plus latitude | Narrowing the search | Useful with a partial sky view | Magnetic north differs from true north |
A Practical Decision Path
Can you see the full Big Dipper?
- Yes: Use Merak and Dubhe.
- Only partly: Verify both pointer stars with a chart.
- No: Look for Cassiopeia.
- Neither pattern is visible: Check cloud, haze, lighting, and obstructions.
- The sky is clear but confusing: Use a chart or app to identify one reference pattern.
- You are in most of the Southern Hemisphere: Polaris is below the horizon.
Do You Need Binoculars or a Telescope?
No. The naked eye is normally the best tool for initially finding Polaris.
The Big Dipper and Polaris cover a wide area of sky. Binoculars and telescopes show narrower fields, which can make it harder to follow the complete pointer line.
| Tool | Best use | Main limitation |
|---|---|---|
| Naked eyes | Finding the Big Dipper and Polaris | Faint Little Dipper stars may disappear |
| Binoculars | Examining faint nearby stars | Field may be too narrow for the first search |
| Telescope | Observing Polaris as a stellar target | Poor tool for locating it from scratch |
| Star chart | Understanding star relationships | Must match the date and orientation |
| Astronomy app | Verifying a candidate | Location or direction sensors may be inaccurate |
Find Polaris with your eyes first. Use binoculars afterward if you want to explore the surrounding stars.
See Binocular Stargazing: What Can You See? for realistic expectations from handheld binoculars.
How Can You Use Polaris to Estimate North?
After confirming Polaris, lower your gaze vertically toward the horizon.
The point on the horizon beneath Polaris is approximately true north. When facing Polaris:
- East is approximately to your right.
- West is approximately to your left.
- South is approximately behind you.
This method is suitable for general orientation, not surveying or precision navigation.
What Is the Difference Between True North and Magnetic North?
| Direction | Meaning | Typical reference |
|---|---|---|
| True north | Direction toward the geographic North Pole | Polaris, geographic maps, astronomical observation |
| Magnetic north | Direction indicated by the local magnetic field | Magnetic compass or phone sensor |
| Grid north | North defined by a map’s coordinate system | Topographic or navigation map |
The angular difference between magnetic north and true north is called magnetic declination.
NOAA explains that magnetic declination changes with both location and time:
Magnetic Declination — NOAA National Centers for Environmental Information
A compass and Polaris may therefore indicate slightly different directions without either method being defective.
Use Polaris for approximate orientation, not as a substitute for a map, compass, GPS receiver, or appropriate navigation equipment.
Common Mistakes and Troubleshooting
| What you see or do | Likely reason | What to do |
|---|---|---|
| You search for the brightest star | Polaris is assumed to be exceptionally bright | Start with the Big Dipper instead |
| The pointer line reaches no obvious star | You may have selected the wrong bowl stars | Use the edge farthest from the handle |
| The line travels in the wrong direction | It was extended backward | Follow Merak → Dubhe → Polaris |
| The Big Dipper looks unfamiliar | Its orientation has changed | Mentally rotate the bowl-and-handle pattern |
| The candidate is far too low or high | It may be another star or planet | Compare its altitude with your latitude |
| The Little Dipper is incomplete | Light pollution hides its fainter stars | Use the pointer line and altitude |
| The Big Dipper is hidden | It may be low or obstructed | Try Cassiopeia or change location |
| The northern sky appears empty | Cloud, haze, or glare reduces contrast | Wait for clearer conditions or block nearby lights |
| A bright point flashes or changes direction | It is probably an aircraft | Observe it for another minute |
| A point moves steadily without flashing | It may be a satellite | Compare its position with nearby stars |
| An app points to the wrong area | Time, location, or calibration may be incorrect | Check permissions, time, and compass calibration |
| The app display appears reversed | An incorrect orientation mode may be active | Check display and mirror settings |
| A compass disagrees with Polaris | Magnetic declination may be significant | Distinguish magnetic north from true north |
| Polaris is extremely low | You may be at a low northern latitude | Find a flat, unobstructed northern horizon |
| You are south of the equator | Polaris may be below the horizon | Use Southern Hemisphere reference patterns |
The Error That Causes the Most Confusion
The most common structural error is selecting the wrong pair of stars in the Big Dipper’s bowl.
Before extending any imaginary line, identify the bowl edge farthest from the handle. That edge contains Merak and Dubhe.
This one check prevents both wrong-star and wrong-direction mistakes.
Try It Yourself: A North Star Observation Log
A simple observation log can reveal whether your main difficulty is pattern recognition, weather, light pollution, or an obstructed horizon.
Take a screenshot, print the table, or copy the fields into your phone’s notes app before observing.
Quick Observation Log
| Field | Your observation |
|---|---|
| Approximate latitude | |
| Date and local time | |
| Urban, suburban, or rural | |
| Big Dipper visible? | |
| Polaris visible? | |
| Main problem |
Detailed Observation Log
| Field | Your observation |
|---|---|
| Approximate latitude | |
| Date and local time | |
| Viewing environment | |
| Northern horizon open or blocked | |
| Cloud or haze | |
| Moon brightness and position | |
| Big Dipper visibility | |
| Merak and Dubhe visibility | |
| Polaris visibility | |
| Little Dipper visibility | |
| Estimated altitude | |
| Main difficulty | |
| Confirmation method used |
Repeat the observation from a darker or more open location. Comparing the two entries may show whether the limiting factor was lighting, atmospheric conditions, or obstruction.
The log records your own experience. It is not a scientific survey or a guarantee of what another observer will see.
One-Minute North Star Routine
- Face roughly north.
- Find the Big Dipper.
- Locate the two bowl stars opposite the handle.
- Follow the line from Merak through Dubhe.
- Extend it about five pointer-star gaps.
- Compare the candidate’s altitude with your latitude.
- Use Polaris only for approximate orientation.
If the Little Dipper is visible, treat it as additional confirmation rather than a required first step.
The Practical Answer
The easiest way to find the North Star is to use the Big Dipper’s two outer bowl stars. Project a line from Merak through Dubhe and look for a moderately bright star near the end of that line.
Confirm the candidate by checking its northern position and whether its altitude broadly matches your latitude.
Do not assume the identification is wrong merely because the complete Little Dipper is invisible. Under city skies, Polaris may remain visible after most of Ursa Minor has disappeared into the background glow.
Once you can find Polaris reliably, use it as an anchor for learning the surrounding northern constellations.
Frequently Asked Questions
Is Polaris the Brightest Star in the Night Sky?
No. Polaris is not the brightest star in the night sky.
It is the brightest star in Ursa Minor, but stars such as Sirius and Vega appear brighter. Polaris should be identified by its position rather than brightness.
Can You Find Polaris When the Big Dipper Is Blocked?
Sometimes.
Cassiopeia can help identify the general region around the north celestial pole, while a planisphere or astronomy app can help confirm the candidate. Avoid guessing from Cassiopeia alone because it lacks the same simple pointer line as Merak and Dubhe.
Can a Phone Compass Help You Find Polaris?
Yes. A phone compass can help you face roughly north.
It may indicate magnetic rather than true north, and the sensor can be affected by metal structures, vehicles, magnets, electronic devices, or poor calibration. Use it as a starting aid, not final proof.
How Accurate Is Polaris for Finding True North?
Polaris provides a useful visual estimate of true north for casual orientation.
It is not exactly at the north celestial pole, and projecting its position onto an uneven horizon introduces additional error. The method should not replace appropriate navigation tools.
Will Polaris Always Be the North Star?
No. Earth’s rotational axis slowly changes direction through axial precession.
NASA describes a cycle of approximately 26,000 years, during which the celestial pole shifts relative to the background stars. Different stars can therefore become the nearest visible pole star over long periods:
What Is the North Star and How Do You Find It? — NASA Science
Is Polaris a Single Star?
Polaris appears as one point to the naked eye, but it is a multiple-star system.
NASA Hubble observations describe Polaris as a triple-star system containing the primary star and two companions:
Hubble Images Polaris’s Companion — NASA Science
Sources
- NASA Science — What Is the North Star and How Do You Find It?
- Royal Observatory — Ursa Minor, the Little Bear, and Polaris
- U.S. National Park Service — Lewis and Clark Used a Sextant; You Can Use Your Hands
- NOAA National Centers for Environmental Information — Magnetic Declination
- NASA Science — Hubble Images Polaris’s Companion
How This Article Was Prepared
The core astronomy facts were checked against educational resources from NASA, the Royal Observatory, the U.S. National Park Service, and NOAA.
The locating instructions are intended for ordinary naked-eye observing. The schematic, Pattern–Projection–Altitude check, visibility matrix, troubleshooting table, and observation logs are original reader tools designed to make the established astronomy easier to apply. They are not scientific measurement results.
Navigation language is deliberately limited to approximate orientation. Polaris should not be treated as a replacement for proper navigation equipment.
More from Constellations & Star Hopping
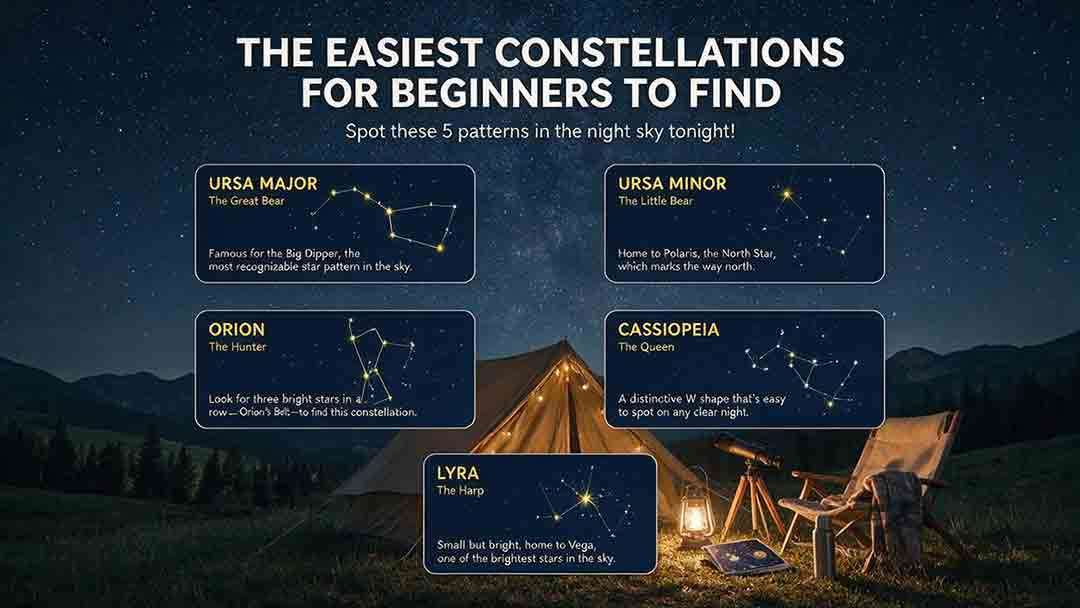
The Easiest Constellations for Beginners to Find
This beginner-friendly guide explains how to find Orion, Ursa Major through the Big Dipper, Cassiopeia, Cygnus, and Scorpius using clear naked-eye observing steps. It compares each pattern through an original Beginner Visibility Score and shows readers how to choose a first target based on season, latitude, light pollution, moonlight, and horizon visibility. The guide also clarifies the difference between constellations and asterisms, explains how the Big Dipper can point toward Polaris, and provides dedicated recommendations for Southern Hemisphere observers, including Crux. Practical tools include the Anchor-Pattern Method, the Three-Check Rule, a 10-minute observing session, city-sky guidance, troubleshooting advice, an equipment comparison, and a safety checklist. Authoritative references from the International Astronomical Union, NASA, NSF NOIRLab, and the European Southern Observatory support the key astronomical facts.
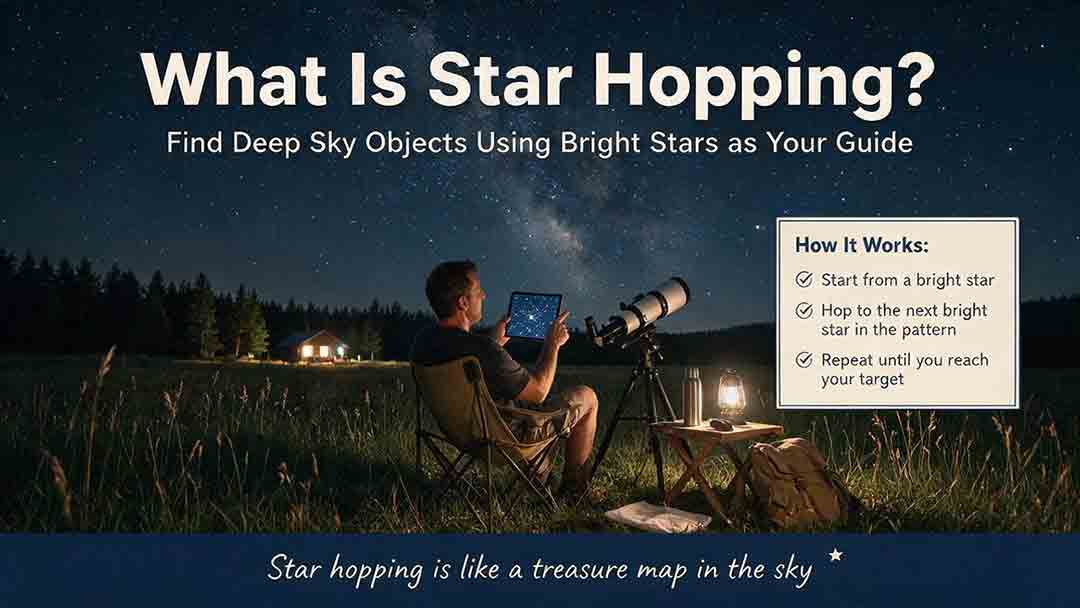
What Is Star Hopping and How Do You Do It?
Star hopping is a practical way to navigate the night sky by moving from a bright, recognizable star to a fainter target through a sequence of visible star patterns. This guide explains how beginners can plan a reliable route, align a finder, match a star chart to a telescope’s field of view, and recognize rotated or mirror-reversed images. It introduces the Anchor–Path–Field–Confirm method, provides a step-by-step observing process, and shows how field-of-view estimates can help determine a practical chart scale. A worked example demonstrates how to locate Messier 13 using the Keystone of Hercules, while the troubleshooting table addresses common problems such as finder misalignment, excessive magnification, incorrect chart orientation, and targets that remain invisible despite correct pointing. The included field checklist gives binocular and telescope users a repeatable method for planning and completing future star hops.
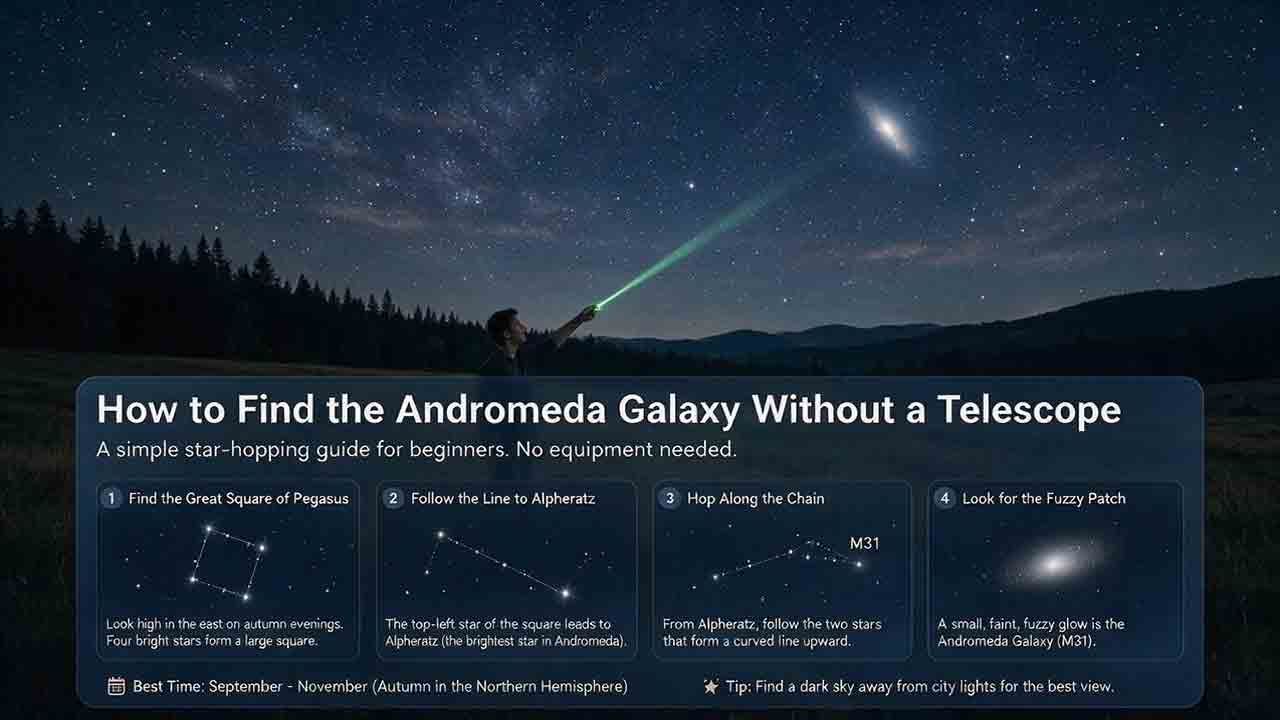
How to Find the Andromeda Galaxy Without a Telescope
Finding the Andromeda Galaxy without a telescope is possible when you know which stars to use as landmarks. This practical guide explains how to start at the Great Square of Pegasus, identify Alpheratz, follow the Andromeda star chain to Mirach, and use two nearly equal short hops to reach Mu Andromedae and M31. It also explains what the galaxy realistically looks like to the naked eye, why dark skies and averted vision matter, and how binoculars can help confirm the target. Beginners can use the six-point observing checklist, three-night practice method, troubleshooting guidance, and reusable observation log to improve each attempt. The guide distinguishes calculated angular distances from practical field estimates and clearly explains its source-checking process without claiming personal testing. It is designed primarily for Northern Hemisphere observers while also addressing visibility limitations from Southern Hemisphere locations.
Explore More Topics

How to Stay Warm and Comfortable During Winter Stargazing
Winter stargazing requires more preparation than wearing one heavy coat because observers often remain nearly motionless for long periods. This guide explains how to check temperature, wind chill, road conditions, snow, and shelter before leaving; build a moisture-managing base, insulating middle, and wind-resistant outer layer; and protect hands, feet, head, face, chair, and ground contact. Readers will learn how to combine liner gloves with mittens, avoid sweat, plan warm-up breaks, use heated clothing safely, manage food and hydration, protect batteries, and prevent condensation when cold equipment returns indoors. The article also includes the WARMER planning framework, clothing and glove comparisons, a three-hour worked example, cold-stress warning signs, troubleshooting guidance, departure rules, FAQs, and a complete winter stargazing checklist.
Red Flashlights for Stargazing: Why Astronomers Use Them
Astronomers use dim red flashlights because dark-adapted rod vision is less sensitive to long-wavelength red light than to much of the visible spectrum. A controlled red beam can illuminate charts, eyepieces, cables, and walking paths while causing less disruption than a typical white flashlight. This guide explains how rods, cones, rhodopsin, wavelength, brightness, exposure time, and beam direction shape the result. Readers will learn why red light is not harmless, how to compare handheld lights and headlamps, which product features prevent accidental white-light activation, how to configure a phone screen, and when safety requires a white emergency light. The article also includes the RED-SAFE buying framework, a task-lighting table, a worked observing example, DIY filter guidance, star-party etiquette, troubleshooting advice, FAQs, and complete purchase and field-use checklists.

Stargazing While Camping: A Practical Planning Guide
Camping can provide long, convenient access to dark skies, but a successful astronomy trip requires more than choosing the darkest location on a map. This guide explains how to combine campground rules, weather, Moon timing, food storage, wildlife protection, quiet hours, power, dew control, and telescope setup into one workable plan. It introduces the original CAMP framework—Confirm access, Align conditions, Map functional zones, and Prepare fallbacks—plus a three-zone campsite layout separating sleeping, service, and observing areas. Readers can compare developed, walk-in, backcountry, dispersed, and astronomy-focused campgrounds; build a night schedule from daylight arrival through morning pack-up; and use practical decision tables for Moonlight, cloud, wind, dew, neighboring lights, and campfire impacts. The article also includes a hypothetical two-night family plan, a go/modify/cancel decision tree, troubleshooting guidance, and a complete campsite checklist grounded in NASA, National Park Service, and National Weather Service resources.