How to Start Stargazing: A Beginner’s Guide
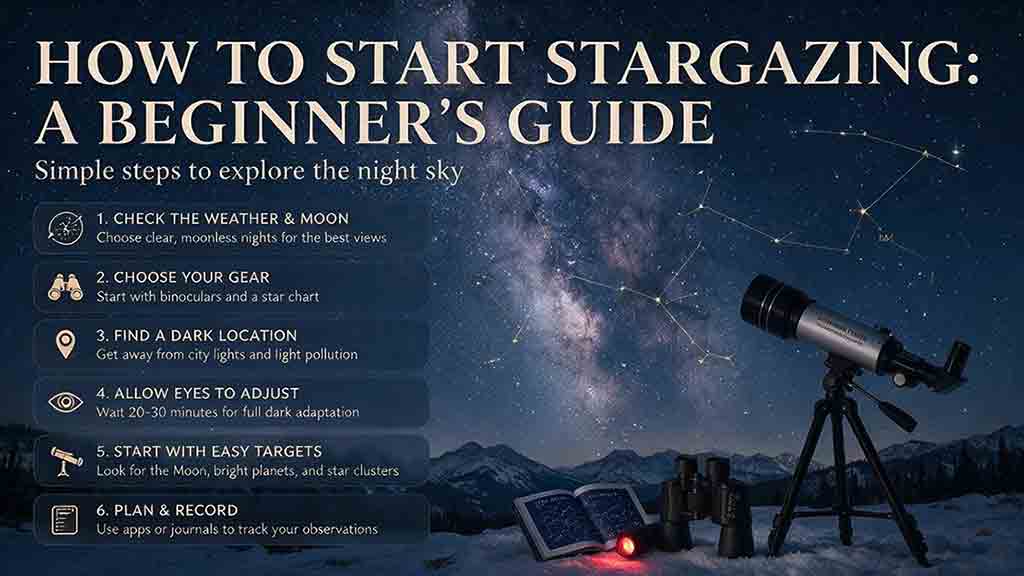
To start stargazing, choose one easy target, check the clouds and Moon, and observe from a safe place with a clear view. Begin with your unaided eyes rather than a telescope. Give your vision time to adjust, use a current star chart to confirm what you see, and keep the first session simple enough to repeat.
Key Takeaways
- You can begin stargazing without buying a telescope.
- Choose one main target and one backup for your first session.
- Cloud cover, Moon position, direct glare, and horizon access matter more than expensive equipment.
- Binoculars can reveal more while remaining easier to aim than most telescopes.
- A successful first night means learning how to find something again—not seeing the greatest possible number of objects.
This guide explains how to choose a realistic target, evaluate the weather and location, select useful equipment, find objects with a chart, solve common viewing problems, and plan a safe first night outside.
Who This Guide Is For
This guide is intended for:
- First-time skywatchers
- City and suburban observers
- Families planning a short night-sky activity
- Readers deciding whether to buy binoculars or a telescope
- Anyone looking for a safe, repeatable way to learn the sky
It is not a technical astrophotography manual, a comparison of specific telescope brands, or a substitute for local weather alerts, park rules, access restrictions, and safety guidance.
Editorial note: This guide uses current guidance from NASA, the National Weather Service, the National Park Service, and DarkSky International. Equipment recommendations are general and are not sponsored.
How Do You Start Stargazing in Seven Steps?
The most practical way to start stargazing is to make the first session small, specific, and repeatable.
- Choose one main target.
- Select one backup target.
- Check hourly cloud cover and Moon timing.
- Confirm that the location is safe, permitted, and open after dark.
- Bring a chart, suitable clothing, a dim light, and optional binoculars.
- Allow your eyes time to adjust before judging the sky.
- Record what you found and how you found it.
The purpose of the first night is not to memorize the entire sky. It is to connect a chart with a real object and learn enough to locate that object again.
What Should a Beginner Look for First?
Start with an object that is bright, easy to confirm, and suitable for your location.
Possible first targets include:
- The Moon
- Venus, Mars, Jupiter, or Saturn when visible
- A recognizable constellation or asterism
- A bright star cluster such as the Pleiades
- The Orion Nebula
- A scheduled pass of the International Space Station
Five planets—Mercury, Venus, Mars, Jupiter, and Saturn—can be visible without optical equipment. Their visibility changes throughout the year, and Mercury often has short observing windows because it remains relatively close to the Sun in the sky. NASA’s skywatching guidance explains which kinds of objects can be observed without a telescope.
Planets often look steadier than stars, but this is not an absolute identification rule. Atmospheric turbulence, low altitude, and object brightness can make both planets and stars appear to flicker. Confirm an identification with a current chart and the surrounding star pattern.
Keep the First Target List Small
Choose:
- One primary target
- One backup target
- One recognizable anchor pattern
A practical plan might use Jupiter as the primary target, the Moon as a backup, and Orion or the Big Dipper as the anchor pattern.
A short list gives you time to understand the route to each object instead of moving constantly between app labels.
Target Visibility Depends on Location and Time
A target mentioned in a beginner guide may not be visible from your location tonight.
Visibility depends on latitude, hemisphere, season, local time, current planetary positions, nearby obstructions, and the object’s height above the horizon.
Orion and the Pleiades are seasonal. The International Space Station requires a local pass prediction. NASA’s Spot the Station service provides location-based flyover schedules and alerts.
Before traveling, confirm that the planned target will be above your usable horizon during the observing window.
How Do You Choose the Right Night for Stargazing?
A useful stargazing night requires more than a forecast showing no rain.
Check the conditions for the actual hours you plan to observe.
| Condition | What to Check | Why It Matters |
|---|---|---|
| Cloud cover | Hourly sky-cover forecast | Clouds may hide the target even without rain |
| Moon | Phase, rise time, set time, and direction | Moonlight can reduce contrast around faint objects |
| Transparency | Haze, smoke, fog, dust, or humidity | Particles and moisture scatter light |
| Wind | Sustained wind and gusts | Wind can shake equipment and reduce comfort |
| Temperature | Conditions during the session | Heat or cold can shorten the session |
| Weather hazards | Lightning, flooding, fire, snow, or extreme temperatures | Safety overrides observing plans |
For observers in the United States, the National Weather Service Graphical Forecast includes sky cover, wind, temperature, and precipitation information.
Forecasts can change. Check again shortly before leaving and follow current warnings issued by local authorities.
Does the Moon Prevent Stargazing?
No. The Moon changes which targets are suitable.
| Moon Condition | Better Target Choices |
|---|---|
| Bright or nearly full Moon | Moon, planets, bright stars |
| Crescent or quarter Moon | Lunar terrain, planets, brighter clusters |
| Moon below the horizon | Milky Way, galaxies, nebulae, faint clusters |
| New Moon period | Dark-sky and deep-sky observing |
| Moon low in one direction | Targets farther from the Moon |
Moon phase alone does not determine whether moonlight will interfere. Rise time, set time, altitude, direction, and distance from the target also matter.
A bright Moon can make faint galaxies difficult while providing an excellent view of lunar terrain. Match the target to the conditions rather than treating the entire night as unsuitable.
Where Is the Best Place for a Beginner to Stargaze?
The best beginner location is a safe, permitted, accessible place with a usable view of the target—not automatically the darkest point on a map.
A backyard, apartment courtyard, local park, beach, campground, or rural viewing area may work. The right choice depends on access rules, terrain, lighting, weather, and the direction you need to face.
Use the Four-Gate Site Check
A location should pass four checks before you rely on it for a night session.
Gate 1: Is the Site Safe and Permitted?
Confirm that:
- The site is legally open after dark.
- You have permission to enter and park.
- Your vehicle can remain fully away from traffic.
- The ground does not contain hidden holes, unstable surfaces, or drop-offs.
- You understand relevant wildlife, fire, water, and weather risks.
- You have a safe route back to the vehicle or exit.
NASA recommends scouting unfamiliar sites during daylight or arriving before sunset. Its guide to finding good places to stargaze also advises observers to consider traffic, branches, rocks, slopes, wildlife, private property, and access hours.
Gate 2: Is the Required Horizon Open?
You do not need an unobstructed view in every direction. You need a clear view where the target will appear.
A planet low in the southwest requires a clear southwestern horizon, while a meteor shower benefits from a broad area of open sky. Low objects are more easily blocked by buildings, trees, hills, haze, and atmospheric distortion.
Polaris can be a useful northern reference for many Northern Hemisphere observers, but it is not visible from much of the Southern Hemisphere.
Gate 3: Can You Control Direct Glare?
Direct glare can be more disruptive than distant skyglow.
Look for a safe position where a wall, building, fence, or hedge blocks nearby lamps without blocking the target. Avoid illuminated signs, sports fields, vehicle entrances, and parking areas with frequent headlights.
The National Park Service describes skyglow as the brightening of the night sky caused by human-made light scattered in the atmosphere. Its light-pollution guidance distinguishes skyglow from direct glare and light trespass.
Gate 4: Is the Location Practical Enough to Revisit?
A remote dark-sky site may reveal more objects, but it can also involve longer driving, unfamiliar roads, additional weather risks, wildlife concerns, and access restrictions.
For learning the sky, a nearby site you can visit regularly may be more useful than a distant site you visit only once.
What Is the Bortle Scale?
The Bortle scale is a nine-level descriptive scale for night-sky darkness. Class 1 represents exceptionally dark conditions, while Class 9 represents heavily light-polluted urban skies.
NASA discusses the scale in its beginner stargazing guidance.
A map-based Bortle estimate is a planning aid, not a guarantee. Nearby lighting, smoke, haze, snow, reflective clouds, temporary events, and recent development can change the actual view.
Is Tonight Worth Going Out? Use the First-Night Readiness Score
The First-Night Readiness Score is a simple planning framework created for this guide. It helps beginners compare conditions for a specific target.
Score each condition from 0 to 2.
| Condition | 0 Points | 1 Point | 2 Points |
|---|---|---|---|
| Cloud cover | Target area likely obscured | Clear gaps or changing cloud | Target area mostly clear |
| Direct glare | Strong, unavoidable lighting | Some lighting can be shielded | Little direct glare |
| Target visibility | Direction blocked or uncertain | Partly obstructed or very low | Clear view in the required direction |
| Site safety | Closed, prohibited, hazardous, or uncertain access | Usable only with added precautions | Clearly permitted and reasonably safe |
| Moon suitability | Poor match for the target | Usable with reduced expectations | Well matched to the target |
Add the five scores.
- 8–10 points: Conditions suit the planned beginner session.
- 5–7 points: Consider a brighter target, different position, or shorter session.
- 0–4 points: Change the target, location, time, or date.
Safety Override
The numerical total never overrides a real safety concern.
Do not continue when there is an active severe-weather warning, site closure, prohibited access, flooding, wildfire, lightning, dangerous road conditions, unsafe parking, or hazardous terrain.
A site-safety score of 0 cannot be offset by higher scores in other categories.
Limitations: This score is not a scientific sky-quality measurement, official weather product, validated research model, or guarantee that a target will be visible.
Example: A Bright-Target Session
Consider a hypothetical suburban session planned around the Moon and Jupiter:
- Cloud cover: mostly clear — 2
- Direct glare: one lamp that can be partly blocked — 1
- Target visibility: open southeastern view — 2
- Site safety: permitted backyard with level ground — 2
- Moon suitability: bright Moon, but both targets are bright — 2
Total: 9 out of 10
The conditions are suitable for lunar and planetary observing. They would not necessarily work for a faint galaxy.
Same Site, Different Target
| Planned Target | Illustrative Score | Why the Result Changes |
|---|---|---|
| Moon or Jupiter | 9/10 | Bright targets tolerate moonlight and moderate skyglow |
| Andromeda Galaxy | 5/10 | Bright Moon and direct glare reduce contrast |
| Milky Way | 3/10 | Urban skyglow and moonlight make the target poorly matched |
The score applies to the planned target, not to the night as a whole.
What Equipment Do You Need to Start Stargazing?
You can begin with your eyes, a current chart, a dim light, suitable clothing, and a safe place to sit. Binoculars are useful but optional.
Naked Eye vs. Binoculars vs. Telescope
| Option | Best Uses | Advantages | Limitations |
|---|---|---|---|
| Unaided eyes | Constellations, meteors, satellites, planets | Free, wide view, easy orientation | Limited fine detail |
| Binoculars | Moon, clusters, bright nebulae, broad star fields | Portable, intuitive, wide field | Hand movement can blur the image |
| Telescope | Planetary detail, lunar features, double stars | More light collection and magnification | More setup, narrower view, mount quality matters |
Are Binoculars Better Than a Telescope for Beginners?
For many beginners, binoculars are easier to aim, carry, and set up.
NASA’s guide, Binoculars: A Great First Telescope, discusses commonly available sizes from approximately 7×35 to 10×50. Larger and more powerful binoculars can become heavy and difficult to hold steadily.
In 10×50 binoculars:
- 10× is the stated magnification.
- 50 mm is the diameter of each front objective lens.
Higher magnification is not automatically better. A wide, steady view is often more useful than a powerful image that constantly shakes.
Before choosing binoculars, check the weight, eyepiece spacing, focusing controls, image alignment, field of view, and compatibility with glasses or a tripod.
Should You Buy a Telescope Immediately?
Usually, no.
First learn the cardinal directions, one or two seasonal patterns, and the types of objects that interest you. A telescope should solve a known observing need.
| Main Interest | Practical Starting Direction |
|---|---|
| Wide star fields and portability | Binoculars |
| Moon and planets | Telescope with a stable mount |
| Faint galaxies and nebulae | Larger aperture plus darker skies |
| Travel observing | Compact binoculars or portable telescope |
| Automated object location | Computerized or app-assisted mount |
| Learning the sky manually | Simple manual mount and chart |
Aperture is the diameter of the main light-collecting lens or mirror. Magnification describes how much larger an object appears. Neither specification alone determines image quality.
Attending a public astronomy-club event before buying can help you compare different instruments under similar conditions.
How Long Do Your Eyes Need to Adjust to Darkness?
Dark adaptation is the gradual process by which the eyes become more sensitive in low light.
Expect noticeable improvement during roughly the first 20–30 minutes, although the process varies among individuals. NASA’s beginner stargazing guidance advises allowing approximately 30 minutes and avoiding bright screens and headlights.
To protect night vision:
- Lower phone brightness.
- Use a dim red or night-display setting.
- Avoid bright white pages and photographs.
- Point flashlights toward the ground.
- Use only as much light as safety requires.
- Block direct lamps where practical.
A red light can still be too bright. Never reduce lighting when doing so would make stairs, roads, water, or uneven ground unsafe.
How Do You Find Objects in the Night Sky?
Begin by orienting yourself before using magnification.
Determine the cardinal directions, note which horizons are blocked, and identify one bright object or recognizable star pattern.
A sky-map app can help, but phone compasses may be affected by vehicles, metal structures, calibration errors, and incorrect settings. A printed chart or planisphere does not depend on battery power or compass alignment.
Use the Anchor-and-Hop Method
The Anchor-and-Hop Method is a beginner-friendly form of star-hopping.
- Find a bright, recognizable anchor.
- Match it with the chart.
- Identify a second nearby star.
- Follow a visible line, curve, or triangle toward the target.
- Compare the surrounding pattern.
- Return to the anchor and repeat the route.
Star-hopping is the practice of navigating from recognizable stars or patterns toward a less obvious target.
Do not confirm a target from one bright point alone. Check the arrangement of nearby stars and the target’s expected direction and height.
Example: Finding the Orion Nebula
When Orion is visible:
- Find Orion’s Belt, a line of three prominent stars.
- Look for Orion’s Sword extending from the belt.
- Examine the middle region of the sword.
- Under suitable conditions, the Orion Nebula may appear as a faint, misty patch.
- Compare the unaided-eye view with binoculars.
Orion’s orientation changes with latitude, hemisphere, season, and time. Use a current local chart rather than a fixed illustration.
How Should You Study a Target?
Once you find an object:
- Identify its basic shape.
- Examine nearby stars and patterns.
- Compare the unaided-eye and binocular views.
- Look away and try to locate it again.
- Note whether haze, cloud, or object altitude changes the view.
Averted vision means looking slightly beside a faint object rather than directly at it. Because the outer retina is more sensitive to dim light, this technique can make a faint nebula, cluster, or galaxy easier to detect.
What Does a Practical First Session Look Like?
The following 45-minute plan works from a backyard, park, campground, or suburban viewing area.
Minutes 0–10: Set up and orient yourself
- Inspect the ground and nearby hazards.
- Confirm the cardinal directions.
- Reduce screen brightness.
- Identify the Moon, a planet, or a major star pattern.
Minutes 10–20: Learn one anchor pattern
- Trace its main stars.
- Compare them with the chart.
- Look away and find the pattern again.
Minutes 20–30: Find the primary target
- Start from the anchor.
- Follow the planned route.
- Confirm the surrounding pattern.
- Compare the unaided-eye and binocular views.
Minutes 30–40: Observe carefully
Compare direct and averted vision, supported and unsupported binoculars, and the view near the horizon with the view higher in the sky.
Minutes 40–45: Record the session
Write down the date, time, location, sky conditions, equipment, target, and route used to find it.
The record does not need to be formal. Its purpose is to make future sessions easier to compare.
How Should You Change Targets When Conditions Change?
| Situation | Better Choices | Lower-Priority Choices |
|---|---|---|
| Bright Moon | Moon, planets, bright stars | Faint galaxies and nebulae |
| Heavy urban skyglow | Moon, planets, major constellations | Milky Way and low-contrast targets |
| Dark rural sky | Milky Way, clusters, nebulae, galaxies | No special restriction beyond visibility |
| Windy conditions | Unaided-eye targets, supported binoculars | High magnification on an unstable mount |
| Thin haze | Moon and bright planets | Faint diffuse objects |
| Partly cloudy sky | Bright objects in clear gaps | Long searches for faint targets |
| Limited horizon | Objects higher in the sky | Low planets and constellations |
| Short family session | Moon, one constellation, ISS pass | Complex multi-object lists |
The lunar terminator is the boundary between lunar day and night. Shadows near this boundary can make craters, ridges, and other terrain easier to see.
What Are the Most Common Beginner Mistakes?
1. Expecting the View to Match Astronomy Photographs
Published images may use long exposures, tracking mounts, filters, image stacking, and digital processing.
The eye usually sees faint deep-sky objects as subtle, low-contrast shapes. Visual observing and astrophotography are different experiences.
2. Trying to Learn Too Many Objects at Once
Learn one route well enough to repeat it before adding another target.
3. Starting With Too Much Magnification
High magnification narrows the field of view and makes shaking more obvious. Begin with the widest practical view and increase power only after centering the target.
4. Observing Through a Closed Window
Window glass can produce reflections and distortion, while temperature differences can blur the image. Observe outside when practical and safe.
5. Looking at a Bright Screen Repeatedly
Prepare charts and target notes in advance so you do not repeatedly interrupt dark adaptation.
6. Choosing Equipment by Magnification Alone
Aperture, optical quality, focusing, field of view, mount stability, and atmospheric conditions all matter.
7. Driving to a Dark Site Without Checking Access
Check closing times, parking rules, weather, road conditions, and property boundaries before leaving.
8. Assuming Every Named Target Is Visible Tonight
Constellations are seasonal, planets move, and low targets can be blocked. Confirm local visibility first.
Why Does the View Look Blurry or Disappointing?
| Problem | Likely Cause | Practical Response |
|---|---|---|
| Stars look like large blobs | Poor focus, dew, or unstable air | Refocus and inspect the optics |
| The image shakes | Unsupported binoculars or unstable mount | Sit down, brace your arms, or use a tripod |
| Very few stars are visible | Skyglow, Moon, haze, cloud, or incomplete adaptation | Block glare, wait longer, or choose brighter targets |
| The object drifts out of view | Earth’s rotation or loose mount | Recenter and check mount tension |
| Binoculars show a doubled image | Incorrect spacing or optical misalignment | Adjust the hinge; stop using them if doubling remains |
| The app does not match the sky | Wrong time, location, calibration, or orientation | Verify settings and directions |
| The telescope shows darkness | Cap left on, finder misaligned, or excessive magnification | Remove caps, use low power, and test on the Moon |
| The lens becomes cloudy | Dew or condensation | Use a dew shield and let moisture evaporate naturally |
| A bright object has colored edges | Low altitude or atmospheric dispersion | Observe when the object is higher |
| The target disappears at higher power | Narrow field or poor centering | Return to lower power and recenter |
Do not aggressively wipe dew, dust, or grit from optical surfaces. Follow the manufacturer’s cleaning instructions to reduce the risk of damaging coatings.
What Safety Rules Should Every Stargazer Follow?
Darkness can hide ordinary hazards, so local conditions and official instructions always take priority.
- Arrive before dark at unfamiliar locations.
- Keep vehicles fully away from traffic.
- Do not enter closed parks or private property.
- Watch for cliffs, holes, rocks, water, and unstable ground.
- Follow local fire, wildlife, weather, and emergency guidance.
- Bring adequate clothing, water, and lighting.
- Leave if conditions become unsafe.
Never Point Unfiltered Optics at the Sun
Never look at the Sun through binoculars, a telescope, a camera lens, or another magnifying device unless a proper solar filter designed for that equipment is securely attached over the Sun-facing front aperture.
Ordinary sunglasses, dark glass, exposed film, and handheld eclipse glasses placed behind binoculars or a telescope do not make magnified solar viewing safe.
NASA’s eclipse-viewing safety guidance explains that filters for telescopes, binoculars, and camera lenses must be secured to the front of the optics.
Do not improvise a solar filter.
Solar eclipses require approved eye protection except during the brief period of totality in locations actually inside the path of totality. Follow NASA’s current instructions for the specific eclipse and location. Lunar eclipses are safe to observe with unaided eyes.
When observing with children, use a familiar level location, maintain close supervision, keep sessions short, and teach them never to point optical equipment toward the Sun.
Beginner Stargazing Checklist
Before the Session
- Choose one primary target.
- Choose one backup target.
- Confirm local target visibility.
- Check cloud cover, Moon timing, wind, and temperature.
- Review weather warnings.
- Confirm access, parking, and closing times.
- Download charts for offline use.
Pack
- Dim red flashlight
- Chair, blanket, or mat
- Star chart or sky-map app
- Notebook
- Optional binoculars
- Suitable clothing and water
- Spare batteries or power bank
At the Site
- Inspect the ground.
- Confirm the route back.
- Reduce screen brightness.
- Identify the cardinal directions.
- Block direct glare where practical.
- Allow time for dark adaptation.
- Record at least one observation.
How Can You Improve After the First Night?
Build skill over several short sessions.
First session: Learn one anchor pattern and one bright target.
Second session: Find the same objects with less reliance on an app.
Third session: Add binoculars and compare the views.
Fourth session: Change one major condition, such as the location, Moon brightness, observing time, or binocular support.
Changing one major variable at a time makes it easier to understand why the view improved or worsened.
What Should You Do Next?
Choose the safest convenient location available and plan a short session around one confirmed target.
City observers can begin with the Moon, bright planets, and major star patterns. Binocular owners can compare the Moon, Pleiades, and broad star fields with their unaided-eye views. Readers considering a telescope can benefit from attending a public observing event before choosing an instrument.
A successful first night depends less on equipment than on choosing a realistic target, looking carefully, and learning a route you can repeat.
Frequently Asked Questions
Can I Start Stargazing From a City?
Yes. City observers can often see the Moon, bright planets, major constellations, prominent stars, and some satellite passes.
Block direct glare and choose targets suited to urban skyglow. Faint galaxies and detailed Milky Way structure usually require darker conditions.
Do I Need a Telescope to See Planets?
No. Mercury, Venus, Mars, Jupiter, and Saturn can be visible without a telescope when their positions and local conditions are favorable.
A telescope can reveal additional detail. Binoculars may show Jupiter’s four brightest moons as small points under suitable conditions.
What Is the Best Time of Night to Stargaze?
The best time depends on the target.
Faint deep-sky objects are generally easier after the sky becomes fully dark and when the Moon is absent or less intrusive. Some planets and satellites are best near sunset or dawn.
Why Can I See a Faint Object Better When I Look Beside It?
This technique is called averted vision.
The outer retina is more sensitive to low light than the center of direct vision, making some faint objects easier to detect.
Can a Phone App Identify Every Star Correctly?
No. Apps can be affected by compass calibration, nearby metal, phone orientation, location permissions, and incorrect time settings.
Confirm an object using the surrounding star pattern and its expected direction.
How Long Should a First Stargazing Session Last?
About 30–60 minutes is enough for many beginners.
This provides time for dark adaptation, orientation, one focused search, and a short observation record without making the experience unnecessarily tiring.
How We Researched and Fact-Checked This Guide
This guide was prepared using the following source-review process:
- General skywatching and unaided-eye visibility information was checked against NASA Science resources.
- Beginner binocular guidance was compared with NASA Night Sky Network material.
- Weather-planning information was checked against National Weather Service resources.
- Site-selection and nighttime safety guidance was compared with NASA recommendations.
- Light-pollution terminology was checked against National Park Service and DarkSky International resources.
- Solar-observation warnings were checked against current NASA eclipse-safety guidance.
- No hands-on comparison of named commercial products is claimed or implied.
- No independent astronomer or outside expert review is claimed.
Sources
- NASA Science — Skywatching Tips
- NASA Science — Stargazing for Beginners
- NASA Science — How to Find Good Places to Stargaze
- NASA Science — Binoculars: A Great First Telescope
- NASA — Spot the Station
- NASA Science — Eclipse Viewing Safety
- NOAA National Weather Service — Graphical Forecast
- U.S. National Park Service — Light Pollution
- DarkSky International — Resources
More from Night Sky Guides
What Is the Best Time of Night for Stargazing?
The best time of night for stargazing is not a fixed hour such as midnight. It is the clearest, darkest period when the Moon causes minimal interference and your chosen target is high enough above the horizon. This practical guide explains how astronomical twilight, moonrise and moonset, target altitude, cloud cover, transparency, atmospheric seeing, light pollution, season, and latitude affect observing conditions. It also introduces the CosmoBasics Five-Filter Night Window, a straightforward planning framework for combining darkness, Moon conditions, target position, weather, and safe site access. Readers can use the included worked example, decision guidance, checklist, and fill-in planning table to calculate a realistic observing window for a specific night. Separate recommendations cover the Moon, planets, the Milky Way, galaxies, nebulae, meteor showers, beginners, urban observers, families, and astrophotographers, with safety guidance for observing Mercury and Venus near the Sun’s direction.
Binocular Stargazing: What Can You See?
This guide explains what beginners can realistically see through binoculars at night and how to get the most from a simple astronomy setup. It covers practical targets including the Moon, Jupiter’s Galilean moons, open star clusters, nebulae, galaxies, Milky Way star fields, and bright comets. The article compares common binocular sizes such as 8x42 and 10x50, explains how magnification, objective diameter, exit pupil, and stability affect observations, and provides a practical framework for choosing suitable targets. It also introduces original tools including a Binocular Target Fit Score, a Jupiter moon tracking table, and a visibility log to help observers understand whether limitations come from sky conditions, target size, or equipment handling. Based on NASA guidance, professional astronomy resources, and official optical documentation, this article focuses on realistic expectations rather than exaggerated views, helping beginners build better observing habits and decide when binoculars are enough or when a telescope may be the next step.
How to Read a Star Chart
Learning how to read a star chart becomes much easier once you understand how the flat map relates to the curved sky above you. This practical beginner’s guide explains how to select the right chart, set the correct location and observing time, align the chart with the horizon, and identify reliable starting points using bright stars and recognizable patterns. It introduces the Three-Anchor Verification Method, which checks direction, brightness, and nearby-star geometry before an identification is accepted. Readers will also learn how magnitude symbols, celestial coordinates, angular distances, planispheres, binocular charts, and telescope finder charts work. A five-minute field exercise, an Orion example, troubleshooting guidance, and a first-night checklist turn the explanations into a repeatable observing process. The guide also addresses light pollution, chart projection distortion, mirrored telescope views, moving planets, and essential solar-viewing safety. It is designed to help beginners move confidently from one confirmed landmark to their first successful star hop.
Explore More Topics
The Easiest Constellations for Beginners to Find
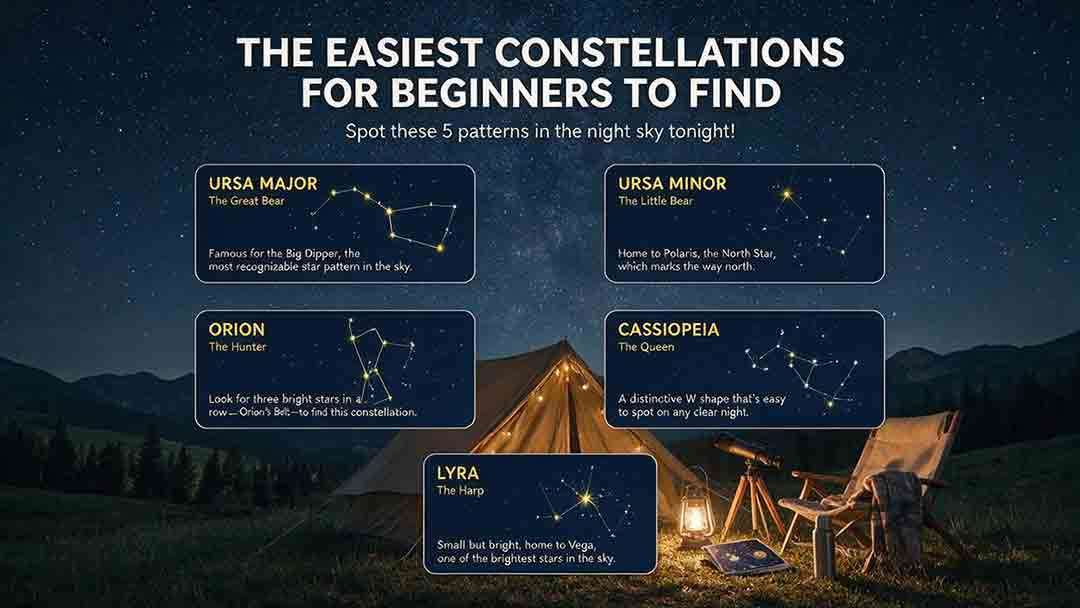
This beginner-friendly guide explains how to find Orion, Ursa Major through the Big Dipper, Cassiopeia, Cygnus, and Scorpius using clear naked-eye observing steps. It compares each pattern through an original Beginner Visibility Score and shows readers how to choose a first target based on season, latitude, light pollution, moonlight, and horizon visibility. The guide also clarifies the difference between constellations and asterisms, explains how the Big Dipper can point toward Polaris, and provides dedicated recommendations for Southern Hemisphere observers, including Crux. Practical tools include the Anchor-Pattern Method, the Three-Check Rule, a 10-minute observing session, city-sky guidance, troubleshooting advice, an equipment comparison, and a safety checklist. Authoritative references from the International Astronomical Union, NASA, NSF NOIRLab, and the European Southern Observatory support the key astronomical facts.
What Is Star Hopping and How Do You Do It?
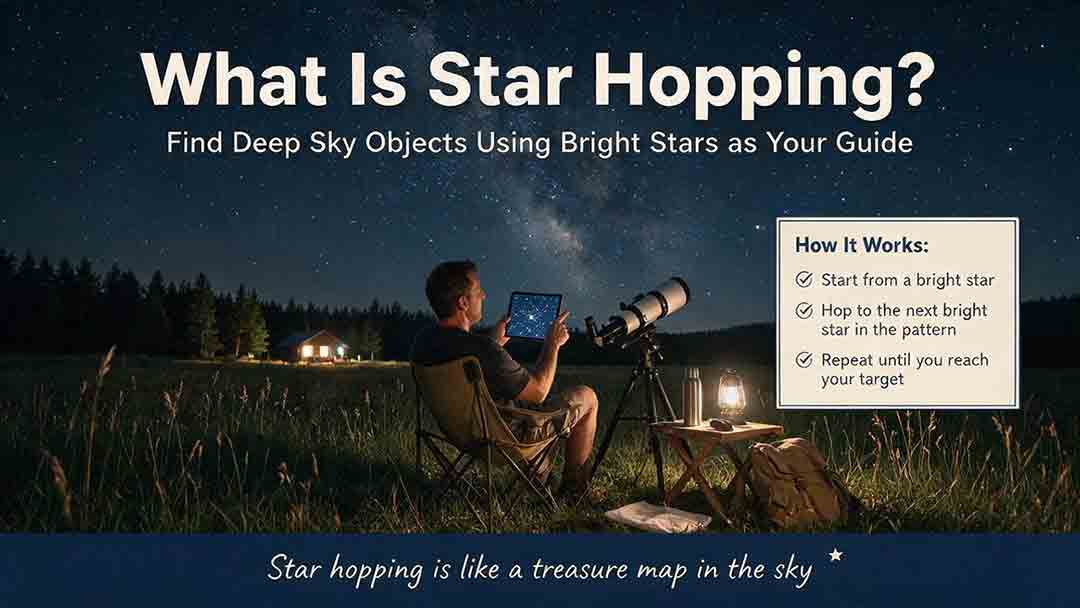
Star hopping is a practical way to navigate the night sky by moving from a bright, recognizable star to a fainter target through a sequence of visible star patterns. This guide explains how beginners can plan a reliable route, align a finder, match a star chart to a telescope’s field of view, and recognize rotated or mirror-reversed images. It introduces the Anchor–Path–Field–Confirm method, provides a step-by-step observing process, and shows how field-of-view estimates can help determine a practical chart scale. A worked example demonstrates how to locate Messier 13 using the Keystone of Hercules, while the troubleshooting table addresses common problems such as finder misalignment, excessive magnification, incorrect chart orientation, and targets that remain invisible despite correct pointing. The included field checklist gives binocular and telescope users a repeatable method for planning and completing future star hops.
How to Find the Andromeda Galaxy Without a Telescope
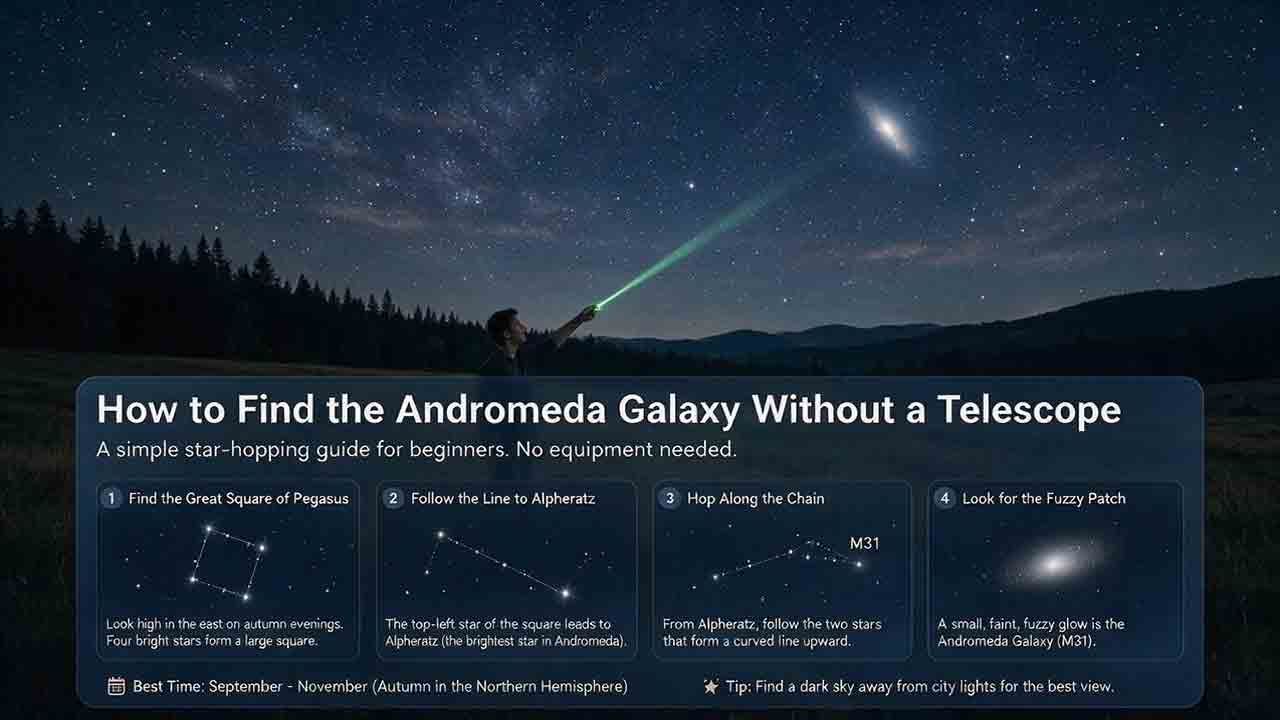
Finding the Andromeda Galaxy without a telescope is possible when you know which stars to use as landmarks. This practical guide explains how to start at the Great Square of Pegasus, identify Alpheratz, follow the Andromeda star chain to Mirach, and use two nearly equal short hops to reach Mu Andromedae and M31. It also explains what the galaxy realistically looks like to the naked eye, why dark skies and averted vision matter, and how binoculars can help confirm the target. Beginners can use the six-point observing checklist, three-night practice method, troubleshooting guidance, and reusable observation log to improve each attempt. The guide distinguishes calculated angular distances from practical field estimates and clearly explains its source-checking process without claiming personal testing. It is designed primarily for Northern Hemisphere observers while also addressing visibility limitations from Southern Hemisphere locations.