Binocular Stargazing: What Can You See?
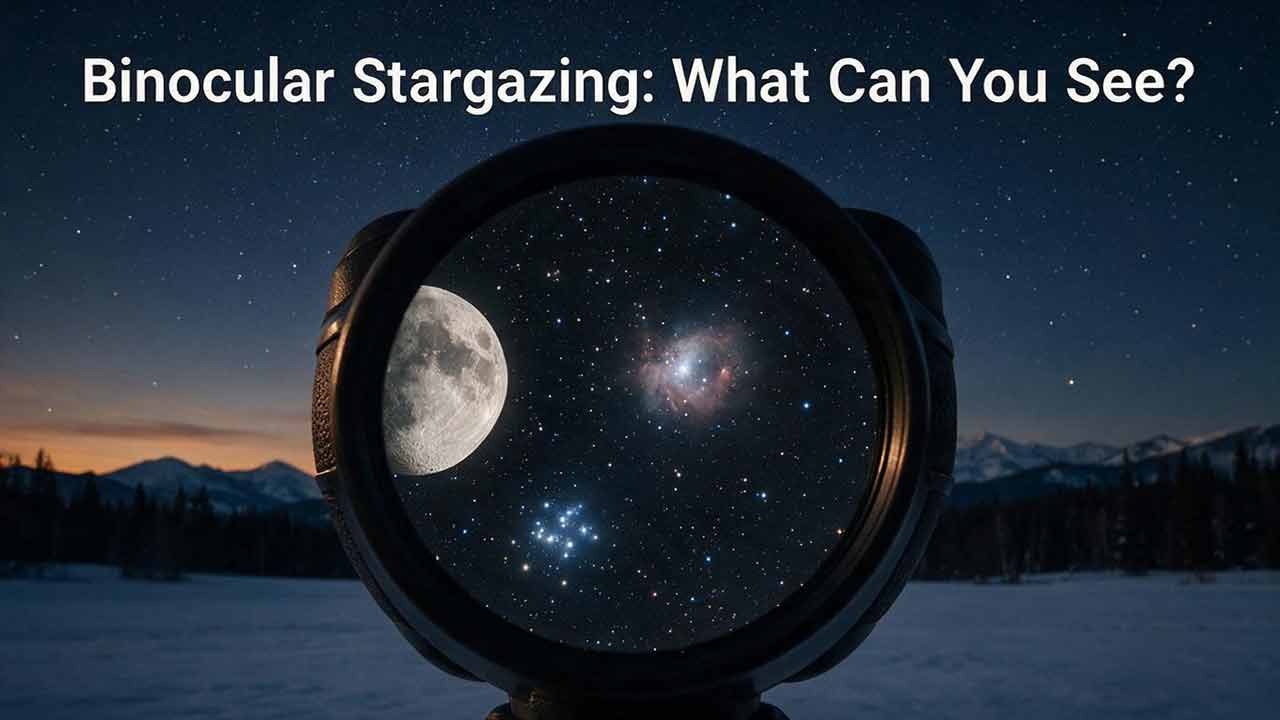
With ordinary 7x35, 8x42, or 10x50 binoculars, you can see lunar craters, Jupiter’s four Galilean moons, bright star clusters, the Orion Nebula, and the central glow of the Andromeda Galaxy. The quality of the view depends on target size, sky brightness, atmospheric clarity, optical alignment, and how steadily you can hold the binoculars.
Key Takeaways
- The Moon, the Pleiades, and Jupiter’s moons are the most dependable first targets.
- Binoculars are strongest on wide objects and star fields, not small planetary details.
- An 8x42 is easier to carry and stabilize; a 10x50 offers more image scale and objective area.
- Galaxies and nebulae usually appear gray and subtle, not colorful like processed photographs.
- A darker observing site can reveal more faint detail, but bright urban targets remain worthwhile.
This guide explains what binocular stargazing realistically reveals, which specifications matter, how to choose suitable targets, and how to troubleshoot a disappointing view without assuming that new equipment is the answer.
How this guide was prepared: This article uses published optical specifications, current guidance from NASA and established astronomy organizations, and practical observing criteria. It does not claim hands-on testing of individual binocular models, and its original planning tools are not official scientific rating systems.
What Can You See Through Binoculars at Night?
Binoculars are especially effective on objects that are bright, visually large, or spread across a broad part of the sky. Their wide field makes it easier to locate targets and see them in the context of nearby stars.
NASA describes binoculars from approximately 7x35 to 10x50 as useful first astronomy instruments. This range can provide detailed lunar views, show large open clusters, and reveal brighter nebulae and galaxies under suitable skies. NASA also notes that instruments much more powerful than 10x50 become increasingly difficult to hold steadily without support. NASA: Binoculars—A Great First Telescope
The ratings below describe typical outcomes rather than guaranteed visibility.
- Reliable: Usually detectable when the target is above the horizon and weather is suitable
- Possible: Often detectable, but sky quality, steadiness, or experience matters
- Challenging: Requires favorable conditions, careful technique, or both
- Conditions-dependent: Visibility changes substantially over time or by location
| Target | Typical Binocular View | Urban or Suburban Sky | Dark Sky | Main Limitation |
|---|---|---|---|---|
| Moon | Craters, maria, ridges, and shadows | Reliable | Reliable | Glare near full Moon |
| Jupiter | Bright point or tiny disk with nearby moons | Reliable | Reliable | Moons may merge with glare |
| Saturn | Bright point, sometimes slightly elongated | Reliable | Reliable | Rings usually unresolved |
| Pleiades | Compact cluster containing many stars | Reliable | Reliable | Narrow fields feel cramped |
| Hyades | Broad V-shaped stellar pattern | Reliable | Reliable | Cluster is extremely wide |
| Beehive Cluster | Loose swarm of stars | Possible | Reliable | Skyglow hides faint members |
| Orion Nebula | Pale glow surrounding several stars | Possible | Reliable | Low contrast |
| Andromeda Galaxy | Central haze, sometimes elongated | Possible | Reliable | Outer disk is faint |
| Bright globular clusters | Small, round, fuzzy patch | Challenging | Possible | Individual stars unresolved |
| Milky Way star fields | Dense stars and dark dust gaps | Challenging | Reliable | Requires low skyglow |
| Bright comet | Diffuse head and possible tail | Conditions-dependent | Conditions-dependent | Appearance changes |
| Artificial satellite | Moving point of light | Possible | Possible | Difficult to keep in the field |
Weather, target altitude, local lighting, eyesight, focus accuracy, and binocular collimation can all affect these results.
What binoculars do especially well
Binoculars show the relationship between a target and the surrounding sky.
A telescope might provide a closer look at one crater, planet, or compact cluster. Binoculars can show the whole Moon, an entire open cluster, or a broad Milky Way field at once.
That wide-field context remains useful even for observers who later purchase a telescope.
What Does the Moon Look Like Through Binoculars?
The Moon becomes a textured landscape rather than a smooth disk.
Even modest binoculars can distinguish dark lunar plains from brighter highlands and reveal crater rims, mountain ridges, impact rays, and changing shadows.
NASA states that good binoculars may show lunar craters around 10 kilometers across or larger under favorable conditions. NASA also recommends viewing phases other than the full Moon because low-angle sunlight produces shadows that make terrain easier to recognize. NASA: Moon Viewing Tips
Features worth finding
- Lunar maria: Large, dark plains created by ancient basaltic lava flows
- Lunar highlands: Brighter and more heavily cratered regions
- Tycho: A prominent crater with a bright ray system
- Copernicus: A conspicuous crater surrounded by rough terrain
- Mare Imbrium: A large impact basin bordered by mountain ranges
- Earthshine: Faint light on the dark part of a crescent Moon
Why the terminator gives the best view
The terminator is the boundary between the illuminated and dark portions of the Moon.
Near this line, crater walls and mountains cast long shadows. These shadows make height and surface texture easier to perceive than they are under the nearly overhead sunlight of a full Moon.
A full Moon is brighter, but it often appears flatter.
A useful two-night exercise
Choose three recognizable features along the terminator and make a simple sketch. Observe the same area the following night.
The shadows will have moved as the angle of sunlight changed. This demonstrates why lunar appearance depends on lighting as much as magnification.
Can Binoculars Show Jupiter’s Moons?
Yes. Jupiter’s four Galilean moons are among the most rewarding binocular targets.
Io, Europa, Ganymede, and Callisto usually appear as tiny points arranged in a line on one or both sides of Jupiter. Their positions change as they orbit the planet.
NASA identifies these four moons as suitable targets for modest binoculars or a small telescope. Depending on their positions, one or more may pass in front of Jupiter, behind it, into its shadow, or so close to the planet that its glare makes them difficult to separate. NASA: Exploring Jupiter’s Moons
What Jupiter realistically looks like
Through common 8x or 10x binoculars:
- Jupiter appears as an intensely bright point or tiny disk-like object.
- Its moons look like small stars.
- You may see one, two, three, or four moons at a given time.
- Moons close to Jupiter may disappear in its glare.
- Jupiter’s cloud belts generally remain indistinct.
- The Great Red Spot and moon shadows should not be expected.
The number of moons visible is not a reliable test of binocular quality. Orbital position, focus, steadiness, haze, and local glare all matter.
Three-night Jupiter moon tracker
Record the pattern first. Identifying each moon can come later.
| Date and Local Time | Location | Binocular Size | Moons Left of Jupiter | Moons Right of Jupiter | Total Seen | Notes |
|---|---|---|---|---|---|---|
| Night 1 | ||||||
| Night 2 | ||||||
| Night 3 |
Draw the points in their approximate positions instead of relying only on numbers. The changing arrangement is the observation that matters.
Can You See Saturn’s Rings Through Binoculars?
Ordinary handheld binoculars usually cannot separate Saturn’s rings clearly from the planet.
Saturn may look slightly elongated or oval through well-focused 10x binoculars, but a clean ring shape with visible space between the globe and the rings generally requires higher magnification and steadier support.
NASA’s beginner binocular guidance sets a similar expectation: Saturn is visible, but its rings are unlikely to be resolved with typical handheld binoculars. NASA: Binoculars—A Great First Telescope
A small astronomical telescope is a better next instrument when seeing Saturn’s rings is a primary goal.
What about Venus and Mars?
Venus and Mars are easy to identify when they are favorably positioned, but ordinary binoculars provide limited surface detail.
- Venus appears extremely bright. Detecting its phase is difficult at low magnification because glare and movement blur its small shape.
- Mars normally appears as an orange or reddish point rather than a disk with visible markings.
These planets demonstrate an important distinction: an object can be bright enough to see easily while still being too small for binoculars to resolve.
Which Star Clusters Look Best Through Binoculars?
Open star clusters are among the best binocular targets because they combine accessible brightness with a wide apparent size.
A cluster that looks like a small haze to the unaided eye may separate into dozens of stars through binoculars.
The Pleiades
The Pleiades, or Messier 45, is an ideal first target. Its bright stars form a compact and recognizable pattern that fits comfortably within most binocular fields.
Under darker skies, additional members appear around the familiar bright stars. The blue reflection nebulosity prominent in photographs is much harder to detect visually and should not be treated as an expected beginner view.
The Hyades
The Hyades forms the broad V-shaped face of Taurus. Its large apparent size makes it better suited to binoculars than to many telescope eyepieces.
Aldebaran appears along the same line of sight and helps identify the pattern, although it is not physically part of the cluster.
The Beehive Cluster
The Beehive Cluster, Messier 44, may appear as a dim patch without magnification. Binoculars divide it into a broad scattering of stars.
The brighter members may remain visible from suburban locations, while a darker background reveals a richer swarm.
The Double Cluster
The Double Cluster in Perseus contains two neighboring concentrations of stars. Binoculars can show both in one field together with their surrounding Milky Way background.
This is a case where greater magnification is not automatically more satisfying. The wide setting is part of the view.
Globular clusters
Bright globular clusters such as Messier 13 may appear as small, round glows. Their densely packed stars usually remain unresolved in ordinary handheld binoculars.
NASA describes the Messier catalog as containing many useful targets for binoculars and small telescopes, although the difficulty varies substantially from one object to another. NASA: Hubble’s Messier Catalog
Which Nebulae Can You See With Binoculars?
The Orion Nebula is the most dependable binocular nebula for many beginners.
Nebulae seen visually usually appear as gray or pale glows. They do not normally display the saturated colors found in processed observatory images.
The Orion Nebula
The Orion Nebula, Messier 42, lies in Orion’s Sword beneath the three belt stars. Binoculars may show a soft glow surrounding a compact group of stars.
From a bright location, the nebulosity may be limited to a small haze. Under a darker, transparent sky, it appears broader and its irregular shape becomes easier to recognize.
The Lagoon Nebula
The Lagoon Nebula, Messier 8, can appear as an extended misty region when Sagittarius is high enough above the horizon and the sky is dark.
Haze, smoke, moonlight, and urban skyglow can reduce its visibility substantially.
Why large nebulae can be difficult
A large apparent size does not guarantee an easy view.
Some nebulae have low surface brightness, meaning their light is distributed over a broad area. A compact star cluster may therefore be easier to detect than a much larger but more diffuse nebula.
Why the colors differ from photographs
Human night vision is not highly sensitive to color at very low light levels. In addition, observatory images may combine long exposures or assign visible colors to ultraviolet and infrared data that human eyes cannot directly detect.
NASA’s Hubble resources explain that Hubble observes visible, ultraviolet, and infrared wavelengths and that colors can be assigned to non-visible data so those measurements can be displayed meaningfully. NASA: Hubble’s Messier Catalog and NASA: Wavelengths
This does not make astronomical photographs inaccurate. It means they are scientific and visual representations produced differently from direct human vision.
Can Binoculars Show Other Galaxies?
Yes, but only a limited number of galaxies are practical binocular targets.
Most appear as faint hazy patches. Binoculars generally reveal their brightest central regions rather than spiral arms or fine internal structure.
The Andromeda Galaxy
The Andromeda Galaxy, Messier 31, is the most accessible binocular galaxy for many Northern Hemisphere observers.
Its bright core usually appears first. Under better conditions, the glow looks elongated and part of the surrounding disk becomes visible.
NASA notes that binoculars can show Andromeda’s central region and some of its extended disk. The same NASA guidance explains that light pollution, thin clouds, smoke, and haze reduce the visibility of fainter structure. NASA: Catch Andromeda Rising
Do not expect obvious spiral arms. The detailed appearance familiar from photographs requires long exposures and sensitive detectors.
Other possible galaxies
Under dark skies, experienced observers may attempt:
- Messier 33, the Triangulum Galaxy
- Messier 81 and Messier 82 in Ursa Major
- NGC 253, the Sculptor Galaxy
- The Large and Small Magellanic Clouds from suitable southern latitudes
These targets are not equally difficult.
A galaxy’s total magnitude does not describe the entire viewing challenge. Light distributed over a large apparent area can produce lower contrast than the same amount of light concentrated into a smaller region.
What Does the Milky Way Look Like Through Binoculars?
From a genuinely dark location, binoculars break parts of the Milky Way into dense star fields, clusters, and dark dust lanes.
Useful regions include Cygnus, Sagittarius, Scorpius, and Carina, depending on season and latitude. Slow scanning reveals changing concentrations of stars rather than one uniform band.
DarkSky International explains that artificial skyglow raises the brightness of the background sky and reduces contrast with faint astronomical objects. This makes diffuse targets and weak star fields harder to observe. DarkSky International: Artificial Light at Night—State of the Science 2024
A dark site is not required for every worthwhile observation. City and suburban observers can still obtain excellent views of the Moon, planets, and bright open clusters.
The important point is to match the target to the sky rather than judging every session by the faintest object on a list.
Can You See Comets and Artificial Satellites?
Comets
A sufficiently bright comet can be an excellent binocular target, but its visibility is highly variable.
Depending on the comet and its activity, binoculars may show:
- A brighter central condensation
- A diffuse surrounding coma
- A short section of tail
- Movement against background stars over successive nights
Comet predictions and brightness estimates can change. Use current information from a reputable observatory, space agency, or established astronomy organization rather than relying on an undated article.
Artificial satellites
Bright artificial satellites can be followed through binoculars, although acquiring a moving target inside a magnified field takes practice.
Locate the satellite with the unaided eye first. Follow its path for several seconds, then raise the binoculars without changing the direction of your gaze.
Do not walk while looking through binoculars.
Meteor showers are generally better observed without magnification because meteors can appear across a large area of sky.
What Do Binocular Specifications Mean?
The two numbers printed on binoculars describe magnification and objective-lens diameter.
For 10x50 binoculars:
- 10x magnification: The object appears ten times larger in angular terms than it does without magnification.
- 50 mm objectives: Each front lens has an effective diameter of approximately 50 millimeters.
Larger objectives can collect more light, but they also increase weight. Higher magnification increases image scale while making hand movement more visible and often narrowing the field.
Nikon’s official optics guidance explains the same trade-offs: higher magnification is more sensitive to shake, while larger objectives improve low-light capability but add size and weight. Nikon: How to Read the Numbers on a Binocular
Common binocular sizes compared
| Size | Exit Pupil | Main Advantage | Main Trade-Off | Practical Role |
|---|---|---|---|---|
| 7x35 | 5.0 mm | Wide and relatively steady | Less image scale | Casual observing |
| 8x42 | 5.25 mm | Portable and versatile | Less objective area than 50 mm | Travel and mixed use |
| 10x50 | 5.0 mm | Strong astronomy balance | Heavier and less steady | Dedicated handheld astronomy |
| 12x50 | 4.17 mm | Greater image scale | Shake becomes prominent | Braced or mounted viewing |
| 15x70 | 4.67 mm | Better reach on faint targets | Heavy and difficult to handhold | Tripod-based observing |
What is exit pupil?
Exit pupil is the diameter of the light beam leaving each eyepiece.
Calculate it by dividing the objective diameter by the magnification:
Exit pupil = objective diameter ÷ magnification
Examples:
- 8x42:
42 ÷ 8 = 5.25 mm - 10x50:
50 ÷ 10 = 5 mm - 15x70:
70 ÷ 15 ≈ 4.67 mm
Exit pupil is useful for comparing configurations, but it is not a complete measure of quality. Coatings, prisms, optical alignment, internal reflections, eye relief, and field sharpness also affect the result.
Does a 10x50 collect much more light than an 8x42?
A 50 mm objective has approximately 42% more geometric area than a 42 mm objective:
50² ÷ 42² ≈ 1.42
The circular-area constant cancels because both objectives are circular.
This does not mean the final image will look exactly 42% brighter. The 10x50 also uses greater magnification, while actual performance depends on optical transmission, coatings, prism quality, contrast, exit pupil, and sky brightness.
The practical conclusions are:
- A 50 mm objective has a meaningful theoretical light-collection advantage.
- The difference is more relevant to faint stars than to the Moon.
- A poorly aligned 10x50 may perform worse than a well-made 8x42.
- Extra optical capacity is useful only when the observer can hold the instrument steadily enough to exploit it.
Which Is Better for Stargazing: 8x42 or 10x50?
Choose an 8x42 for portability, comfort, and a steadier multipurpose view. Choose a 10x50 when astronomy is the main use and the additional size is manageable.
| Consideration | 8x42 | 10x50 |
|---|---|---|
| Portability | Better | Bulkier |
| Handheld steadiness | Better | More sensitive to shake |
| Image scale | Lower | Higher |
| Objective area | Smaller | Larger |
| Field of view | Often wider | Often narrower |
| Daytime versatility | Excellent | Good |
| Dedicated astronomy use | Good | Very good |
| Long-session comfort | Usually better | Depends on weight and grip |
An 8x42 is a sensible choice when:
- You also want to use the binoculars for wildlife, travel, or events.
- You value a compact instrument.
- Your arms tire easily.
- You have difficulty maintaining a steady 10x view.
- Your sessions are usually brief or spontaneous.
A 10x50 is a sensible choice when:
- Astronomy is the primary purpose.
- You want more image scale for Jupiter’s moons and smaller clusters.
- You regularly observe from reasonably dark locations.
- You are willing to sit, brace your arms, or use support.
- The additional weight remains comfortable.
Neither specification guarantees better optical quality. Comfort, alignment, coatings, and mechanical construction matter as much as the numbers printed on the body.
How Can You Judge Whether a Target Suits Your Binoculars?
For this guide, the Binocular Target Fit Score is an editorial planning tool for beginners. It is not a NASA standard, a scientific visibility prediction, or a professional observing scale.
It is designed to help separate three different problems:
- Insufficient contrast
- Insufficient image scale
- Insufficient stability
Step 1: Score three factors
| Score | Brightness and Contrast | Target Scale | Stability |
|---|---|---|---|
| 0 | Target does not stand out from the background | Target is too small for useful detail | View cannot be held steadily |
| 1 | Detectable only under suitable conditions | Partly suited to low magnification | Usable with bracing |
| 2 | Bright and conspicuous | Well suited to a wide binocular field | Steady and comfortable |
Step 2: Apply the limiting-factor rule
A score of zero in any category is a critical limitation.
Do not rely on the total score when one category is zero:
- Brightness = 0: Choose a brighter target, wait for clearer conditions, reduce direct glare, or observe from a darker site.
- Scale = 0: The target is too small for the available magnification; a telescope or different instrument may be required.
- Stability = 0: Sit down, brace your arms, reduce magnification, or use a mount.
A high score in one category cannot compensate for a complete failure in another.
Step 3: Interpret the result
- 5–6 points with no zero: Strong binocular target
- 3–4 points with no zero: Possible, but conditions or technique matter
- Any category scored zero: Critical limiting factor
- 0–2 points overall: Poor match for the current setup
Example: The Pleiades with 8x42 binoculars
- Brightness: 2
- Scale: 2
- Stability: 2
- Result: 6 — strong binocular target
The Pleiades is bright, wide, and easy to observe at low magnification.
Example: Saturn’s rings with handheld 10x50 binoculars
- Brightness: 2
- Scale: 0
- Stability: 1
- Result: critical scale limitation
Saturn is bright, but the ring system is too small for an ordinary 10x view. A tripod may reduce shake, but it cannot fully solve the lack of image scale.
Example: Andromeda from a brightly illuminated parking area
- Brightness: 0
- Scale: 2
- Stability: 2
- Result: critical contrast limitation
The galaxy is large enough for binoculars, and the instrument may be steady, but the surroundings remove too much contrast. Changing the observing location is more useful than adding a small amount of magnification.
What the score cannot do
The Binocular Target Fit Score does not:
- Guarantee that an object will be visible
- Replace a current star chart
- Account precisely for target altitude
- Predict weather or transparency
- Compare specific brands or models
- Calculate limiting magnitude
- Replace experienced visual judgment
It is a troubleshooting framework, not a visibility promise.
How Different Is an Urban View From a Dark-Sky View?
Consider the same observer using the same 10x50 binoculars in two locations.
Suburban driveway
A streetlight is visible, the sky background looks gray, and only prominent constellation stars stand out.
The observer can still see:
- Lunar craters and maria
- Jupiter and some of its Galilean moons
- The Pleiades
- The Hyades
- The central glow of the Orion Nebula
Andromeda may be limited to a small haze around its core.
Rural dark location
The Milky Way is visible without magnification, no direct lights reach the observer’s eyes, and the air is clear.
Through the same binoculars:
- Open clusters contain more visible stars.
- The Orion Nebula appears broader.
- Andromeda looks more elongated.
- Milky Way regions become densely populated.
- Fainter clusters and diffuse targets are easier to recognize.
This is a realistic comparison, not a controlled experiment. Weather, humidity, altitude, eyesight, and local conditions prevent a guaranteed outcome.
The meaningful lesson is that the observer, the sky, and the instrument form one system.
How Should You Plan Your First Binocular Session?
A focused 30-minute session with three planned targets is often more productive than aimless scanning.
Before going outside
Choose three targets
Use this simple mix:
- One bright object: The Moon
- One wide stellar target: The Pleiades or Hyades
- One changing target: Jupiter and its moons
Confirm that each target is visible during your planned observing time. Target availability changes with season, latitude, and time of night.
Check practical conditions
Look for:
- Clear or mostly clear weather
- Minimal smoke, fog, or haze
- A safe, level observing location
- An open view in the required direction
- No bright light shining directly into your eyes
- Clothing suitable for the temperature
- Permission to remain at the site after dark
Adjust the binoculars in daylight
Before the session:
- Set the distance between the barrels so the two views merge into one circle.
- Follow the manufacturer’s procedure for setting the diopter.
- Confirm that both eyes can reach sharp focus.
- Attach the strap correctly.
- Check for condensation or visible damage.
Learning the controls before dark prevents a focusing problem from being mistaken for a poor night sky.
At the observing site
Locate the target without magnification
Find the target or its surrounding constellation with your unaided eyes first.
Keep looking in the same direction as you raise the binoculars. Make small corrections only after the binoculars reach your eyes.
Stabilize before increasing power
Try these methods in order:
- Sit in a chair.
- Hold your elbows against your chest.
- Rest your elbows on your knees or chair arms.
- Lean against a stable support.
- Use a monopod, tripod adapter, or image-stabilized binocular.
A steadier 8x image can reveal more usable detail than an unstable 12x image.
Scan slowly
Move in short, overlapping sections. Pause whenever the star pattern changes.
For a faint target, use averted vision by looking slightly beside it rather than directly at it. This can improve detection of weak light, although it does not create detail that the optics cannot resolve.
Binocular visibility log
Use the log to identify patterns instead of relying on memory.
| Date and Time | Location | Moon Phase | Direct Light Present? | Binocular Size | Target | Approximate Direction or Altitude | Stability Method | Result | Notes |
|---|---|---|---|---|---|---|---|---|---|
| Clear / Uncertain / Not seen | |||||||||
| Clear / Uncertain / Not seen | |||||||||
| Clear / Uncertain / Not seen |
A target that repeatedly fails from one location but appears elsewhere points to an environmental limitation. A view that remains doubled everywhere suggests an equipment problem.
Which Mistakes Most Often Reduce the View?
Buying excessive magnification
Higher magnification enlarges the target but also amplifies movement and narrows the field.
A large number on the box is not automatically an improvement.
Observing next to a bright light
Porch lights, streetlights, and phone screens reduce contrast and interfere with night adaptation.
Blocking direct glare can help even when you cannot travel far from a city.
Looking through a closed window
Window glass may create reflections, distortion, double images, and reduced contrast. Temperature differences between indoor and outdoor air can introduce further blur.
Observing outdoors is more reliable.
Expecting an astrophotograph
Nebulae and galaxies usually appear pale or gray through binoculars. Their value lies in seeing the real light directly, not in matching a long-exposure image.
Starting with the most difficult object
Do not use a faint galaxy as the first test of unfamiliar binoculars.
Begin with the Moon, Jupiter, or the Pleiades. Once focus and alignment are confirmed, move to lower-contrast targets.
Ignoring the diopter
Many binoculars have both a central focus control and a separate adjustment for one eyepiece.
If the diopter is incorrect, one eye may remain blurred even when the other is sharp.
How Do You Troubleshoot a Poor Binocular View?
| Problem | Likely Cause | Practical Response |
|---|---|---|
| Image shakes constantly | High magnification, fatigue, or unsupported posture | Sit, brace your elbows, or use a mount |
| One eye is sharp and the other blurred | Incorrect diopter setting | Repeat the individual-eye focusing procedure |
| Two images will not merge | Incorrect barrel spacing or optical misalignment | Adjust spacing; stop using if double vision remains |
| Stars look like short lines | Hand movement or poor edge performance | Stabilize and move the target to the center |
| Faint target cannot be found | Wrong location, skyglow, haze, or moonlight | Confirm the position and try a clearer session |
| Image becomes cloudy | Dew or condensation | Move to a dry place and allow the optics to dry naturally |
| Eyeglasses block part of the field | Eye cups or eye relief mismatch | Lower adjustable eye cups if appropriate |
| Bright arcs cross the view | Off-axis Moon or artificial light | Reposition and shield the objectives from stray light |
| Focus shifts after releasing the wheel | Mechanical play | Check the manual or contact the manufacturer |
| Headache or eye strain develops | Misalignment, spacing error, or prolonged effort | Stop observing and inspect the setup |
Persistent double vision may indicate a collimation problem, meaning the two optical paths are not aligned.
Do not force your eyes to compensate for a defective instrument.
Are Binoculars Better Than a Telescope for Beginners?
Binoculars are usually easier to begin with, while telescopes are better for close detail.
| Factor | Binoculars | Beginner Telescope |
|---|---|---|
| Setup | Minimal | Usually requires more preparation |
| Field of view | Wide | Usually narrower |
| Viewing method | Both eyes | Usually one eye |
| Portability | Generally high | Varies |
| Learning constellations | Excellent | Less convenient |
| Open clusters | Excellent | Some clusters may not fit |
| Moon | Full-disk terrain view | More detailed close view |
| Jupiter’s moons | Visible | Visible with better planetary detail |
| Saturn’s rings | Usually unresolved | Visible in a suitable telescope |
| Large nebulae and galaxies | Good under suitable skies | More reach with adequate aperture |
| Small deep-sky targets | Limited | Better suited |
| Daytime use | Versatile | Usually limited |
Start with binoculars when your goal is to:
- Learn the sky
- Travel lightly
- Observe without complicated setup
- Scan star fields
- See large clusters in context
- Use one instrument during both day and night
Consider adding a telescope when your main goal becomes:
- Clearly resolving Saturn’s rings
- Seeing Jupiter’s cloud bands
- Examining smaller lunar features
- Separating close double stars
- Studying compact deep-sky targets
Binoculars remain useful after a telescope purchase because they make finding and orienting targets easier.
What Should You Check Before Buying Binoculars?
Use binoculars you already own before assuming that you need a specialized astronomy model. Any pair that focuses correctly and produces one comfortable image can provide useful first observations.
Before purchasing another pair, check:
- Can the two images merge comfortably?
- Can both eyes reach sharp focus?
- Is the weight comfortable for several minutes?
- Is the full field visible while wearing glasses?
- Is the center of the field sharp?
- Does the focus mechanism move smoothly?
- Is there persistent glare or internal reflection?
- Can the binoculars accept a tripod adapter?
- Are specifications published by the manufacturer?
- Is the return policy clear if alignment is defective?
Do not choose solely by magnification.
A comfortable, aligned, frequently used binocular is more valuable than a powerful instrument that stays indoors because it is tiring or unstable.
What Is the Most Important Binocular Safety Rule?
Never point ordinary binoculars at the Sun.
Viewing the Sun through binoculars without properly fitted solar filters can cause immediate and severe eye injury. Concentrated sunlight may also damage optical components.
NASA states that optical devices require special-purpose solar filters secured over the front, Sun-facing objectives. Wearing eclipse glasses while looking through binoculars is not safe because concentrated sunlight can damage the glasses and the eyes. NASA advises seeking expert guidance before using solar filters with binoculars, telescopes, or cameras. NASA: Eclipse Viewing Safety
Safe rules to follow
- Never aim binoculars at the Sun unless both objectives have purpose-built, securely mounted solar filters.
- Have the complete optical setup checked by a qualified expert before use.
- Never place eclipse glasses between your eyes and binocular eyepieces.
- Never tape ordinary eclipse glasses over binocular lenses.
- Never use smoked glass, exposed film, CDs, sunglasses, or homemade filters.
- Never use ordinary binoculars to project an image of the Sun.
- Supervise children whenever binoculars are used outdoors during daylight.
Safer indirect viewing
When direct solar-viewing equipment is unavailable, use a method that does not involve magnifying optics.
Examples include:
- A pinhole card projector
- A cardboard-box pinhole projector
- The natural projections formed by small gaps between tree leaves
Keep the Sun behind you and view only the projected image. Never look through the pinhole toward the Sun.
The Practical Bottom Line
Binocular stargazing works best when the target matches the instrument.
The Moon, bright open clusters, Jupiter’s Galilean moons, and rich star fields provide the most dependable early successes. The Orion Nebula and Andromeda Galaxy are realistic next steps when the sky is clear and direct glare is controlled.
Binoculars are not intended to show close planetary detail or reproduce processed observatory images. Their advantages are immediacy, portability, wide fields, and the ability to explore the sky naturally with both eyes.
Start with the situation you have
- First night: Observe the Moon, the Pleiades, and Jupiter’s moons.
- Urban location: Concentrate on the Moon, planets, and bright open clusters.
- Dark location: Add Andromeda, the Orion Nebula, and Milky Way fields.
- Unsteady hands: Use lower magnification, sit down, or add support.
- Main goal is planetary detail: Keep the binoculars for navigation and consider a small telescope.
- Already own binoculars: Use them before buying another pair.
The most useful upgrade is not always a larger instrument. It may be a chair, a darker corner of the yard, better focusing, a clearer night, or a target better suited to the equipment already in your hands.
Frequently Asked Questions
Can 10x50 binoculars show Saturn’s rings?
Usually not as a clearly separated ring system. Saturn may look slightly elongated, but a small telescope is a more reliable instrument for resolving its rings.
Are 8x42 binoculars powerful enough for astronomy?
Yes. An 8x42 can show lunar terrain, open star clusters, rich star fields, and some or all of Jupiter’s Galilean moons when their positions and viewing conditions are favorable.
Can you see a galaxy through binoculars from a city?
The bright central region of the Andromeda Galaxy may remain visible from some urban or suburban locations when the air is transparent and direct glare is controlled. Most other galaxies require darker skies.
Do binoculars need a tripod for stargazing?
Most 7x-to-10x binoculars can be used handheld, especially while seated and braced. Higher magnifications and larger instruments benefit increasingly from a tripod, monopod, or image stabilization.
Why can I see more stars but little detail on planets?
Binoculars gather enough light to reveal stars that are too faint for the unaided eye. Planetary features are extremely small in apparent angular size and require greater magnification and resolving power.
Can binoculars be used through a window?
Bright targets may remain visible, but window glass can introduce reflections, distortion, and double images. Observing outdoors normally produces a cleaner and more stable view.
Sources
The following sources were reviewed for the factual and safety claims used in this guide.
NASA Science — Binoculars: A Great First Telescope
Guidance on practical beginner binocular sizes, lunar detail, open clusters, Andromeda, Orion, Jupiter’s moons, Saturn’s rings, field of view, and mounting considerations.NASA Science — Moon Viewing Tips
Guidance on lunar maria, highlands, earthshine, the terminator, lunar phases, and binocular observation.NASA Science — From Galileo to Clipper: Exploring Jupiter’s Moons
Guidance on observing and tracking Io, Europa, Ganymede, and Callisto with modest binoculars.NASA Science — Spot the King of Planets: Observe Jupiter
Additional guidance on the visibility and changing positions of the Galilean moons.NASA Science — Catch Andromeda Rising
Description of Andromeda’s binocular appearance and the effects of skyglow, cloud, smoke, and haze.NASA Science — Hubble’s Messier Catalog
Information on Messier targets, binocular observing, Hubble wavelengths, and the use of color in astronomical imagery.NASA Science — Wavelengths
Explanation of visible, ultraviolet, and infrared observations and how multiwavelength data are presented.DarkSky International — Artificial Light at Night: State of the Science 2024
Scientific review of skyglow and its effect on astronomical contrast.Nikon USA — How to Read the Numbers on a Binocular
Manufacturer documentation covering magnification, objective diameter, exit pupil, low-light capability, field of view, weight, and hand shake.NASA Science — Eclipse Viewing Safety
Safety requirements for viewing the Sun with binoculars, telescopes, cameras, eclipse glasses, and purpose-built front-mounted solar filters.
Editorial note: Documented astronomical and optical claims are attributed to the relevant sources. The Binocular Target Fit Score, observing log, and Jupiter tracker are original educational tools created for this guide; they are not professional visibility standards. No individual binocular model was claimed to have been tested, and no scientific reviewer is credited without a documented review.
More from Night Sky Guides
What Is the Best Time of Night for Stargazing?
The best time of night for stargazing is not a fixed hour such as midnight. It is the clearest, darkest period when the Moon causes minimal interference and your chosen target is high enough above the horizon. This practical guide explains how astronomical twilight, moonrise and moonset, target altitude, cloud cover, transparency, atmospheric seeing, light pollution, season, and latitude affect observing conditions. It also introduces the CosmoBasics Five-Filter Night Window, a straightforward planning framework for combining darkness, Moon conditions, target position, weather, and safe site access. Readers can use the included worked example, decision guidance, checklist, and fill-in planning table to calculate a realistic observing window for a specific night. Separate recommendations cover the Moon, planets, the Milky Way, galaxies, nebulae, meteor showers, beginners, urban observers, families, and astrophotographers, with safety guidance for observing Mercury and Venus near the Sun’s direction.
How to Read a Star Chart
Learning how to read a star chart becomes much easier once you understand how the flat map relates to the curved sky above you. This practical beginner’s guide explains how to select the right chart, set the correct location and observing time, align the chart with the horizon, and identify reliable starting points using bright stars and recognizable patterns. It introduces the Three-Anchor Verification Method, which checks direction, brightness, and nearby-star geometry before an identification is accepted. Readers will also learn how magnitude symbols, celestial coordinates, angular distances, planispheres, binocular charts, and telescope finder charts work. A five-minute field exercise, an Orion example, troubleshooting guidance, and a first-night checklist turn the explanations into a repeatable observing process. The guide also addresses light pollution, chart projection distortion, mirrored telescope views, moving planets, and essential solar-viewing safety. It is designed to help beginners move confidently from one confirmed landmark to their first successful star hop.
What Can You See in the Night Sky Without a Telescope?
You do not need a telescope to begin exploring the night sky. This practical guide explains which objects can be seen with unaided eyes, from the Moon, Mercury, Venus, Mars, Jupiter, and Saturn to bright stars, constellations, star clusters, meteors, and artificial satellites. It also describes the darker conditions needed to find the Milky Way, the Andromeda Galaxy, the Orion Nebula, and the Magellanic Clouds. Readers will learn what these objects realistically look like, why astronomical photographs show more color and detail than human vision, and how light pollution, moonlight, altitude, haze, season, and latitude affect visibility. The guide includes a Naked-Eye Visibility Ladder, a realistic 30-minute observing session, location-based target recommendations, a practical checklist, and troubleshooting advice. It also clearly separates dependable beginner targets from advanced challenges while providing essential safety guidance for solar and daytime observing.
Explore More Topics
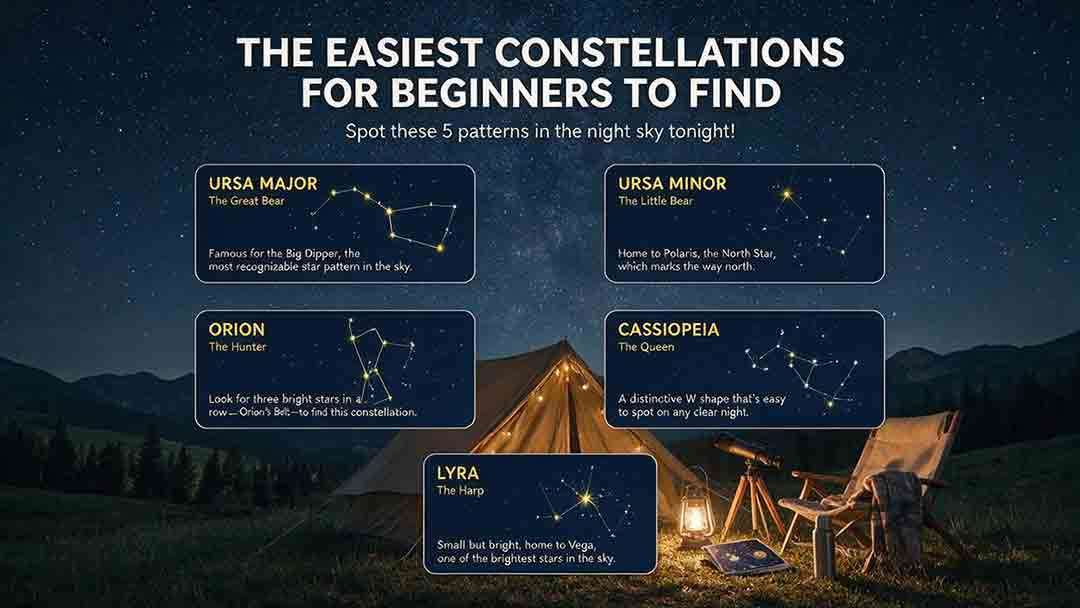
The Easiest Constellations for Beginners to Find
This beginner-friendly guide explains how to find Orion, Ursa Major through the Big Dipper, Cassiopeia, Cygnus, and Scorpius using clear naked-eye observing steps. It compares each pattern through an original Beginner Visibility Score and shows readers how to choose a first target based on season, latitude, light pollution, moonlight, and horizon visibility. The guide also clarifies the difference between constellations and asterisms, explains how the Big Dipper can point toward Polaris, and provides dedicated recommendations for Southern Hemisphere observers, including Crux. Practical tools include the Anchor-Pattern Method, the Three-Check Rule, a 10-minute observing session, city-sky guidance, troubleshooting advice, an equipment comparison, and a safety checklist. Authoritative references from the International Astronomical Union, NASA, NSF NOIRLab, and the European Southern Observatory support the key astronomical facts.
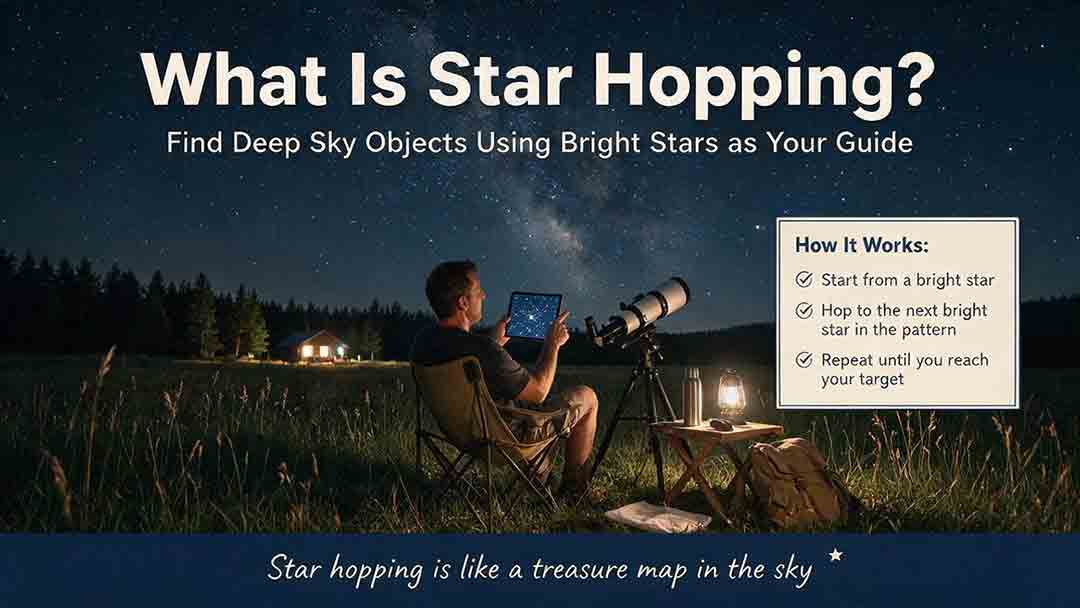
What Is Star Hopping and How Do You Do It?
Star hopping is a practical way to navigate the night sky by moving from a bright, recognizable star to a fainter target through a sequence of visible star patterns. This guide explains how beginners can plan a reliable route, align a finder, match a star chart to a telescope’s field of view, and recognize rotated or mirror-reversed images. It introduces the Anchor–Path–Field–Confirm method, provides a step-by-step observing process, and shows how field-of-view estimates can help determine a practical chart scale. A worked example demonstrates how to locate Messier 13 using the Keystone of Hercules, while the troubleshooting table addresses common problems such as finder misalignment, excessive magnification, incorrect chart orientation, and targets that remain invisible despite correct pointing. The included field checklist gives binocular and telescope users a repeatable method for planning and completing future star hops.
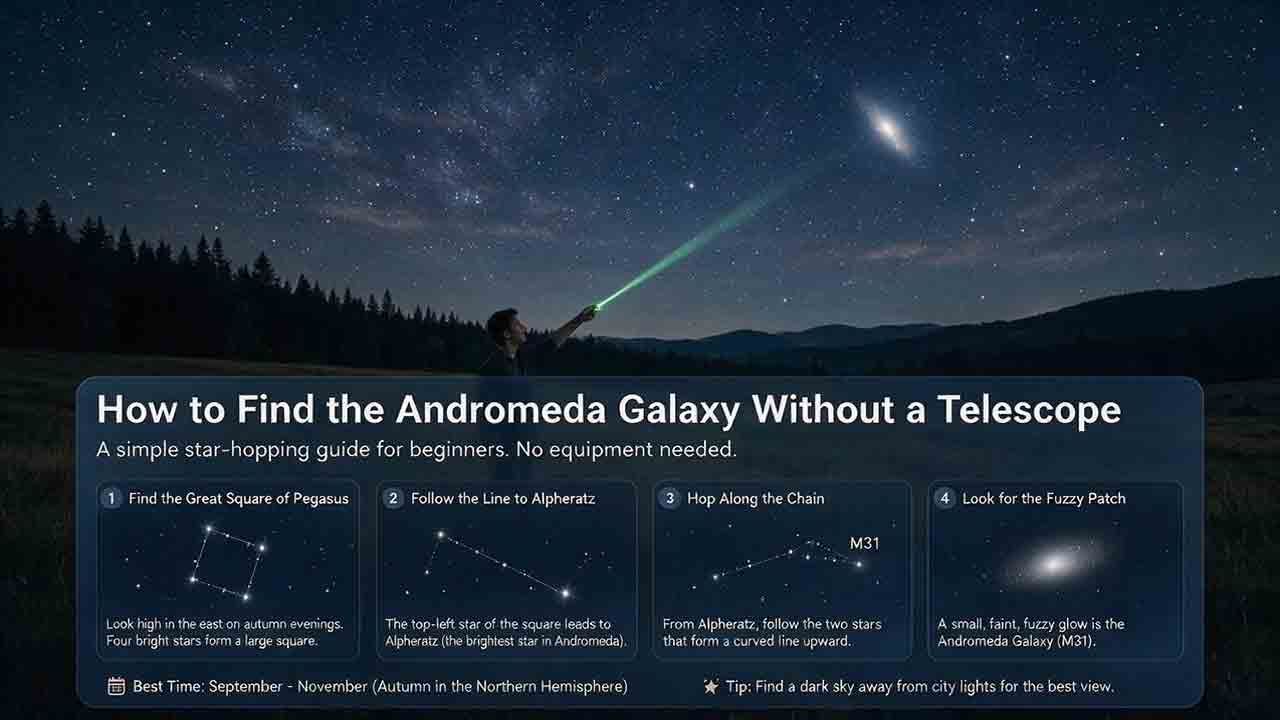
How to Find the Andromeda Galaxy Without a Telescope
Finding the Andromeda Galaxy without a telescope is possible when you know which stars to use as landmarks. This practical guide explains how to start at the Great Square of Pegasus, identify Alpheratz, follow the Andromeda star chain to Mirach, and use two nearly equal short hops to reach Mu Andromedae and M31. It also explains what the galaxy realistically looks like to the naked eye, why dark skies and averted vision matter, and how binoculars can help confirm the target. Beginners can use the six-point observing checklist, three-night practice method, troubleshooting guidance, and reusable observation log to improve each attempt. The guide distinguishes calculated angular distances from practical field estimates and clearly explains its source-checking process without claiming personal testing. It is designed primarily for Northern Hemisphere observers while also addressing visibility limitations from Southern Hemisphere locations.