What to Bring on a Stargazing Trip

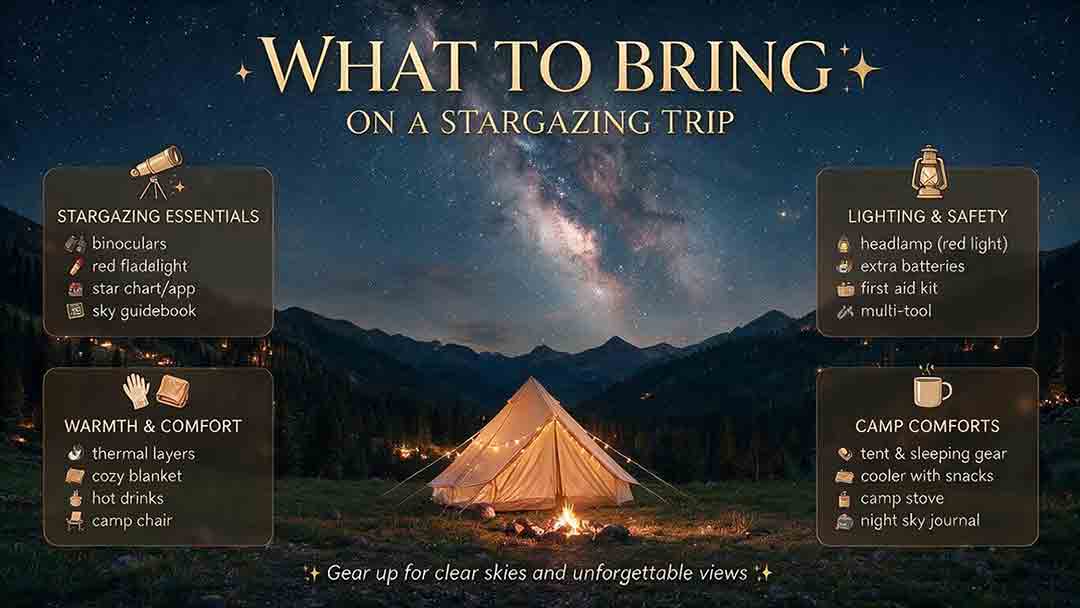
Bring a dim red-light headlamp, warm layers, water, a chair or blanket, a star chart, and only the observing equipment you can set up safely in the dark. Add backup power, dew protection, navigation, and emergency supplies for remote trips. The right packing list depends on whether you are observing from a car, hiking in, staying overnight, or taking photographs.
Key Takeaways
- Safety and access come before astronomy gear. Confirm legal access, weather, road conditions, parking, and an exit plan before leaving.
- Protect night vision with dim red light. Carry a primary red-light source and a separate backup rather than relying only on a phone.
- Pack for nighttime temperatures, not daytime forecasts. Layers, closed-toe footwear, water, and a comfortable seat often matter more than an extra accessory.
- Match the equipment to the trip. Binoculars suit hike-in sessions; larger telescopes, batteries, and dew-control systems are usually better for car-access sites.
- Use a written checklist. Small missing items—an adapter, charged battery, lens cap, or tripod plate—can end a session early.
This guide provides a practical packing system, trip-type comparison, power calculation, dark-sky etiquette checklist, and troubleshooting guide for visual observing and astrophotography.
This guide is based on official astronomy, park, and outdoor-safety guidance together with practical packing criteria. It does not claim hands-on testing of specific products.
What Are the Essentials for a Stargazing Trip?
The essential kit should help you see the sky, stay comfortable, navigate safely, and leave the site without losing or damaging equipment.
| Priority | What to bring | Why it matters |
|---|---|---|
| Light | Dim red-light headlamp or flashlight | Preserves more night vision than bright white light while helping you navigate |
| Backup light | Second independent flashlight with fresh batteries | Provides a fallback if the primary light fails |
| Clothing | Layered clothing, hat, gloves when needed, closed-toe shoes | Nighttime temperatures and wind can feel much colder than daytime conditions |
| Hydration | Water in a secure bottle | Remote observing sites may have no services or running water |
| Comfort | Reclining chair, camp chair, blanket, or ground pad | Reduces neck strain and makes long sessions more enjoyable |
| Navigation | Offline map, written directions, or downloaded park map | Mobile service may be weak or unavailable |
| Sky guide | Planisphere, printed chart, or app with a dim red mode | Helps identify constellations and plan targets |
| Optics | Eyes, binoculars, or a telescope appropriate to the trip | The simplest useful instrument is often the easiest to use |
| Weather protection | Dew shield, lens caps, microfiber cloth for non-optical surfaces, protective cases | Protects equipment from moisture and dirt |
| Safety | First-aid supplies, emergency contact plan, and weather access | Supports a safer response to minor problems or changing conditions |
| Site care | Trash bag and required food-storage supplies | Helps follow site rules and leave the area clean |
The U.S. National Park Service commonly recommends red light, warm layers, water, a chair or blanket, and a star chart for public stargazing programs. Examples include guidance from Acadia National Park and Voyageurs National Park.
How Should You Pack for Different Types of Stargazing Trips?
The best list changes with access, distance, and the observing goal.
| Trip type | Practical equipment level | Highest priorities | Items to limit |
|---|---|---|---|
| Backyard or nearby park | Naked eye, binoculars, or small telescope | Red light, chair, chart, warm layer | Large batteries and complex cases |
| Car-access dark site | Binoculars, full visual telescope, or imaging rig | Power, dew control, table, chair, backup parts | Equipment that blocks vehicle access or creates trip hazards |
| Short hike-in site | Naked eye, binoculars, compact tripod | Low weight, secure footwear, water, navigation | Large mounts, counterweights, fragile cases |
| Overnight campground | Visual telescope or portable imaging setup | Legal campsite, food storage, shelter, warm sleep system | Bright campsite lighting near observers |
| Public star party | Small personal optics or no telescope | Red light, etiquette, chair, questions for volunteers | White lights, vehicle headlights, crowded personal setups |
| Milky Way photography trip | Camera, wide-angle lens, sturdy tripod | Batteries, memory cards, focus aid, weather protection | Unfamiliar equipment and unnecessary lenses |
For choosing a site by darkness and local skyglow, see What Is the Bortle Scale? A Guide to Light Pollution.
How Can the NIGHT Packing Framework Prevent Forgotten Gear?
Use the NIGHT framework to check the trip in five parts. NIGHT is an original packing and planning method designed for astronomy outings.
N — Navigation, Notice, and Necessary Permission
Confirm where you are allowed to park, walk, observe, and remain after dark.
Check:
- Opening and closing hours
- Parking restrictions
- Entry fees or reservations
- Camping and sleeping rules
- Trail or road closures
- Private-property boundaries
- Fire restrictions
- Pet rules
- Restroom and water availability
- Mobile-service limitations
NASA recommends scouting an unfamiliar observing location in daylight, checking for road hazards and uneven ground, and confirming that nighttime access is allowed. See How to Find Good Places to Stargaze.
Download an offline map before departure. Share the location and expected return time with someone who is not on the trip, especially when the site is remote.
I — Insulation, Hydration, and Insect Protection
Dress for the temperature expected several hours after sunset. A clear sky can allow rapid ground cooling, and a stationary observer often feels colder than someone hiking.
A practical clothing system includes:
- Moisture-managing base layer
- Insulating middle layer
- Wind-resistant outer layer
- Hat and gloves when conditions justify them
- Closed-toe shoes with suitable traction
- Spare socks for damp locations
Bring enough water for the planned session and travel time. Pack food that is easy to handle without creating crumbs, spills, or bright packaging around equipment.
Use insect protection appropriate to the location and follow label directions. Avoid spraying repellents near optical coatings, camera equipment, or other people’s telescopes.
G — Gear Matched to the Goal
Choose one primary observing goal and pack only what supports it.
| Main goal | Core gear | Useful additions |
|---|---|---|
| Learn constellations | Planisphere, red light, chair | Binoculars, printed target list |
| Watch a meteor shower | Reclining chair or pad, warm layers, wide sky view | Blanket, thermos, written shower timing |
| Observe the Moon and planets | Telescope, stable mount, low- and medium-power eyepieces | Higher-power eyepiece, observing chair |
| Observe galaxies and nebulae | Telescope or binoculars, dark site, low-power eyepiece | Finder chart, dew protection |
| Photograph the Milky Way | Camera, lens, tripod, remote release or timer | Spare batteries, lens heater, focus aid |
| Deep-sky imaging | Tracking mount, camera, optics, power, cables, control device | Dew heaters, spare storage, calibration plan |
Do not pack every eyepiece or lens you own unless the session has a reason for each one. Fewer clearly labeled accessories are easier to manage in the dark.
For weather-dependent target planning, see How Clouds, Humidity, and Air Turbulence Affect Stargazing.
H — Handle Darkness Safely
Use dim red light for normal movement and equipment adjustments. Keep a white light available for emergencies, but do not use it casually around dark-adapted observers.
The National Park Service notes that dark adaptation commonly takes about 20–30 minutes and that white lights from phones, flashlights, and vehicle headlights can disrupt it. See the stargazing guidance from Yosemite National Park.
Before dark:
- Inspect the ground for holes, rocks, roots, cactus, steep edges, and drainage channels.
- Position the telescope away from traffic routes.
- Mark tripod legs with dim reflective or tactile markers if appropriate.
- Route cables close to the mount rather than across walking paths.
- Decide where cases, chairs, and drinks will remain.
- Learn how to leave the site without relying on mobile reception.
A phone is useful for navigation and sky charts, but it should not be the only light source, map, clock, or emergency tool.
T — Test Power, Parts, and the Return Plan
Charge all devices before leaving and test the complete system at home.
Verify:
- Battery state
- Correct cables and adapters
- Memory cards and storage space
- Tripod plate
- Counterweights
- Finder alignment
- Mount controls
- Camera connection
- Dew-heater function
- Firmware or app compatibility
- Vehicle fuel or charging level
- Route home and expected arrival time
Avoid performing optional firmware updates immediately before a trip. A failed update or changed interface can make familiar equipment unusable at the site.
What Astronomy Equipment Should Beginners Bring?
Beginners usually need less equipment than expected.
For Naked-Eye Stargazing
Bring:
- Reclining chair or ground pad
- Red light
- Star chart or planisphere
- Warm layers
- Water
- Short target list
This setup is excellent for meteor showers, constellations, satellite passes, and learning sky directions.
For Binocular Stargazing
Add:
- Binoculars with neck strap or harness
- Lens caps
- Cleaning blower
- Optional tripod adapter for heavier binoculars
Binoculars are particularly useful for large star clusters, the Milky Way, lunar views, and scanning unfamiliar areas.
For Telescope Stargazing
Add:
- Optical tube
- Mount and tripod or Dobsonian base
- Finder or red-dot sight
- One low-power eyepiece
- One medium-power eyepiece
- Collimation tool if the telescope requires it
- Dew shield or heater when conditions justify it
- Observing chair
- Small table or accessory tray
A low-power eyepiece should be the first eyepiece used because it provides a wider field and makes targets easier to locate.
Choose a portable setup that matches your observing goals, travel constraints, and site conditions.
What Should Astrophotographers Bring?
Astrophotography adds power, storage, cables, and time-sensitive setup steps.
Camera and Optics
- Camera body
- Intended lens or telescope
- Sturdy tripod or tracking mount
- Lens hood or dew shield
- Remote release, intervalometer, or verified timer function
- Correct adapters, spacers, and field accessories
- Lens and body caps
Power and Data
- Fully charged batteries
- Spare batteries
- External power source when required
- Correct charging and data cables
- Empty, tested memory cards
- Backup storage for longer trips
- Offline copy of mount or camera instructions
Imaging Support
- Headlamp with dim red mode
- Lens heater or dew heater
- Focusing aid
- Bubble level if useful for the setup
- Cable ties or reusable straps
- Small tool kit approved for the equipment
- Notebook or digital session log
For Milky Way photography, plan around dark skies, clear weather, stable support, and an appropriate camera setup.
How Much Battery Capacity Do You Need?
Estimate energy before the trip rather than carrying an arbitrary battery.
The basic planning formula is:
Energy required in watt-hours = device power in watts × operating time in hours
Example Power Budget
Assume a small imaging setup uses:
- Tracking mount: 6 W
- Camera or control device: 5 W
- Dew heater: 8 W
Combined power:
6 W + 5 W + 8 W = 19 W
For a four-hour session:
19 W × 4 hours = 76 Wh
A 76 Wh estimate is the theoretical operating energy. Real systems may need more because of cold temperatures, conversion losses, battery age, startup loads, heater cycling, and reserve capacity.
Use the actual specifications for each device and the battery manufacturer’s guidance. Do not connect equipment to a voltage or connector that the manufacturer does not support.
Power-Packing Checklist
- Calculate expected watt-hours
- Add a reasonable reserve
- Test the complete system before departure
- Protect batteries from extreme cold or heat
- Keep connectors dry and strain-free
- Separate spare batteries from loose conductive objects
- Follow airline and transport rules when applicable
What Comfort Items Make the Biggest Difference?
Comfort is not a luxury when it determines how long you can observe safely and attentively.
Chair or Reclining Support
A reclining chair is useful for meteor showers and naked-eye viewing. An adjustable observing chair helps maintain a steady eye position at a telescope.
Small Table
A stable table keeps charts, eyepieces, and accessories off the ground. Avoid lightweight tables that can tip in wind or collapse under equipment.
Warm Drink and Snacks
A warm drink can improve comfort, but use a sealed container placed away from optics, electronics, and walking paths. Follow local rules for food storage, especially in wildlife areas.
Blanket or Ground Pad
A blanket or insulated pad is useful when lying back to observe. Check the area first for moisture, insects, sharp plants, rocks, and protected vegetation.
What Should Be in a Stargazing Safety Kit?
A safety kit should match the location rather than imitate a full expedition pack.
Consider:
- Basic first-aid supplies
- Backup light
- Whistle
- Weather access
- Offline map
- Emergency contact information
- Warm emergency layer
- Water and extra snack
- Required medications
- Vehicle key stored securely
- Portable charger
- Reflective item for a roadside emergency
- Trash bag
Remote or hike-in trips may require additional equipment based on terrain, wildlife, temperature, and local agency guidance.
What Should You Do About Thunderstorms?
Do not begin or continue an outdoor stargazing session when thunderstorms threaten the area.
The U.S. National Weather Service states that there is no safe place outside during a thunderstorm. If thunder is heard, move to a substantial enclosed building or a hard-topped vehicle and wait at least 30 minutes after the last thunder before returning outside. See NWS Lightning Safety.
A tent, open shelter, isolated tree, or telescope canopy is not a safe substitute for a building or enclosed vehicle.
How Should You Prepare the Site Before Sunset?
Arrive early enough to inspect and organize the location in daylight.
Step 1: Confirm the Exact Observing Area
Check that the ground is stable, legal to use, and safely separated from vehicle traffic. Avoid setting up in a roadway, emergency access lane, trail, or fragile vegetation.
Step 2: Identify Hazards
Look for:
- Drop-offs
- Roots and rocks
- Cactus or thorny plants
- Soft sand or mud
- Drainage channels
- Wildlife signs
- Overhead branches
- Nearby sprinklers
- Unshielded lights
- Moving vehicles
Step 3: Set the Equipment Layout
Create separate areas for:
- Telescope or camera
- Chair
- Accessory case
- Power
- Drinks and food
- Empty packaging and trash
Keep every cable and tripod leg visible under dim red light.
Step 4: Prepare the Vehicle
Park only where allowed. Orient the vehicle so leaving later does not require headlights to sweep across a group of observers when possible.
Do not disable legally required safety lighting or operate the vehicle in an unsafe way. At a public star party, follow organizer instructions.
Step 5: Test the Exit Route
Walk the path back to the vehicle or campsite before full darkness. Confirm that gates, restrooms, trail junctions, and landmarks can be identified later.
What Is Good Dark-Sky Etiquette?
Dark-sky etiquette protects other people’s vision, the site, wildlife, and access.
- Use the dimmest practical red light.
- Point lights toward the ground.
- Warn nearby observers before using unavoidable white light.
- Keep phone and camera screens dim and shielded.
- Avoid unnecessary noise.
- Do not touch another person’s telescope without permission.
- Keep children and pets supervised according to site rules.
- Do not walk between a camera and its target.
- Pack out all trash and food waste.
- Follow campground, fire, drone, photography, and closing-time rules.
- Do not assume sleeping in a vehicle or beside a telescope is permitted.
Yosemite National Park advises visitors to reduce noise, keep food controlled, pack out trash, and use only authorized camping locations. See Yosemite Stargazing.
Should You Bring a Laser Pointer?
A laser pointer is not essential equipment for a personal stargazing trip.
Some organized programs use trained presenters and approved procedures, but public lands, star parties, and jurisdictions may restrict laser use. Never aim a laser toward aircraft, vehicles, people, animals, buildings, or an unknown object in the sky.
For most beginners, a printed chart, app, or careful hand pointing is safer and sufficient.
What Should You Leave at Home?
More gear does not always create a better trip.
Consider leaving behind:
- Bright lanterns without a dim red mode
- Unfamiliar equipment that has not been tested
- Every eyepiece or lens in the collection
- Loose papers without clips or covers
- Open cups near electronics
- Large equipment that cannot be transported or assembled safely
- Optional accessories without the required adapters
- Speakers or bright decorative lights
- A complex imaging setup when the weather window is short
- Equipment that violates site rules
A smaller setup that can be assembled confidently is usually more productive than a larger system that consumes the entire dark period.
A Practical Packing List by Trip Length
One-Hour Local Session
- Red light and backup
- Warm layer
- Water
- Chair
- Binoculars or compact telescope
- Star chart
- Phone with offline location
- Lens caps
- Short target list
Half-Night Car-Access Session
- All local-session items
- Additional clothing
- Food
- Larger telescope or imaging gear
- Dew control
- Power and spare batteries
- Table
- First-aid kit
- Tool and cable pouch
- Trash bag
- Written shutdown checklist
Overnight Campground Session
- All half-night items
- Valid campsite or permit
- Shelter and sleep system
- Approved food storage
- Additional water
- Morning clothing
- Condensation-management plan
- Secure storage for equipment
- Daytime charging plan
- Local wildlife and fire information
Short Hike-In Session
- Red headlamp and backup
- Offline map
- Water
- Warm and weather-resistant layers
- First-aid essentials
- Binoculars or compact camera setup
- Lightweight chair or pad if practical
- Whistle
- Emergency contact plan
- Minimal target list
Do not carry a telescope or tripod that interferes with balance, visibility, or safe movement on the trail.
How Can You Troubleshoot Common Trip Problems?
| Problem | Likely cause | Best response |
|---|---|---|
| Phone is too bright | Screen settings or app has no red mode | Dim it fully, shield it, or use a printed chart |
| Primary light fails | Battery or switch problem | Use the independent backup light |
| Optics gradually fog | Dew | Activate dew control and inspect exposed surfaces |
| Mount will not power on | Battery, cable, polarity, or connection issue | Stop, inspect against the manual, and avoid improvised wiring |
| Tripod is unstable | Soft ground, wind, loose hardware | Move to firm ground, shorten legs, and tighten approved controls |
| Target cannot be found | Finder misalignment or wrong chart settings | Begin with a bright reference and low-power eyepiece |
| Everyone is cold | Underestimated nighttime temperature | Add layers, take a warm break, or end the session |
| Vehicle headlights disturb observers | Poor parking or departure planning | Follow site instructions and coordinate departure |
| Memory card is full | Files were not cleared or storage was underestimated | Use a tested spare card; do not delete important files in the dark |
| Local access changes | Gate, closure, or event restriction | Follow posted rules and move to a legal alternative |
| Thunder is heard | Lightning risk | Stop immediately and enter a safe building or hard-topped vehicle |
| Wildlife approaches | Food, habitat, or local animal activity | Follow local wildlife guidance and leave if necessary |
Do not repair electrical equipment with improvised connectors in darkness. A failed component is usually a reason to simplify the session, not bypass safety features.
What Are the Most Common Packing Mistakes?
Bringing Too Much Equipment
Excess equipment increases setup time, creates trip hazards, and makes it easier to lose small parts. Build the kit around one main goal.
Forgetting the Backup Light
A phone is not an ideal emergency light because its battery may be needed for navigation or communication. Carry a separate backup.
Dressing for Sunset
Conditions can become colder and windier several hours later. Pack for the overnight low and expected exposure, not the temperature at departure.
Skipping the Daylight Site Check
An online map cannot show every pothole, gate, root, drop-off, sprinkler, or newly installed light. Inspect unfamiliar sites before dark.
Depending on Mobile Service
Download maps, weather details, permits, and instructions before leaving coverage.
Testing New Gear at the Dark Site
Assemble and power the complete system at home. A dark-sky trip is not the ideal place to discover a missing plate, cable, account login, or firmware problem.
Ignoring the Return Trip
Fatigue, cold, wildlife, fog, and dark roads can make the drive home more demanding than the drive out. Set an end time and reassess whether the driver is fit to continue.
A Final Pre-Departure Checklist
Site and Conditions
- Night access is legal
- Parking and road conditions are confirmed
- Weather, cloud layers, smoke, wind, and thunderstorm risk are checked
- Moonrise, moonset, and phase are checked
- Site was inspected in daylight or reliable current information is available
- Someone knows the destination and expected return time
Personal Items
- Closed-toe footwear
- Sufficient layers
- Water and food
- Required medication
- Chair, blanket, or pad
- First-aid supplies
- Trash bag
- Insect or sun protection as appropriate
Navigation and Lighting
- Offline map
- Dim red-light source
- Independent backup light
- Emergency white light
- Charged phone
- Portable charger
- Vehicle key secured
Astronomy Gear
- Target list
- Star chart or configured app
- Binoculars, telescope, or camera
- Tripod, mount, and required plates
- Eyepieces or lenses
- Finder
- Lens and dust caps
- Correct cables and adapters
- Batteries and memory cards
- Dew shield or heater
- Small table if required
Shutdown and Departure
- End time selected
- Weather will be monitored
- Gear inventory list is available
- Cases remain in assigned locations
- Site will be checked for trash and small parts
- Driver fatigue will be assessed before departure
What Should You Bring First?
For a short first trip, prioritize a red light, warm layers, water, a chair, a chart, and binoculars. This simple kit minimizes setup and lets you learn how the site, weather, Moon, and darkness affect the experience.
For a telescope trip, add only the mount, optics, two useful eyepieces, finder, power, and dew protection required by the conditions. For photography, prepare a written equipment and power checklist and test the complete system before leaving.
A successful stargazing trip is not defined by how much equipment reaches the site. It is defined by legal access, safe preparation, a workable observing plan, and a complete return home.
Frequently Asked Questions
Do I need a telescope for a stargazing trip?
No. The unaided eye is enough for constellations, meteor showers, bright planets, satellites, and the Milky Way under dark skies. Binoculars are an effective next step because they are portable and require almost no setup.
Why should I bring a red flashlight?
Dim red light generally preserves more dark adaptation than bright white light. It helps observers move and adjust equipment without forcing everyone nearby to wait again for their eyes to adapt.
What should I bring to watch a meteor shower?
Bring a reclining chair or insulated pad, warm layers, water, a dim red light, and a wide-open view of the sky. Binoculars and telescopes are usually unnecessary because meteors can appear anywhere across a broad area.
How cold does a stargazing trip feel?
The experience depends on air temperature, wind, humidity, ground temperature, clothing, and how long you remain still. Pack layers based on the nighttime forecast and bring more insulation than you would for an active daytime outing.
Can I stargaze from a national park parking area?
Only where nighttime access and parking are allowed. Park rules differ, and some roads, overlooks, trails, archaeological areas, and parking lots close after certain hours. Check the current official park page before traveling.
Is a phone enough for navigation and sky charts?
A phone is useful, but it should not be the only map, light, clock, or emergency resource. Download offline information, conserve battery, and carry an independent light source.
Sources
NASA Science — How to Find Good Places to Stargaze
Supports site selection, daylight scouting, Moon planning, weather checks, dark adaptation, and nighttime safety considerations.U.S. National Park Service — Where to Stargaze
Supports red-light use, traveling with others, weather preparation, and general night-sky planning.U.S. National Park Service — Stargazing at Acadia National Park
Supports recommended items such as red light, seating, and star maps.U.S. National Park Service — Stargazing at Yosemite National Park
Supports layers, water, dark adaptation, red-light etiquette, food control, trash removal, and camping restrictions.U.S. National Park Service — Stargazing at Voyageurs National Park
Supports clothing, water, binoculars, charts, red lights, batteries, and bringing a companion.U.S. National Park Service — Stargaze
Supports backup lights, following permits and camping rules, avoiding road-based photography, and dressing for nighttime weather.U.S. National Weather Service — Lightning Safety Overview
Supports immediate shelter when thunder is heard and waiting after the last thunder before resuming outdoor activity.
More from Dark-Sky Trips & Gear
How to Stay Warm and Comfortable During Winter Stargazing
Winter stargazing requires more preparation than wearing one heavy coat because observers often remain nearly motionless for long periods. This guide explains how to check temperature, wind chill, road conditions, snow, and shelter before leaving; build a moisture-managing base, insulating middle, and wind-resistant outer layer; and protect hands, feet, head, face, chair, and ground contact. Readers will learn how to combine liner gloves with mittens, avoid sweat, plan warm-up breaks, use heated clothing safely, manage food and hydration, protect batteries, and prevent condensation when cold equipment returns indoors. The article also includes the WARMER planning framework, clothing and glove comparisons, a three-hour worked example, cold-stress warning signs, troubleshooting guidance, departure rules, FAQs, and a complete winter stargazing checklist.
Red Flashlights for Stargazing: Why Astronomers Use Them
Astronomers use dim red flashlights because dark-adapted rod vision is less sensitive to long-wavelength red light than to much of the visible spectrum. A controlled red beam can illuminate charts, eyepieces, cables, and walking paths while causing less disruption than a typical white flashlight. This guide explains how rods, cones, rhodopsin, wavelength, brightness, exposure time, and beam direction shape the result. Readers will learn why red light is not harmless, how to compare handheld lights and headlamps, which product features prevent accidental white-light activation, how to configure a phone screen, and when safety requires a white emergency light. The article also includes the RED-SAFE buying framework, a task-lighting table, a worked observing example, DIY filter guidance, star-party etiquette, troubleshooting advice, FAQs, and complete purchase and field-use checklists.
Stargazing While Camping: A Practical Planning Guide
Camping can provide long, convenient access to dark skies, but a successful astronomy trip requires more than choosing the darkest location on a map. This guide explains how to combine campground rules, weather, Moon timing, food storage, wildlife protection, quiet hours, power, dew control, and telescope setup into one workable plan. It introduces the original CAMP framework—Confirm access, Align conditions, Map functional zones, and Prepare fallbacks—plus a three-zone campsite layout separating sleeping, service, and observing areas. Readers can compare developed, walk-in, backcountry, dispersed, and astronomy-focused campgrounds; build a night schedule from daylight arrival through morning pack-up; and use practical decision tables for Moonlight, cloud, wind, dew, neighboring lights, and campfire impacts. The article also includes a hypothetical two-night family plan, a go/modify/cancel decision tree, troubleshooting guidance, and a complete campsite checklist grounded in NASA, National Park Service, and National Weather Service resources.
Explore More Topics
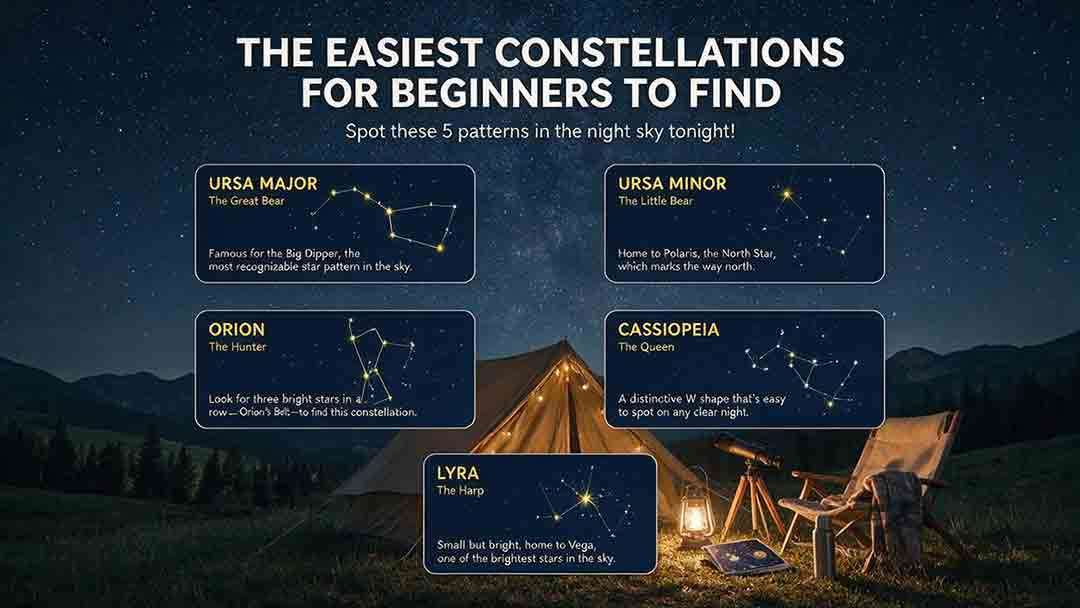
The Easiest Constellations for Beginners to Find
This beginner-friendly guide explains how to find Orion, Ursa Major through the Big Dipper, Cassiopeia, Cygnus, and Scorpius using clear naked-eye observing steps. It compares each pattern through an original Beginner Visibility Score and shows readers how to choose a first target based on season, latitude, light pollution, moonlight, and horizon visibility. The guide also clarifies the difference between constellations and asterisms, explains how the Big Dipper can point toward Polaris, and provides dedicated recommendations for Southern Hemisphere observers, including Crux. Practical tools include the Anchor-Pattern Method, the Three-Check Rule, a 10-minute observing session, city-sky guidance, troubleshooting advice, an equipment comparison, and a safety checklist. Authoritative references from the International Astronomical Union, NASA, NSF NOIRLab, and the European Southern Observatory support the key astronomical facts.
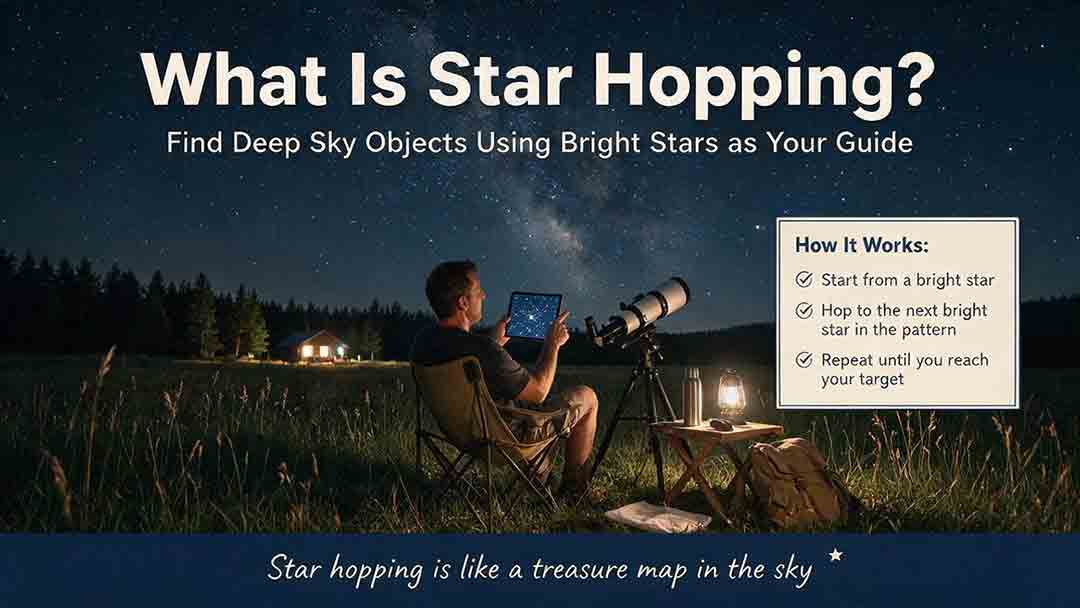
What Is Star Hopping and How Do You Do It?
Star hopping is a practical way to navigate the night sky by moving from a bright, recognizable star to a fainter target through a sequence of visible star patterns. This guide explains how beginners can plan a reliable route, align a finder, match a star chart to a telescope’s field of view, and recognize rotated or mirror-reversed images. It introduces the Anchor–Path–Field–Confirm method, provides a step-by-step observing process, and shows how field-of-view estimates can help determine a practical chart scale. A worked example demonstrates how to locate Messier 13 using the Keystone of Hercules, while the troubleshooting table addresses common problems such as finder misalignment, excessive magnification, incorrect chart orientation, and targets that remain invisible despite correct pointing. The included field checklist gives binocular and telescope users a repeatable method for planning and completing future star hops.
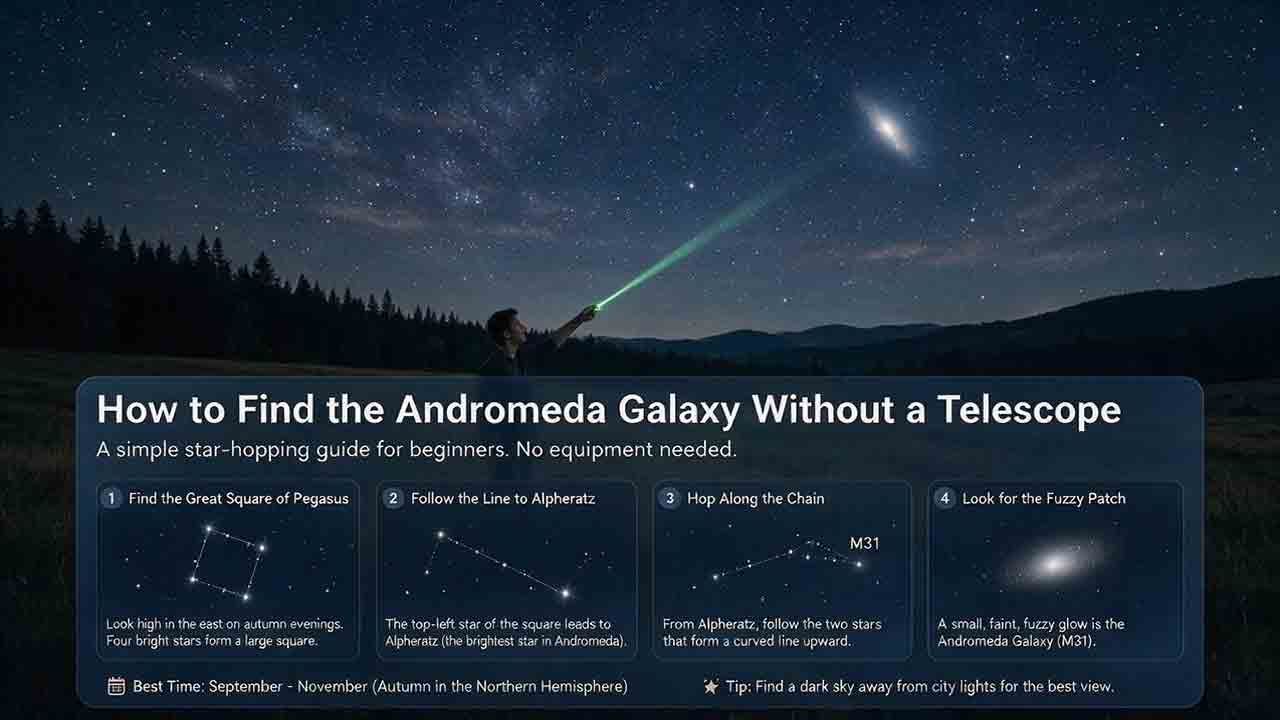
How to Find the Andromeda Galaxy Without a Telescope
Finding the Andromeda Galaxy without a telescope is possible when you know which stars to use as landmarks. This practical guide explains how to start at the Great Square of Pegasus, identify Alpheratz, follow the Andromeda star chain to Mirach, and use two nearly equal short hops to reach Mu Andromedae and M31. It also explains what the galaxy realistically looks like to the naked eye, why dark skies and averted vision matter, and how binoculars can help confirm the target. Beginners can use the six-point observing checklist, three-night practice method, troubleshooting guidance, and reusable observation log to improve each attempt. The guide distinguishes calculated angular distances from practical field estimates and clearly explains its source-checking process without claiming personal testing. It is designed primarily for Northern Hemisphere observers while also addressing visibility limitations from Southern Hemisphere locations.