How to Find a Dark-Sky Site Near You

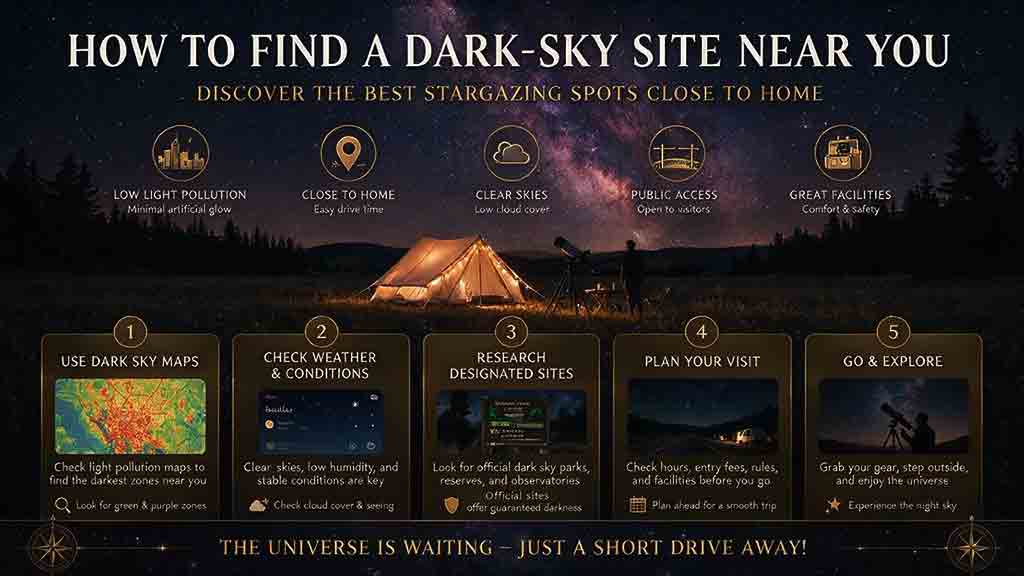
To find a dark-sky site near you, use a light-pollution map to identify darker areas, then verify legal nighttime access, parking, horizon views, road conditions, local lighting, weather, and Moon timing. Certified Dark Sky Places, public-land recreation sites, observatories, and astronomy-club observing fields are strong starting points, but every candidate should be checked through official land-manager information before you travel.
Key Takeaways
- Treat a light-pollution map as a screening tool, not proof that a parking area will be dark, open, safe, or unobstructed.
- Certified Dark Sky Places are useful starting points, but a closer non-certified site may provide a better practical observing night.
- Confirm nighttime access, gate hours, fees, permits, road conditions, parking rules, and closures through the official site manager.
- Evaluate the horizon and nearby lights as well as the zenith; a dark overhead sky can coexist with a bright city light dome.
- Scout unfamiliar locations in daylight and prepare for limited cell service, wildlife, temperature changes, and emergency travel.
This guide provides a repeatable search process, a comparison of site types, the DARK-SITE decision framework, a worked example, field-testing methods, common mistakes, and a complete trip checklist.
This guide is based on official land-management resources, nighttime-light datasets, dark-sky organization guidance, and practical selection criteria rather than a claimed hands-on test of every location or mapping service.
What Counts as a Good Dark-Sky Site?
A good dark-sky site combines low artificial skyglow with legal access, a useful horizon, safe parking, manageable travel, and conditions that match the observing goal. The darkest pixel on a map is not automatically the best destination.
A practical site should answer five questions:
- Is the sky dark enough for the intended targets?
- Can visitors legally remain there after dark?
- Can the location be reached and exited safely?
- Are the horizon, local lights, weather, and Moon acceptable?
- Is the trip worth the time and setup required?
DarkSky International defines light pollution as the human-made alteration of outdoor light levels from their natural condition and maintains a searchable directory of certified International Dark Sky Places.[1][2] Certification can identify places with documented night-sky protection, but it does not replace checking current access and observing conditions.
How Do You Find a Dark-Sky Site Near You Step by Step?
Step 1: Decide What You Want to Observe
The required darkness depends on the target.
| Observing goal | Darkness priority | Other important site features |
|---|---|---|
| Milky Way with the unaided eye | High | Wide southern or seasonal Galactic-center horizon |
| Faint galaxies and nebulae | High | Transparent air, low horizon glow, safe telescope setup |
| Meteor shower | High | Broad unobstructed sky, reclining space, moon-free timing |
| Planets and the Moon | Low to moderate | Stable air, good target altitude, easy access |
| Double stars and bright clusters | Moderate | Steady seeing and comfortable setup |
| Nightscape photography | High | Legal tripod use, composition, foreground, safe parking |
| Deep-sky astrophotography | High | Stable ground, low wind, power, long legal access |
| Family stargazing | Moderate | Restrooms, simple access, short walk, safe boundaries |
Do not drive several hours for extreme darkness if the goal is Jupiter, the Moon, or a bright double star. Conversely, an urban overlook may not justify a Milky Way trip even if it has a clear horizon.
Step 2: Use a Light-Pollution Map to Find Darker Directions
Begin with a regional nighttime-light or sky-brightness map. Look outward from the city rather than searching only for famous destinations.
Satellite nighttime-light products such as the Earth Observation Group’s VIIRS Nighttime Lights data measure upward radiance at a mapped resolution.[3] Many public light-pollution maps use satellite data or modeled sky brightness to make those measurements easier to explore.
Create a first shortlist by identifying:
- Darker regions within a realistic driving radius
- Gaps between major urban light domes
- Public lands, parks, lakes, deserts, grasslands, and high plateaus
- Roads that reach open terrain
- Candidate sites on the side of a city opposite the target
- Multiple options at different travel distances
A map color is not a promise. Satellite radiance, modeled sky brightness, and what an observer sees from the ground are related but not identical.
Step 3: Check Certified Dark Sky Places
Search the International Dark Sky Places directory for certified parks, reserves, sanctuaries, communities, urban night-sky places, and approved lodging.[2]
Certified locations can offer:
- Documented lighting management
- Public observing information
- Educational programs
- Recognized night-sky quality
- Local partners familiar with stargazing
- Better guidance about suitable viewing areas
However, certification does not guarantee that every road, campground, or parking lot within the boundary is open all night. Verify the exact observing area.
Step 4: Search Official Public-Land and Recreation Directories
In the United States, useful official starting points include:
- National Park Service night-sky pages and individual park sites
- Bureau of Land Management recreation maps and local field-office pages
- U.S. Forest Service Interactive Visitor Map and forest pages
- Recreation.gov
- State park and wildlife-agency websites
- County and municipal park websites
The National Park Service provides night-sky resources and maps for locations where the agency has collected sky-quality data.[4][5] Bureau of Land Management and U.S. Forest Service recreation datasets can help locate campgrounds, trailheads, day-use areas, and other public facilities, but the local office remains the authority on restrictions and access.[6][7]
Recreation.gov is a centralized federal trip-planning platform for recreation areas, facilities, permits, and reservations, while its underlying database notes that some records can be incomplete.[8] Confirm important details with the managing agency.
Step 5: Ask Local Astronomy Organizations
Local astronomy clubs, universities, planetariums, observatories, and DarkSky chapters often know sites that a global map cannot evaluate well.
They may provide:
- Public star-party locations
- Member observing fields
- Safe parking arrangements
- Landowner agreements
- Local weather knowledge
- Recommended horizon directions
- Etiquette rules
- Seasonal road information
Do not assume that a club’s private observing field is open to the public. Ask before arriving and follow membership, registration, and guest rules.
Step 6: Verify Legal Nighttime Access
Open space on a map is not automatically public or open after sunset.
Check the official page for:
- Hours and gate closures
- Overnight parking
- Camping restrictions
- Day-use limits
- Entrance fees
- Reservations
- Special-use permits
- Group-size rules
- Seasonal closures
- Fire restrictions
- Tripod, generator, drone, or lighting rules
- Whether roadside pullouts permit stopping
- Whether the area crosses private land
Call the ranger station, visitor center, field office, or land manager when the rules are unclear. Save the official phone number before entering an area with weak service.
Step 7: Inspect the Road and Route
A site can be dark but unsuitable because the road is rough, flooded, snow-covered, gated, or impassable after rain.
Check:
- Road surface
- Vehicle-clearance requirements
- Seasonal snow
- Washouts and flood risk
- Stream crossings
- Fuel availability
- Cell coverage
- Navigation offline
- Turnaround space
- Construction and closures
- Towing limitations
- Return route after midnight
Official Forest Service maps and apps can provide road, trail, closure, and amenity information for national forests and grasslands.[7] A navigation app should not override an official closure or vehicle restriction.
Step 8: Evaluate the Horizon and Local Light Sources
Look beyond the map’s darkness color.
A strong site should minimize:
- Streetlights
- Restroom floodlights
- Campground lights
- Security lighting
- Passing headlights
- Industrial facilities
- Sports fields
- Illuminated signs
- Nearby homes
- Campfires and vehicle interior lights
Also examine:
- Trees
- Ridges
- Buildings
- Power lines
- Mountains
- Shoreline fog
- Dust-generating roads
- Wind exposure
- Warm pavement or roofs
A site with a dark zenith but a bright southern horizon may be poor for the summer Milky Way. The same site may be excellent for northern constellations or a meteor shower radiant high overhead.
Step 9: Check Moonlight, Twilight, and Weather
A dark location can perform poorly under a bright Moon, smoke, haze, clouds, or unsafe weather.
Check the exact observing hours for:
- Moonrise and moonset
- Illuminated fraction
- Moon altitude
- Moon–target separation
- End of astronomical twilight
- Cloud cover
- Transparency
- Smoke
- Wind and gusts
- Temperature
- Dew or frost risk
- Thunderstorms
- Fog
- Road-weather hazards
The U.S. Naval Observatory provides location-specific Sun and Moon rise, set, transit, twilight, phase, and illumination data.[9] The National Weather Service provides hourly forecast tools for clouds, temperature, wind, humidity, and precipitation.[10]
Step 10: Scout the Site in Daylight
Visit an unfamiliar location before dark whenever practical.
A daylight scout can reveal:
- Locked gates
- Private-property boundaries
- Unsafe shoulders
- Cliff edges
- Soft sand or mud
- Wildlife activity
- Hidden drainage channels
- Poor turnarounds
- Obstructed horizons
- Bright fixtures that activate at night
- Where to position the telescope without blocking traffic
Save coordinates for the entrance, parking area, setup area, and route home. Do not rely on one dropped map pin.
Step 11: Test the Site Under Real Conditions
The first trip should be treated as a validation visit, not a guaranteed major observing session.
Record:
- Date and time
- Moon status
- Cloud and transparency
- Visible light domes
- Direct lights
- Horizon obstructions
- Traffic frequency
- Wind
- Dew
- Naked-eye Milky Way visibility
- Faintest recognizable stars or constellation features
- Setup comfort
- Access problems
DarkSky International describes visual observations, Bortle-class estimates, photography, and sky-quality meters as complementary methods for assessing night-sky quality.[11] Measurements should be made under suitable conditions and interpreted with awareness of Moon, twilight, clouds, and local obstructions.
Which Type of Dark-Sky Site Is Best?
| Site type | Advantages | Limitations | Best for |
|---|---|---|---|
| Certified Dark Sky Place | Documented protection and public information | May require travel, fees, or reservations | First major dark-sky trip |
| National or state park | Facilities, official rules, scenic horizons | Gates, closures, headlights, visitor traffic | Families and planned trips |
| BLM or open public land | Remote terrain and flexible locations | Rough roads, few facilities, weak cell service | Experienced observers |
| National forest or grassland | Many recreation sites and varied elevation | Tree cover, seasonal roads, dispersed-use rules | Portable telescopes and camping |
| Observatory or astronomy club site | Known observing area and knowledgeable community | Event, membership, or access restrictions | Beginners and telescope users |
| Rural campground | Overnight access and facilities | Campfires, lanterns, vehicle lights | Casual multi-night trips |
| Rural roadside pullout | Convenient and flexible | Legal, safety, traffic, and property concerns | Only when officially permitted and safe |
| Urban night-sky place | Close, accessible, educational | Not as dark as remote sites | Beginners and bright targets |
| Private land with permission | Controlled access and potentially low traffic | Requires explicit permission and boundaries | Repeat local observing |
The best site is often the one that is dark enough, reliably accessible, and safe enough to visit repeatedly.
How Accurate Are Light-Pollution Maps?
Light-pollution maps are useful for regional screening but cannot fully predict the view from a specific parking space.
What Satellite Maps Measure
VIIRS nighttime-light products report upward radiance detected from orbit.[3] They are valuable for identifying illuminated development and regional change.
They may not directly show:
- The exact sky brightness seen at ground level
- A light hidden from the satellite but aimed toward the observer
- Temporary event lighting
- Headlights
- A newly installed facility
- Local shielding
- Terrain blocking a city
- The direction of a horizon light dome
- Clouds that amplify skyglow
- Snow reflecting artificial light
- The quality of the access road
What Modeled Maps Estimate
Modeled sky-brightness maps attempt to translate light sources and atmospheric assumptions into estimated skyglow. The model may be useful, but atmospheric clarity and local geometry change from night to night.
Use a map to answer:
“Where should I investigate?”
Do not use it alone to answer:
“Will this exact turnout be safe, legal, open, and dark tonight?”
What Does the Bortle Scale Tell You?
The Bortle scale is a nine-class visual description of night-sky brightness, with Class 1 representing exceptionally dark conditions and Class 9 representing bright inner-city skies.[5][11]
It can help describe:
- Milky Way visibility
- Zodiacal light
- Light domes
- Naked-eye limiting magnitude
- The appearance of clouds and the horizon
- The general visibility of faint objects
Limits of a Bortle Label
A Bortle class is not a permanent property of a map coordinate.
The observed result varies with:
- Moonlight
- Twilight
- Clouds
- Smoke and haze
- Snow cover
- Airglow
- Aurora
- Season
- Observer experience
- Dark adaptation
- Direction in the sky
- Nearby temporary lighting
A map-estimated Bortle class and a field-estimated Bortle class may differ. State whether a value is mapped, measured, or visually estimated.
Should You Buy a Sky Quality Meter?
A sky quality meter can make repeated site comparisons more consistent, but it is not required to find a useful observing location.
Benefits
- Repeatable numeric records
- Comparison across nights
- Tracking changes over time
- Citizen-science participation
- Evaluating lighting changes
- Distinguishing several local setup areas
Limitations
- Measures a defined portion of the sky rather than every horizon
- Can be affected by Moon, twilight, clouds, and nearby obstructions
- Does not evaluate safety or access
- Does not replace visual observations
- Different devices and methods require careful comparison
DarkSky International recommends multiple measurements and suitable moonless, cloud-free, astronomically dark conditions for formal sky-quality surveys.[11]
For most beginners, a map, a daylight scout, careful visual notes, and repeat visits are sufficient.
How Far Should You Drive for Darker Skies?
Drive far enough to gain a meaningful observing benefit without making fatigue, cost, road risk, or setup complexity disproportionate.
Use this comparison:
| Candidate | Drive | Darkness | Access | Horizon | Practical value |
|---|---|---|---|---|---|
| Local edge-of-town park | Short | Moderate | Easy | Partial | Frequent bright-target sessions |
| Rural county site | Medium | Good | Confirmed | Broad | Regular Milky Way and telescope use |
| Remote public land | Long | Excellent | Complex | Broad | Occasional faint-object trip |
| Certified park | Long | Excellent | Managed | Varies | Planned destination and education |
A site one hour away that you visit monthly may produce more observing value than a pristine site four hours away that you rarely reach.
A Simple Trip-Value Calculation
Use a non-scientific planning score:
Useful dark time ÷ total travel and setup time
Example:
- Site A provides 2 hours of useful darkness after 30 minutes of travel and 20 minutes of setup.
- Site B provides 3 hours of slightly darker sky after 2 hours of travel and 30 minutes of setup.
Site B may be darker, but Site A can be the better choice for a weeknight. The calculation is an editorial planning tool, not a measure of sky quality.
A DARK-SITE Decision Framework
Use the DARK-SITE framework to compare candidate locations.
| Letter | Check | Key question |
|---|---|---|
| D | Darkness evidence | Do maps, measurements, and observations support a meaningful improvement? |
| A | Access legality | Is nighttime entry, parking, and equipment use permitted? |
| R | Route safety | Can the site be reached and exited safely in the expected conditions? |
| K | Key horizon | Is the required direction open and away from the strongest light dome? |
| S | Sky timing | Do Moon, twilight, clouds, and seasonal targets align? |
| I | Interference | Will headlights, fixtures, campfires, or visitors disrupt the session? |
| T | Terrain and facilities | Is the ground stable, accessible, and appropriate for the group? |
| E | Emergency readiness | Are communication, weather, fuel, clothing, and backup plans adequate? |
GO
Choose GO when darkness, access, route, horizon, sky timing, and safety all meet the session requirements.
CONDITIONAL GO
Choose CONDITIONAL GO when the site is legal and safe but requires:
- A different target direction
- A moon-free time window
- Portable equipment
- A shorter stay
- Extra dew, wind, or cold preparation
- A backup parking or observing area
REJECT
Reject the site when:
- Night access is prohibited
- The road exceeds the vehicle’s capability
- Parking creates a traffic hazard
- The location is private without permission
- The horizon is blocked for the intended target
- Direct lighting overwhelms the setup area
- Weather or wildfire risk is unacceptable
- The return drive would be unsafe
Worked Example: Choosing Between Three Nearby Sites
This hypothetical example demonstrates the selection method and is not a recommendation for a real location.
The Goal
An observer wants to see the summer Milky Way and photograph a wide nightscape. The Moon sets before the main observing window.
Candidate A: Suburban Hilltop Park
- 25-minute drive
- Official closing time before midnight
- Good southern horizon
- Strong city glow to the south
- Paved parking and restrooms
Decision: Reject for this session because access ends too early and the strongest light dome is in the target direction. Keep it for planets and public outreach.
Candidate B: Rural Lakeside Campground
- 70-minute drive
- Legal overnight access with reservation
- Moderate light pollution
- Open southern view
- Some campground lanterns and vehicle movement
- Restrooms available
Decision: Conditional GO. Reserve a site on the darkest edge, request lighting etiquette where appropriate, and use foreground objects to block direct lights.
Candidate C: Remote Public-Land Plateau
- Two-hour drive
- Darker map region
- Broad horizon
- Rough final road
- No facilities or cell service
- Wind exposure
- Unverified nighttime route
Decision: Do not use as the first visit at night. Scout during daylight, confirm current land rules and road status, carry emergency supplies, and return later if the route is suitable.
Best Choice
Candidate B is not the darkest location, but it is the best verified choice for the current trip. Candidate C may become the strongest future site after a daylight validation visit.
How Do You Verify a Site Without Special Equipment?
Use repeatable visual notes.
Check the Zenith
After dark adaptation, observe:
- Milky Way structure
- Number of visible stars in a familiar constellation
- Dark lanes
- Zodiacal light when seasonally possible
- Whether clouds appear darker or brighter than the sky
Check Every Horizon
Rotate through north, east, south, and west.
Record:
- Light-dome direction
- Dome height
- Bright facilities
- Passing headlights
- Tree and ridge obstructions
- Target-specific suitability
Check Local Interference
Spend at least part of the visit watching for:
- Vehicle arrival patterns
- Automatic security lights
- Restroom lights
- Campground quiet hours
- Dust from roads
- Late-night gates
- Irrigation, sprinklers, or maintenance activity
- Wildlife and livestock
Record Comparable Conditions
A fair site comparison should note:
- Moon below horizon or lunar condition
- Similar twilight status
- Cloud cover
- Transparency
- Snow or ground reflectivity
- Observation time
- Level of dark adaptation
Otherwise, the darker-looking night may be caused by better weather rather than a better location.
What Safety Checks Matter at a Remote Dark-Sky Site?
Remote stargazing combines night driving, low visibility, weather exposure, and potentially limited communication. Bureau of Land Management guidance for remote stargazing emphasizes preparation for long drives, rough roads, cold temperatures, and loss of cell service.[6]
Before Departure
- Share the site and return time with someone.
- Download offline maps.
- Carry enough fuel or charging range for detours.
- Check fire, weather, road, and closure notices.
- Bring water, food, layers, and basic first aid.
- Pack a white emergency light in addition to a dim red observing light.
- Charge phones and power banks.
- Know the nearest staffed location or emergency route.
At the Site
- Park entirely outside active traffic lanes.
- Do not block gates, trailheads, fire roads, or private drives.
- Identify cliffs, water, soft shoulders, and trip hazards before dark.
- Keep equipment within the permitted area.
- Control cables and tripod legs.
- Respect wildlife and quiet hours.
- Leave if weather, people, animals, road conditions, or personal comfort become unsafe.
Before the Return Drive
- Assess fatigue honestly.
- Warm up if cold stress is affecting concentration.
- Pack wet or frosted equipment safely.
- Check the route for new fog, snow, flooding, or closures.
- Do not rush teardown in darkness.
- Rest or use legal overnight accommodation when driving would be unsafe.
What Should You Bring on a First Dark-Sky Trip?
Essential Safety Gear
- Offline map
- Charged phone
- Power bank
- White emergency flashlight
- Dimmable red light
- Water and food
- Weather-appropriate clothing
- Basic first-aid supplies
- Vehicle emergency equipment
- Personal identification and permits
Observing Gear
- Binoculars or telescope
- Stable tripod
- Star chart or offline planetarium app
- Observing chair
- Dew shield or heater
- Spare batteries
- Lens caps and storage cases
- Red film or screen cover
- Notebook
- Watch or clock with dim display
Optional Comfort Gear
- Ground tarp
- Wind protection
- Insect protection
- Hand warmers
- Thermos
- Blanket
- Small table
- Shelter permitted by the land manager
Do not bring brighter lighting than the site or task requires.
How Should You Behave at a Shared Observing Site?
Dark-sky etiquette protects everyone’s adaptation and safety.
- Arrive before dark when possible.
- Use parking lights when site rules request them.
- Avoid headlights across telescope areas.
- Keep red lights dim and directed downward.
- Cover bright screens.
- Do not touch another person’s equipment.
- Ask before using a laser pointer.
- Follow fire and generator rules.
- Keep music and conversation considerate.
- Pack out all waste.
- Do not publish sensitive private-site coordinates without permission.
A red light can still be too bright. Use the minimum brightness needed for the task.
What Common Mistakes Lead to a Poor Site Choice?
Choosing the Darkest Map Pixel
The location may be inaccessible, private, unsafe, forested, or inside a closed road system.
Assuming Public Land Means Unrestricted Access
Public lands can have seasonal closures, vehicle restrictions, permits, day-use hours, and protected areas.
Arriving for the First Time After Dark
Road hazards, boundaries, cliffs, mud, and parking problems are much harder to identify at night.
Ignoring the Target Direction
A site may be dark overhead but poor toward the city-facing horizon where the target appears.
Checking Phase but Not Moonrise or Moonset
A bright Moon may be below the horizon during the session, or a smaller Moon may be close to the target.
Trusting One Map or Rating
Different maps may represent upward radiance, modeled sky brightness, or community estimates. Validate the site in person.
Forgetting Temporary Light
Sports events, campgrounds, industrial work, seasonal facilities, and vehicles can change a site dramatically.
Driving Too Far for the Available Window
A short dark interval may not justify a long trip and elaborate setup.
Ignoring Return-Trip Fatigue
A successful observing night can still end badly if the driver is exhausted.
How Can You Improve a Site That Is Not Perfect?
Block Direct Lights
Use legal terrain, vegetation, a vehicle position, or an observing hood to shield the eyes. Do not block roads or damage plants.
Choose the Darkest Direction
Observe away from the nearest city or illuminated facility.
Wait for Traffic to Decrease
Some rural overlooks improve after businesses close and visitors leave.
Match the Target to the Site
Use a moderately dark local site for planets, clusters, and double stars. Save faint galaxies and the Milky Way for the darker trip.
Change the Time
Observe after moonset, after evening traffic, or before dawn when the site remains legally accessible.
Build a Local Site Network
Maintain:
- A close bright-target site
- A medium-distance general site
- A remote dark-sky destination
- A safe backup site for changing weather
One location does not need to solve every observing problem.
Dark-Sky Site Selection Checklist
Map Screening
- Identify darker regions within a realistic drive
- Compare more than one map or data source
- Note nearby towns and light-dome directions
- Identify certified places and public lands
- Create at least two backup candidates
Access Verification
- Confirm the land manager
- Confirm nighttime hours
- Check parking and camping rules
- Check fees, reservations, and permits
- Check gates and seasonal closures
- Confirm that the route does not cross private land
- Save official contact details
Site Quality
- Check target-facing horizon
- Identify direct lights
- Check likely traffic
- Check ground stability
- Check wind exposure
- Check restroom or facility lighting
- Check whether the site supports the intended equipment
Sky Timing
- Check astronomical twilight
- Check Moon phase, rise, set, and target separation
- Check cloud cover and transparency
- Check smoke and haze
- Check wind, temperature, dew, and frost
- Confirm target altitude during the session
Safety
- Scout unfamiliar sites in daylight
- Download offline maps
- Share the plan and return time
- Bring emergency white light
- Carry water, layers, and first aid
- Verify fuel or battery range
- Plan for poor cell service
- Assess return-drive fatigue
Field Validation
- Record light domes in every direction
- Record local lights and traffic
- Note horizon obstructions
- Note Milky Way and familiar constellation visibility
- Record Moon and weather conditions
- Decide whether the site is suitable for repeat visits
Choose a Site You Can Use, Not Just a Dark Color on a Map
The best dark-sky site near you is a location that provides a meaningful reduction in skyglow while remaining legal, accessible, safe, and useful for the chosen targets. Start with light-pollution maps and certified-place directories, then verify the land manager, hours, road, horizon, Moon, weather, and local lights.
For a first trip, favor a managed park, campground, observatory event, or astronomy-club site over an unverified remote turnout. For regular observing, build a small network of locations at different travel distances. Reserve the most remote site for nights when the darkness, weather, Moon, travel time, and target all justify the trip.
Recommended Next Step by User Type
- Beginner: Attend a public star party or visit a managed site with clear nighttime rules.
- Urban observer: Find the darkest legal location on the city’s outer edge and observe away from the main light dome.
- Milky Way viewer: Prioritize a moon-free window, broad target-facing horizon, and low skyglow.
- Telescope observer: Prioritize stable ground, legal long-duration access, wind protection, and safe parking.
- Astrophotographer: Verify tripod rules, horizon composition, traffic, dew, power, and the full imaging window.
- Family group: Choose facilities, simple access, safe terrain, and a shorter return drive over maximum remoteness.
Frequently Asked Questions
How Far From a City Do You Need to Go for Dark Skies?
There is no universal distance. City size, terrain, humidity, atmospheric clarity, lighting design, and the direction of the observing target all matter. Use a map to identify darker corridors, then validate the horizon and access in person.
Is a Dark Sky Park Always Free and Open All Night?
No. Certification does not determine fees, reservations, gates, camping rules, or operating hours. Check the current official page for the exact park and viewing area.
Can You Stargaze on Any Public Land?
No. Public land can include closures, permit zones, protected habitats, vehicle restrictions, private inholdings, and day-use areas. Confirm the managing agency and current rules.
Is the Bortle Class on a Map Accurate?
It is an estimate. Actual conditions vary with Moon, clouds, haze, snow, airglow, observer experience, direction, and temporary lights. Distinguish mapped estimates from field observations or instrument measurements.
Do You Need a Telescope at a Dark-Sky Site?
No. The Milky Way, constellations, meteor showers, satellites, zodiacal light, and many star clusters can be enjoyed with unaided eyes or binoculars. A chair and dark adaptation may add more value than a telescope for a first trip.
What Is the Safest Dark-Sky Site for a First Visit?
A managed park, public observing program, established campground, observatory, or astronomy-club event is usually easier to verify than an isolated roadside location. Confirm hours, fees, weather, and access before leaving.
Sources
- DarkSky International, What Is Light Pollution?. Accessed August 4, 2026.
- DarkSky International, International Dark Sky Places. Accessed August 4, 2026.
- Earth Observation Group, Colorado School of Mines, VIIRS Nighttime Lights. Accessed August 4, 2026.
- U.S. National Park Service, Night Skies. Last updated May 6, 2025. Accessed August 4, 2026.
- U.S. National Park Service, Night Sky Maps and Night Sky Report Guide. Accessed August 4, 2026.
- Bureau of Land Management, Dark Sky Week: 12 Spectacular BLM Stargazing Sites. Published April 21, 2025. Accessed August 4, 2026.
- U.S. Forest Service, Maps and Interactive Visitor Map. Accessed August 4, 2026.
- Recreation.gov, Recreation.gov and Recreation Information Database. Accessed August 4, 2026.
- U.S. Naval Observatory, Complete Sun and Moon Data for One Day. Accessed August 4, 2026.
- National Weather Service, Get Your Hourly Weather Forecast From the NWS. Accessed August 4, 2026.
- DarkSky International, How to Conduct a Night Sky Quality Survey. Updated July 5, 2026. Accessed August 4, 2026.
More from Dark-Sky Trips & Gear
How to Stay Warm and Comfortable During Winter Stargazing
Winter stargazing requires more preparation than wearing one heavy coat because observers often remain nearly motionless for long periods. This guide explains how to check temperature, wind chill, road conditions, snow, and shelter before leaving; build a moisture-managing base, insulating middle, and wind-resistant outer layer; and protect hands, feet, head, face, chair, and ground contact. Readers will learn how to combine liner gloves with mittens, avoid sweat, plan warm-up breaks, use heated clothing safely, manage food and hydration, protect batteries, and prevent condensation when cold equipment returns indoors. The article also includes the WARMER planning framework, clothing and glove comparisons, a three-hour worked example, cold-stress warning signs, troubleshooting guidance, departure rules, FAQs, and a complete winter stargazing checklist.
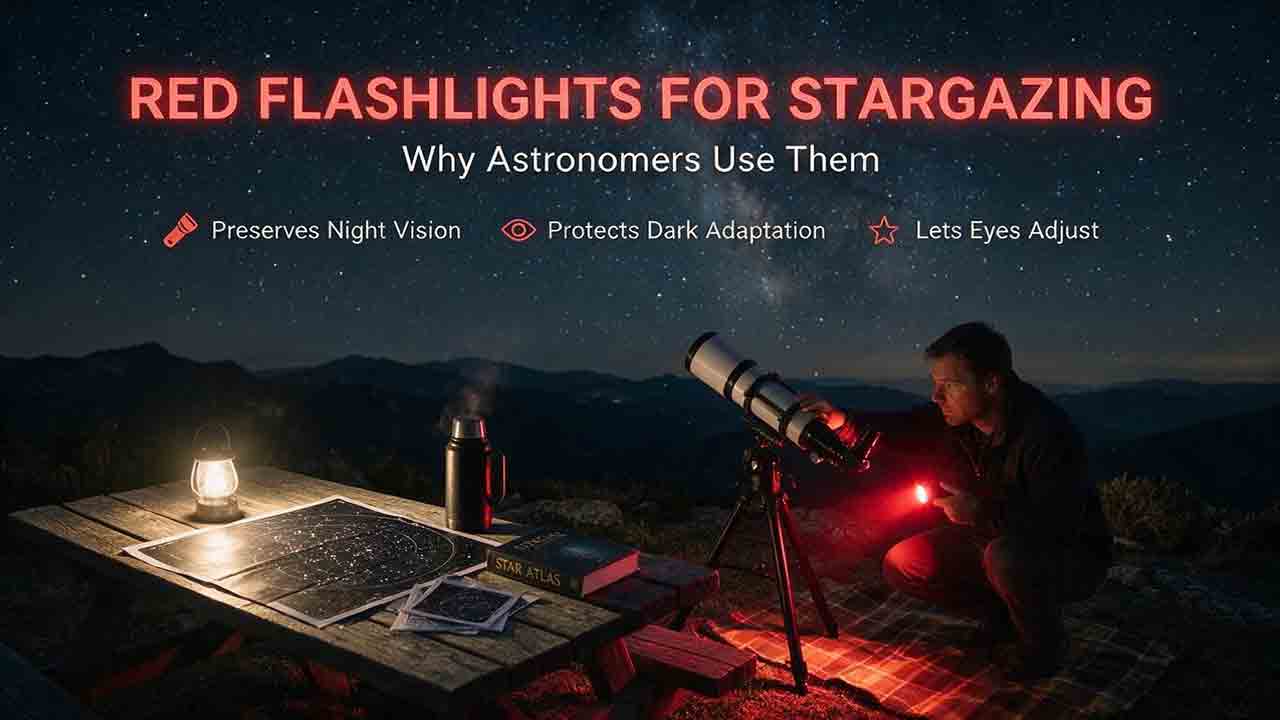
Red Flashlights for Stargazing: Why Astronomers Use Them
Astronomers use dim red flashlights because dark-adapted rod vision is less sensitive to long-wavelength red light than to much of the visible spectrum. A controlled red beam can illuminate charts, eyepieces, cables, and walking paths while causing less disruption than a typical white flashlight. This guide explains how rods, cones, rhodopsin, wavelength, brightness, exposure time, and beam direction shape the result. Readers will learn why red light is not harmless, how to compare handheld lights and headlamps, which product features prevent accidental white-light activation, how to configure a phone screen, and when safety requires a white emergency light. The article also includes the RED-SAFE buying framework, a task-lighting table, a worked observing example, DIY filter guidance, star-party etiquette, troubleshooting advice, FAQs, and complete purchase and field-use checklists.
Stargazing While Camping: A Practical Planning Guide
Camping can provide long, convenient access to dark skies, but a successful astronomy trip requires more than choosing the darkest location on a map. This guide explains how to combine campground rules, weather, Moon timing, food storage, wildlife protection, quiet hours, power, dew control, and telescope setup into one workable plan. It introduces the original CAMP framework—Confirm access, Align conditions, Map functional zones, and Prepare fallbacks—plus a three-zone campsite layout separating sleeping, service, and observing areas. Readers can compare developed, walk-in, backcountry, dispersed, and astronomy-focused campgrounds; build a night schedule from daylight arrival through morning pack-up; and use practical decision tables for Moonlight, cloud, wind, dew, neighboring lights, and campfire impacts. The article also includes a hypothetical two-night family plan, a go/modify/cancel decision tree, troubleshooting guidance, and a complete campsite checklist grounded in NASA, National Park Service, and National Weather Service resources.
Explore More Topics
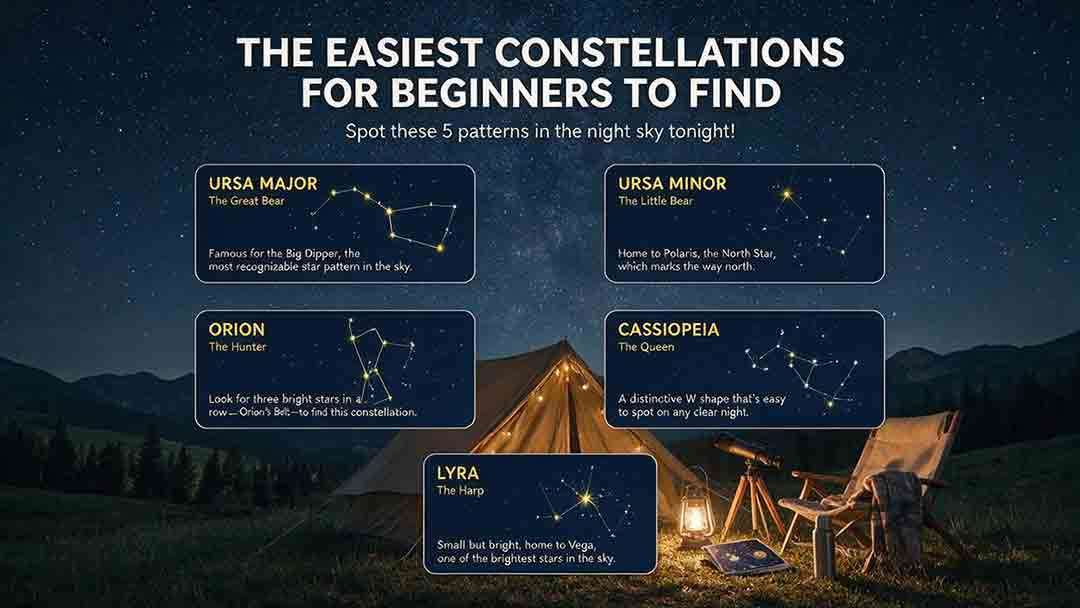
The Easiest Constellations for Beginners to Find
This beginner-friendly guide explains how to find Orion, Ursa Major through the Big Dipper, Cassiopeia, Cygnus, and Scorpius using clear naked-eye observing steps. It compares each pattern through an original Beginner Visibility Score and shows readers how to choose a first target based on season, latitude, light pollution, moonlight, and horizon visibility. The guide also clarifies the difference between constellations and asterisms, explains how the Big Dipper can point toward Polaris, and provides dedicated recommendations for Southern Hemisphere observers, including Crux. Practical tools include the Anchor-Pattern Method, the Three-Check Rule, a 10-minute observing session, city-sky guidance, troubleshooting advice, an equipment comparison, and a safety checklist. Authoritative references from the International Astronomical Union, NASA, NSF NOIRLab, and the European Southern Observatory support the key astronomical facts.
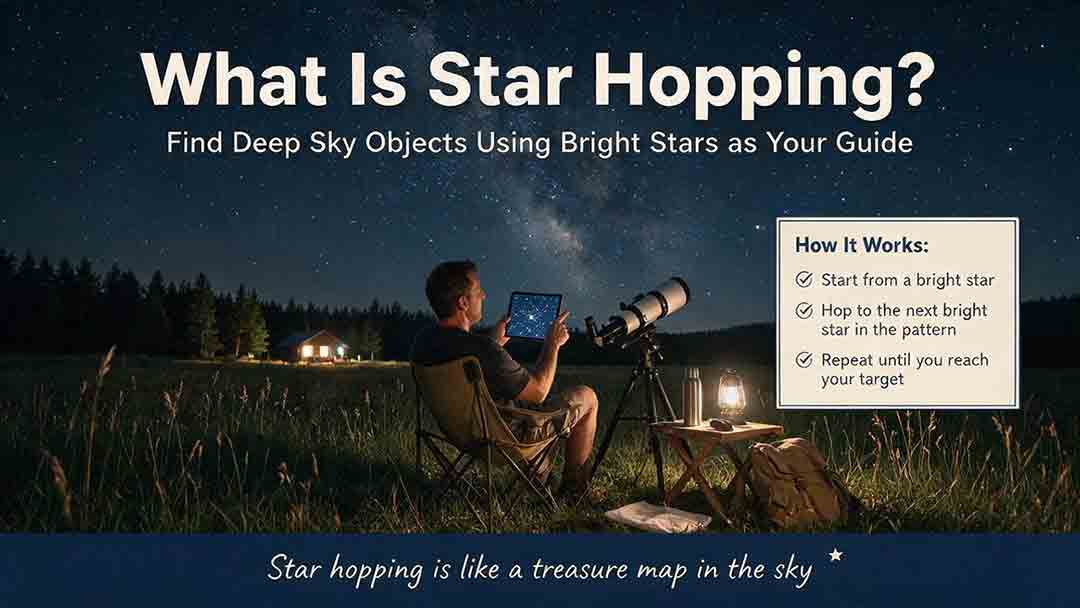
What Is Star Hopping and How Do You Do It?
Star hopping is a practical way to navigate the night sky by moving from a bright, recognizable star to a fainter target through a sequence of visible star patterns. This guide explains how beginners can plan a reliable route, align a finder, match a star chart to a telescope’s field of view, and recognize rotated or mirror-reversed images. It introduces the Anchor–Path–Field–Confirm method, provides a step-by-step observing process, and shows how field-of-view estimates can help determine a practical chart scale. A worked example demonstrates how to locate Messier 13 using the Keystone of Hercules, while the troubleshooting table addresses common problems such as finder misalignment, excessive magnification, incorrect chart orientation, and targets that remain invisible despite correct pointing. The included field checklist gives binocular and telescope users a repeatable method for planning and completing future star hops.
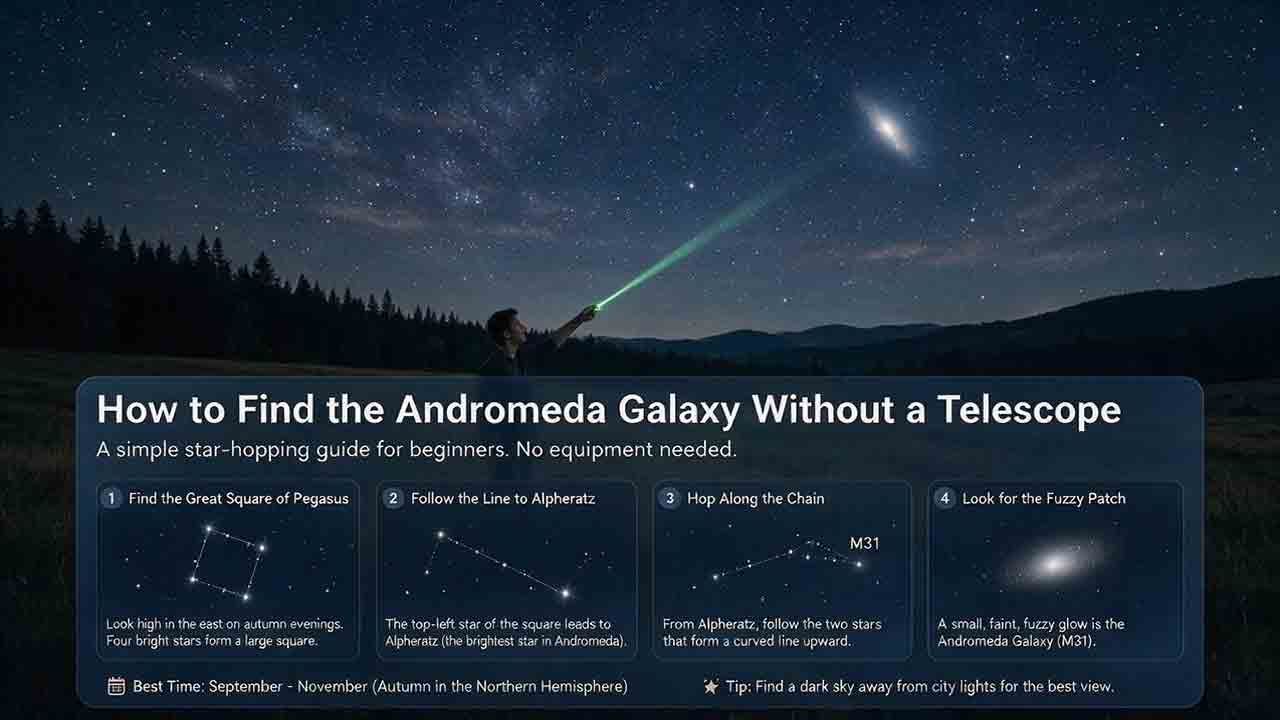
How to Find the Andromeda Galaxy Without a Telescope
Finding the Andromeda Galaxy without a telescope is possible when you know which stars to use as landmarks. This practical guide explains how to start at the Great Square of Pegasus, identify Alpheratz, follow the Andromeda star chain to Mirach, and use two nearly equal short hops to reach Mu Andromedae and M31. It also explains what the galaxy realistically looks like to the naked eye, why dark skies and averted vision matter, and how binoculars can help confirm the target. Beginners can use the six-point observing checklist, three-night practice method, troubleshooting guidance, and reusable observation log to improve each attempt. The guide distinguishes calculated angular distances from practical field estimates and clearly explains its source-checking process without claiming personal testing. It is designed primarily for Northern Hemisphere observers while also addressing visibility limitations from Southern Hemisphere locations.